5 Game-Changing Google Docs Hacks To Revolutionize Your Writing
Anybody who composes and edits bodies of text with some regularity ought to be familiar with Google Docs, as it's one of the most popular writing tools out there to date. Google's text-editing platform is easy and convenient to use, because all the documents you create can be viewed and edited on most devices that allow you to access your Google account, including mobile phones that have the Google Docs app installed. Of course, to take advantage of Google Docs's full functionality and the complete slate of features and tools, it's highly recommended that you do your actual writing through a desktop web browser.
A quick run-through of Google Docs' various navigation menus should already reveal several useful features you can utilize to optimize your writing experience. For instance, the ability to clear formatting from text you paste into a Google Docs document is only a quick click or keyboard shortcut away. You can also do something as simple as turn on the word count meter through the Tools menu so that you are aware of exactly how long your document is as you type. Whether it's familiarizing yourself with the user interface of Google Docs itself or trying out seemingly underutilized functions like voice typing, there are plenty of cool Google Docs hacks and tricks you can still discover. Below are a few suggestions you can start testing out.
Know your shortcuts

By now, you should already have the basic editing keyboard shortcuts memorized, such as copy, cut, paste, undo, and redo. However, if you need access to a cheat sheet, you can always pull up a list of Google Docs-specific shortcuts by pressing Ctrl + / (for Windows and Chrome OS) or ⌘ + / ( for Mac) on your keyboard. Below are notable commands to improve elements of your writing:
- Ctrl + F / ⌘ + F: Minimize redundancy by plugging in a word (that you tend to overuse), finding all its instances within your document, and replacing a few with a synonym.
- Ctrl + Alt + M / ⌘ + Option + M: Highlight a word or phrase and use this shortcut to type a comment. You can associate notes to a text snippet you may want to fact-check or revise later. You can also use this on a document others will access and edit.
- Ctrl + K / ⌘ + K: Highlight a word or phrase and use this shortcut to insert or edit a hyperlink.
- Ctrl + Shift + Y / ⌘ + Shift + Y: This opens the dictionary. You can highlight any word before using the shortcut to read its definition.
- Ctrl + Shift + S / ⌘ + Shift + S: This initiates voice typing. To use this feature, your computer microphone needs to be enabled and functional. Click on the microphone icon and speak clearly at a normal volume and pacing.
If you're using Google Docs on a Google Chrome desktop, a couple of browser-specific shortcuts are incredibly useful. To quickly look up documents in Google Docs, type "docs" into the browser's address bar followed by a keyword, and Docs may include relevant results sourced from your Google Drive. To create a blank document, type "docs.new" into the address bar.
Use templates and add more fonts
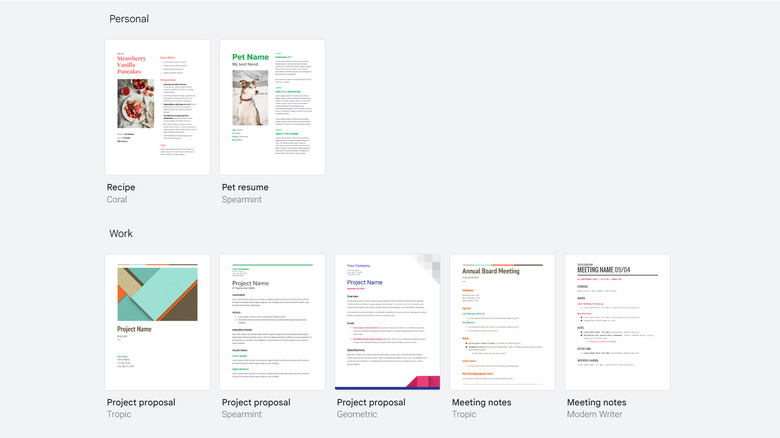
Although you now know the shortcut for launching a blank Google Docs document, it's not the only thing you can make on the text editor. If you type http://docs.google.com into your browser's address bar, it will bring you to a page that shows all your recent Google Docs documents. Near the top should be a "Start a new document" section, where, along with the Blank option, you may see other document templates, such as "Book report," "Meeting notes," or "Resume." To see all available templates, click on "Template gallery."
When you see one for the type of document you're hoping to compose, click on it to launch a new document in that template. The new file will have design elements and filler text in predetermined text styles and placement on the page. Simply replace each section containing text with your own, and voilà, you now have a visually captivating Google Docs file instead of a generic text document.
You can even take it a step further by using different fonts. Google Docs already has a slew of default choices you can pick from, but you can easily add more font styles by clicking on "More fonts" at the top of the font dropdown. You can choose any font from the list by selecting the ones you want — or using the Google Fonts library as a guide and typing the font names into the "More fonts" search bar — and hitting OK. Any new fonts chosen will be added to the "My fonts" panel on the side and should automatically show up in Google Docs' font dropdown moving forward.
Access Google Docs' useful sidebars
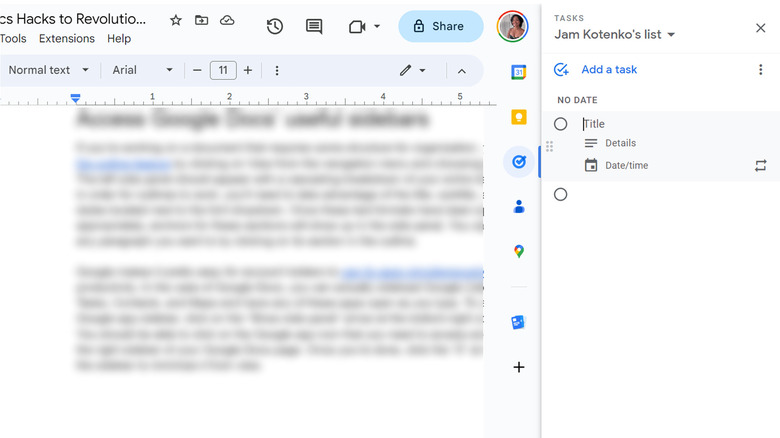
If you're working on a document that requires some structure for organization, you can turn on the outline feature by clicking "View" from the navigation menu and choosing "Show outline." The left side panel should appear with a cascading breakdown of your entire text. It should be noted, for outlines to work, you'll need to take advantage of the title, subtitle, and heading styles located next to the font dropdown. Once these text formats have been applied appropriately, anchors for these sections will show up in the side panel. You can easily jump to any paragraph you want simply by clicking on its section in the outline.
Google makes it pretty easy for account holders to use its apps simultaneously to enhance productivity. In the case of Google Docs, you can sideload Google Calendar, Keep, Tasks, Contacts, and Maps and have any of these apps open as you type. To access the Google app sidebar, click on the "Show side panel" arrow at the bottom-right corner of the page. You should be able to click on the Google app icon you need to access and have it take up the right sidebar of your Google Docs page. Once you're done, click the "X" at the top corner of the sidebar to minimize it from view.
Plug in useful add-ons
Google products aren't the only things that can make or break your writing session. Google Docs lets you use third-party extensions to add extra functionality or improve upon what's already available within the text editor. Here's how to find ones that are compatible with Google Docs:
- From the Google Docs navigation menu, click Extensions.
- Go to "Add-ons."
- Select "Get add-ons."
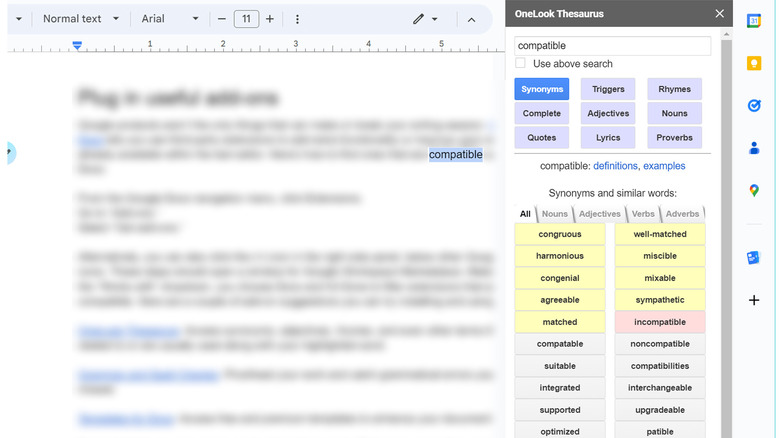
Alternatively, you can also click the (+) icon in the right-side panel below other Google app icons. This should open a window for Google Workspace Marketplace. Make sure under the "Works with" dropdown, you choose Docs and hit Done to filter compatible extensions. Here are a couple of add-on suggestions you can try installing and using:
- OneLook Thesaurus: Access synonyms, adjectives, rhymes, and even other terms that are related to or are usually used along with your highlighted word.
- Grammar and Spell Checker: Proofread your work and catch grammatical errors you may have missed.
- Templates for Docs: Access free and premium templates to enhance your document even more.
Quickly do research within your document
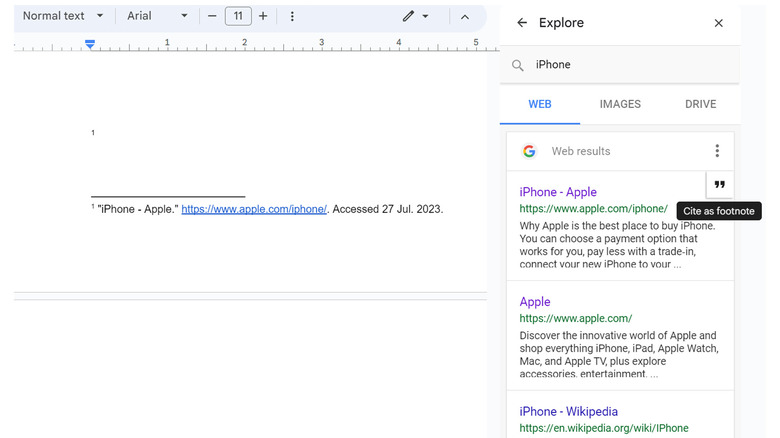
Many people use Google Docs to write long and incredibly detailed documents that require a higher level of external sources that also need to be appropriately cited. Rather than switch between browser tabs to look stuff up on the Internet, you can do research right inside Google Docs. Choose Tools from the navigation menu and select Explore (or use the keyboard shortcut Ctrl + Alt + Shift + I on a PC or ⌘ + Option + Shift + I on a Mac). This will open the Explore side panel on the right, which you can use to search your documents in Google Docs and the entire web for potential references.
A list of related topics will automatically be generated, which you can click and check out for relevance to your current work. Alternatively, you can type any keyword into the search bar and go through relevant Google search results, images, and items saved in your Google Drive.
Clicking on any web result within the Explore tab will open the page in a new browser tab, so you can easily go through it and verify if it's a suitable source for your document. If you decide that you do want to use it in conjunction with your work, place the blinking text cursor where you want to link to the source in the document. Next, use the mouse cursor to hover over the source's entry within the Explore tab and hit the quotation mark icon to cite it as a footnote. A proper citation should automatically be generated at the bottom of the page.