How To Add Fonts In Google Docs
While you can get away with using Arial and Times New Roman for practically any document, it's still nice to have more font options. It's especially important for documents that you want to look more creative and visually pleasing, such as a personal planner, a study reviewer, or a recipe book. Arial and Times New Roman don't give off that "fun" vibe — you're better off choosing a new font. On the other hand, you can also choose to write your work documents in Comic Sans to mess with your co-workers.
If you're using Google Docs, you're in for a treat, as it comes with access to over a thousand different styles from the Google Fonts Library. You can find classic serifs, funky handwriting, and modern-looking monospace ones in the library. You can't, however, add your custom font to Google Docs, as this feature is unfortunately not supported yet. But if what you need is already in the Google Fonts Library, here are two ways you use these new fonts in your Google Docs file.
How to add new fonts to Google Docs using Google Fonts Library
Thanks to Google Docs' built-in integration with the Google Fonts Library, you can easily add a new font to your document without opening a new tab. Here's how to do so:
- Go to docs.google.com on your browser and log in if you haven't already.
- Open a new document or an existing one from the list.
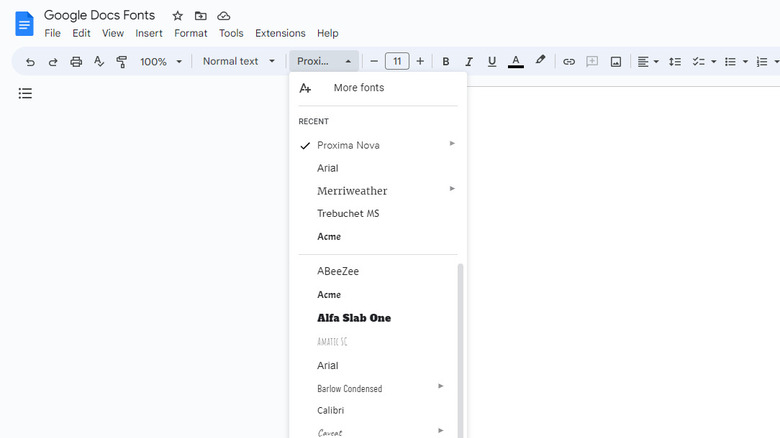
- In the toolbar, click the font name next to the font size button.
- From the drop-down menu, select More fonts.
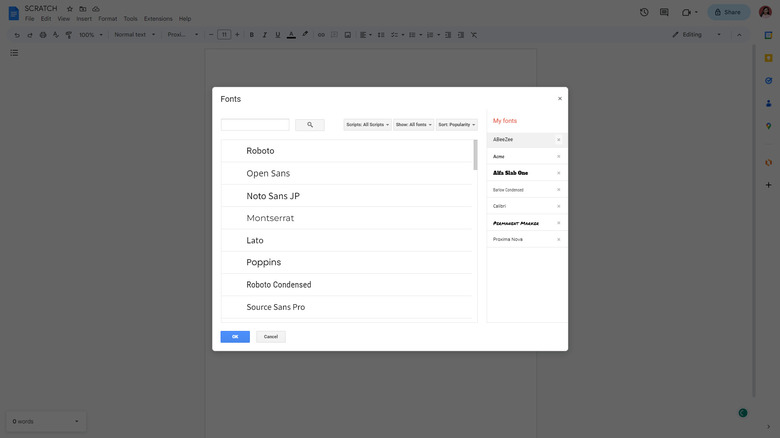
- Scroll through the list and click on the fonts of your liking. You can select one or multiple fonts. As you review the list, each font you pick will appear on the right-hand side of the dialog box under "My fonts."
- Once done, click on the OK button to add your new fonts.
When you want to use these newly added fonts, highlight your chosen words, click on the font drop-down menu, and select your new font from the list.
How to add new fonts to Google Docs using Extensis Add-on
Another way to add new fonts to Google Docs is using Extensis Fonts. This handy Google Doc add-on gets its fonts from the Google Fonts library, but instead of installing them in Google Docs, you can open Extensis and use the fonts directly on your document. Here's how to use the add-on:
- Open your preferred document in docs.google.com.
- Navigate to the Extensions tab.
- Select Add-ons.
- Choose Get add-ons to open the Google Workspace Marketplace.
- Type "Extensis Fonts" in the search bar.
- Click Extensis on the search results.
- Select Install.
- In the pop-up box, choose Continue to confirm the installation.
- Choose your Google account.
- Click on Allow to finish installing the add-on.
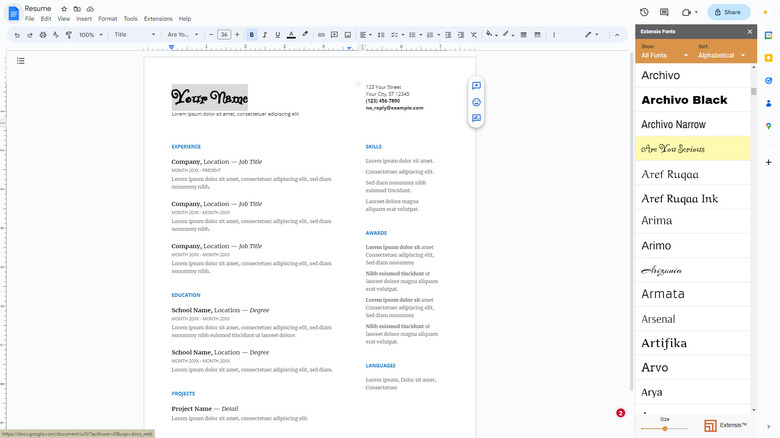
To use the fonts in Extensis, go to the Extensions tab and select Extensis Fonts from the drop-down menu. Click on Start to open the Extensis panel on the right-hand side of the screen. On your document, highlight the words or sentences where you want to change the font. Then, click on the font in the Extensis list to change it.