10 Best Raspberry Pi Accessories That Will Enhance Your Microcomputer
We may receive a commission on purchases made from links.
If there's a knock on the Raspberry Pi, it's that sacrifices were made to create a small, surprisingly powerful, maker-friendly single-board computer at a very low price. Still, unless you're trying to use the Pi as a general-purpose family computer, this sometimes turns out to be a blessing in disguise because it makes the Pi a platform you can customize to do exactly what you need it to.
Out of the box, Raspberry Pis do most things that desktop computers do, though not always as fast, sometimes not quite as well, and occasionally with some peculiar requirements. There are a lot of accessories you can buy for the Raspberry Pi, and some of the very best options enable you to make even more accessories for the Pi — bespoke add-ons designed, developed, and made by you.
So think of your Pi accessories as tools to keep you productive in taking the Pi where only you were ever going to take it. With that in mind, here are 10 of the best tools you can use to enable further creativity with your next Raspberry Pi project.
Sound card HAT
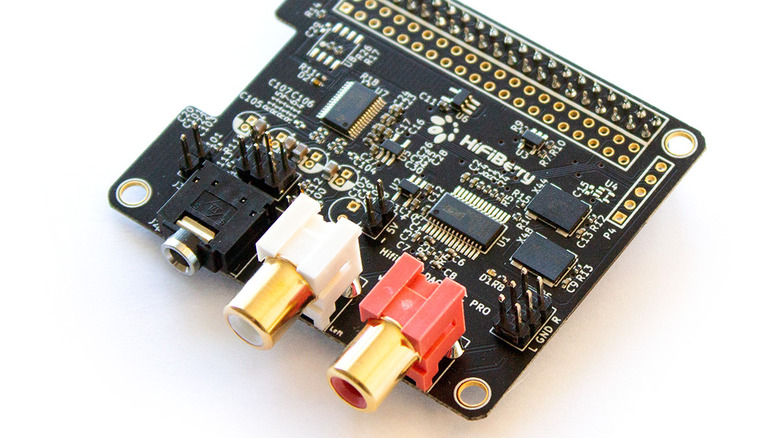
One of the notable deficiencies of the Raspberry Pi is its sound capabilities. The built-in sound is driven by pulse-width modulation, a hack that won't produce hi-fi sound via the device's 3.5 mm combo jack. Basically, the dynamic range of sound output through the headphone jack has a restricted dynamic range. Fortunately, there's a universe of add-on digital-to-analog converters (DACs) and even analog-to-digital converters (ADCs) if you need inputs as well.
These include four official Digital-to-Analog Converter (DAC) HATs (Hardware Attached on Top add-on boards), once branded IQAudio before the Raspberry Pi Foundation acquired IQAudio in 2020. These official boards offer a couple of levels of sound quality, and some include high-resolution sound and an integrated amplifier or headphone amp. Of the many third-party sound HAT brands, HiFiBerry is perhaps the most well-known, alongside brands like Raspiaudio, Audio Injector, Pirate Audio, Pimoroni, and Allo BOSS.
Each model has slightly different features, but most are DAC HATs that convert digital audio to analog output. Few include an ADC to digitize analog audio, other than perhaps support for piezo microphones or onboard MEMS mics. When you do find a good ADC/DAC HAT, you'll typically find that the price is quite a bit higher and starts to enter the range of cheaper professional audio interfaces like those from M-Audio and PreSonus. However, if all you need is the ability to play internet radio, Spotify, and the like, a DAC should serve you well in any number of projects.
Camera
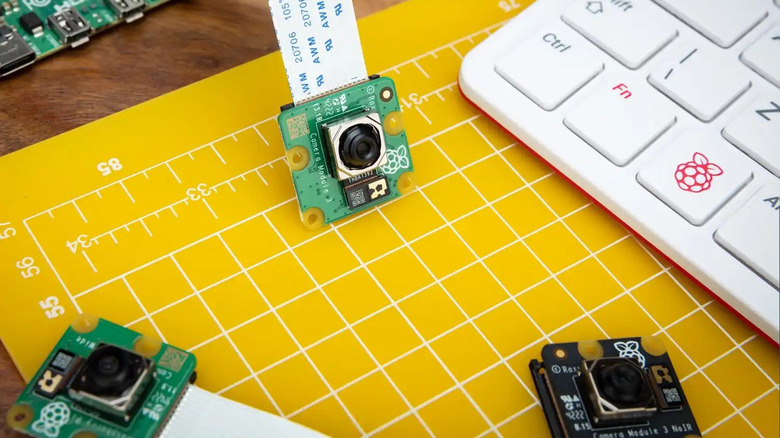
Not everyone needs a camera, but if you do the Raspberry Pi is a great platform for inexpensive, high-quality photography — not to mention inexpensive, low-quality photography as well, depending on your priorities. Using the built-in CSI-2 connector, you can add official and unofficial cameras with a wide range of capabilities. The current official Raspberry Pi Camera Module 3 is a 12-megapixel autofocus, HDR-capable camera with 75-degree and 120-degree angle of view options and versions without IR filtering. The standard-angle cameras cost $25, while the wide-angle versions are $35. Attach this to a Raspberry Pi and you've got something like a decent smartphone camera with all manner of programmability options.
Perhaps you consider the 25x24mm (just under one-inch square) Camera Module 3 untenably enormous and have some home security or wearable camera applications in mind that requires a much smaller device. For this, you have options like Adafruit's Zero Spy Camera or the Mini Spy Camera. In exchange for the tiny size, you'll get resolution familiar to anyone who owned a dirt-cheap fixed-focus point-and-shoot camera in the late '90s.
At the other end of the quality spectrum is the 12.3-megapixel HQ Camera, which accepts interchangeable C- and CS-mount lenses (there's an M12-mount variant as well). To say nothing of the $50 global shutter camera, a specialized bit of kit capable of far more than most available Raspberry Pi camera options.
HDMI adapter
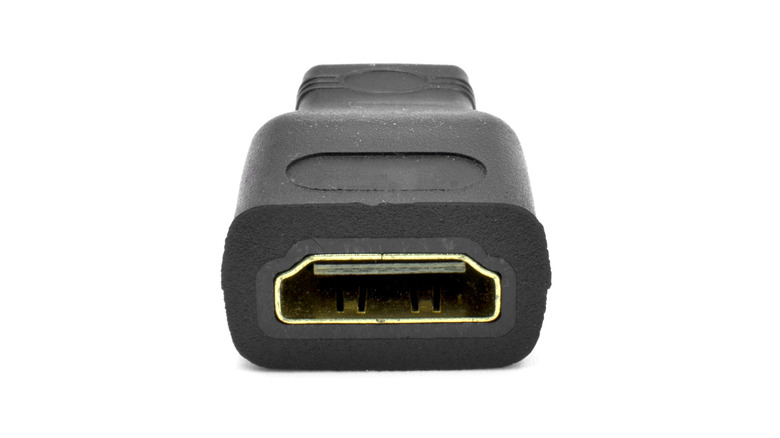
Everyday users, especially those who have a desktop UI installed on their Raspberry Pis, are often frustrated at the Pi 4's dual micro HDMI ports. It's excellent that the Pi natively supports two displays, but micro HDMI is a connector that almost always demands an adapter. The fact that Raspberry Pi models 1, 2, and 3 used full-size HDMI ports and the Pi Zero uses Mni HDMI was understandable. After all, no one expected full-sized HDMI on the Zero form factor. Still, introducing this third option probably caused a bit of last-minute scrambling for anyone who didn't have the right cable or adapter lying around.
The solution for Pi 4 owners is, of course, to have the correct cable or adapter. Two of them, really, if you intend to use both ports. The good news is that you can use either a Micro HDMI to HDMI cable or a Micro HDMI to HDMI adapter with an HDMI to HDMI cable. Since passive HDMI is bidirectional, unlike standards like DisplayPort, you don't have to worry about which of two identical-looking adapters won't work for you.
A proper power supply
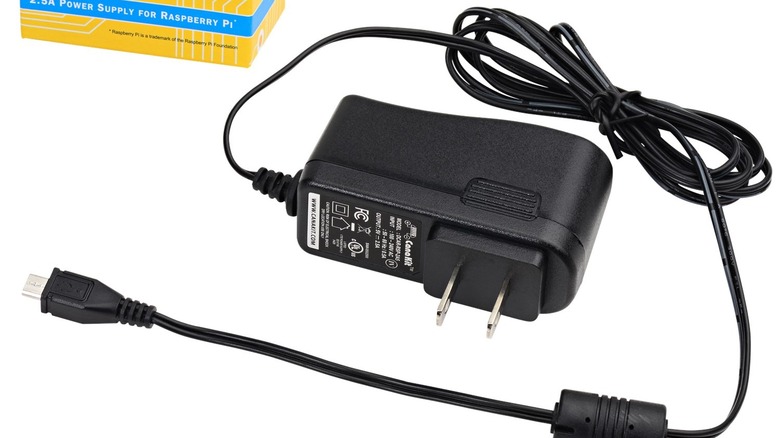
That old advice about turning your computer off and back on again is like magic most of the time. However, if you're using a Raspberry Pi, your problems are almost as likely to be solved by using the right power supply. Since Pis are powered by USB connectors, a common error is thinking that any USB charger will do the trick. The truth is that very few USB power supplies will work because the power requirements of Raspberry Pis are unusually high for a USB connection. A Raspberry Pi 3, for example, requires 5 volts at 2.5 amps, while the Pi 4 requires 5 volts at 3 amps. However, most smartphone chargers, for example, will supply fewer than 2 amps.
Your Raspberry Pi is likely to behave erratically if underpowered. Insufficient amperage will lead to voltage drop, which can cause unexpected shutdowns, processor slowdowns, misbehavior of HATs or peripherals (even outright failure to function), and possible physical damage to the computer. Your best bet is to use an official power supply, either the older Micro USB variety or the USB-C supply for Pi 4.
USB drive or adapter
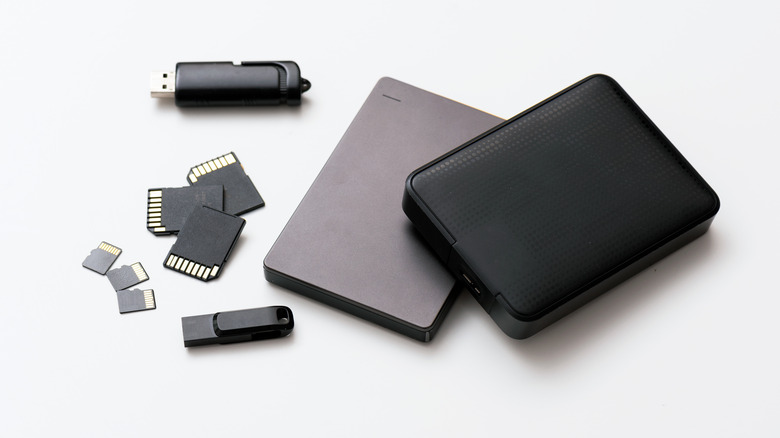
The ability to run an OS from a USB drive was, in many ways, a game-changer for Raspberry Pis. Many common uses are well-served by the old-school MicroSD card, but anything that writes to storage frequently has a habit of borking SD cards at inopportune moments. USB drives are cheaper (per unit of storage), larger, and more reliable. Note that USB flash drives, or thumb drives, suffer from the same issues as SD cards and won't be any more reliable. If you have a Raspberry Pi 2B v1.2 or later, it's a fairly simple process to update your Pi to boot from USB.
You can, of course, attach a USB adapter to many types of drives, effectively turning them into USB boot devices. Adapters sometimes create a frequent point of failure, so take care to get an adapter that's as secure as possible. The ideal might be something like an SSD dock that will clearly indicate when your drive isn't properly connected.
Battery power HAT
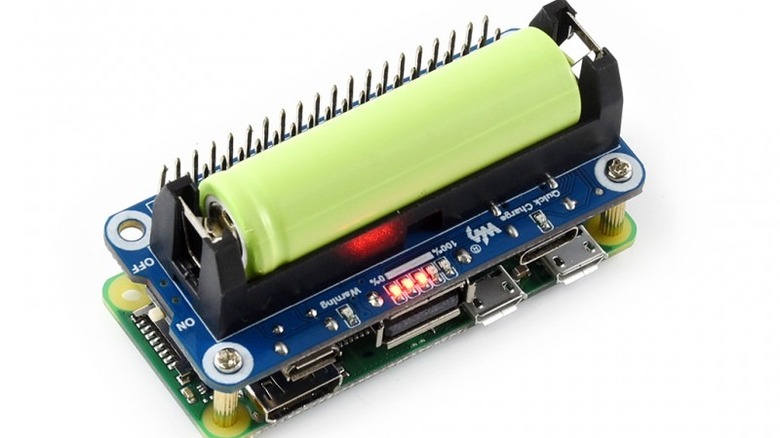
Since a Raspberry Pi runs off a relatively small amount of DC power (5V at 2.5 or 3 amps), you can also run it using battery power through a simple add-on board. This opens up a lot of IoT and portability possibilities for your Pi. You can pick up a battery HAT for as little as $20, and they typically use Lithium-Ion batteries in 14500 or 18650 form factors, while others use lithium polymer batteries. These batteries operate between 3.7 and 4.2 volts, so circuitry to boost the voltage to 5v is necessary. Good circuits will provide protection against reversed polarity, short-circuit, and over-current and over-discharge situations.
You'll also want a charging circuit specifically designed for lithium-Ion cells, including over-charge protection. Quick-charging capabilities are a plus. Some HATs add UPS functionality, meaning your Pi can run from your main electricity and switch to the battery if there is an outage. These cost slightly more and often involve more or larger cells. Any battery system that uses more than one Lithium battery should have balanced charging functionality to operate as safely as possible.
A case
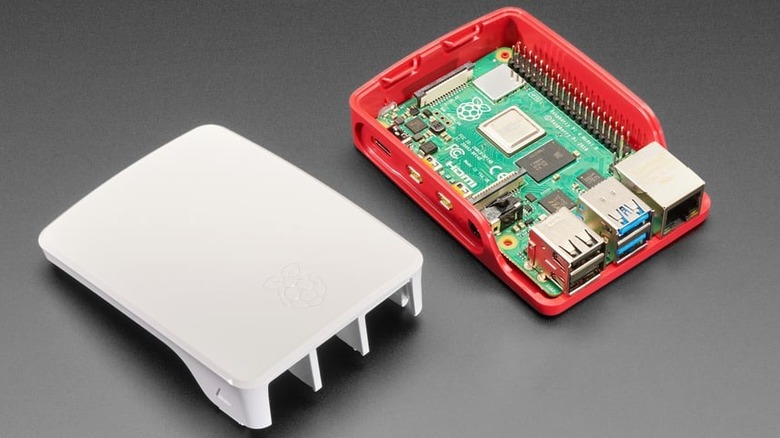
Some makers have Raspberry Pis sitting around all over the place naked and dangling from wires like someone trying to escape from a burning telecom facility. However, you always have the option of dressing up your Pi with an appropriate case, and there are good reasons to — although there are also some good reasons not to.
A case can protect your Pi and sometimes other hardware (like an audio HAT) as well, although for that to work the case has to fit. If you are using add-on boards that won't fit within the case, you will at least need access to the GPIO header when the case is in place. It has to fit your Pi model, and it has to expose all of the ports (USB, ethernet, etc.) that you plan to use. Will you be adding a camera? If you plan to use Wi-Fi, you will want to avoid solid aluminum cases. Give some thought to your project. Will it require a custom enclosure of its own for peripherals, sensors, or buttons? If so, you might want to just build space for the Pi into that enclosure.
Some cases are highly specialized and add functionality that might be critical for your particular needs. They might add space for drives, an integrated display, or even room for a bunch of Pis. There are a lot of cases out there, so choose carefully. If you're so inclined, your best option might be to 3-D print a case you can customize as you see fit.
Fan or heatsink
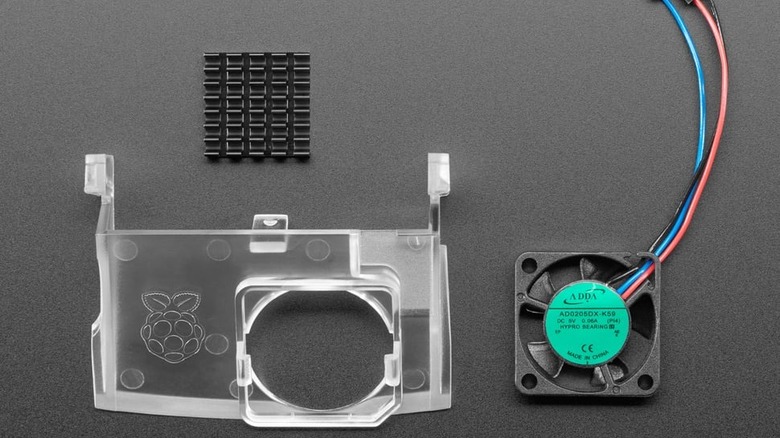
There's one final piece of the puzzle to keep an eye on — your case should accommodate whatever level of cooling you need for the way you will use your Raspberry Pi. If you're using a case or doing anything more interesting than playing a hobbled version of Minecraft, there's a good chance you'll benefit from having a fan, heatsink, or both. Your Pi will thank you by running faster and living longer.
Whether you need active cooling (a fan, usually), passive cooling (normally a heat sink or two that sit on top of your processor and other components), or no cooling depends on how much work the Pi is doing. Even a Raspberry Pi that has no extra peripherals and isn't overclocked can become hot if it's constantly in use, as is the case with some types of servers (DNS, for example) and IoT devices. You might also need extra cooling if you're doing really processor-intensive work like graphic manipulation or large language model processing.
If you have the official Raspberry Pi 4 Case, you can pick up the compatible Official Case Fan for $5.
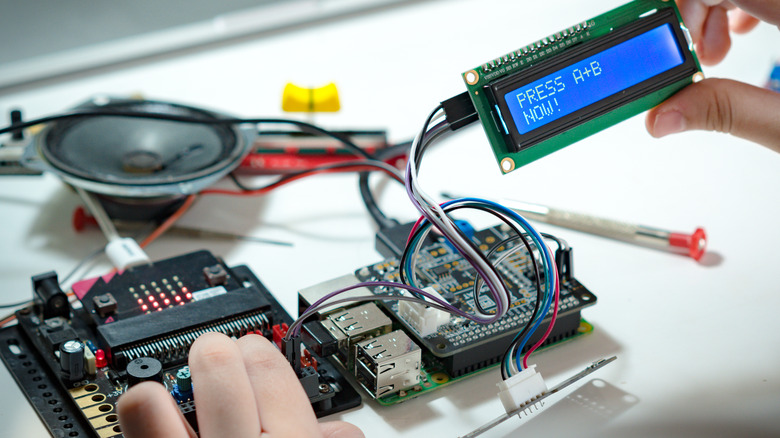
A sensor kit (or HAT)
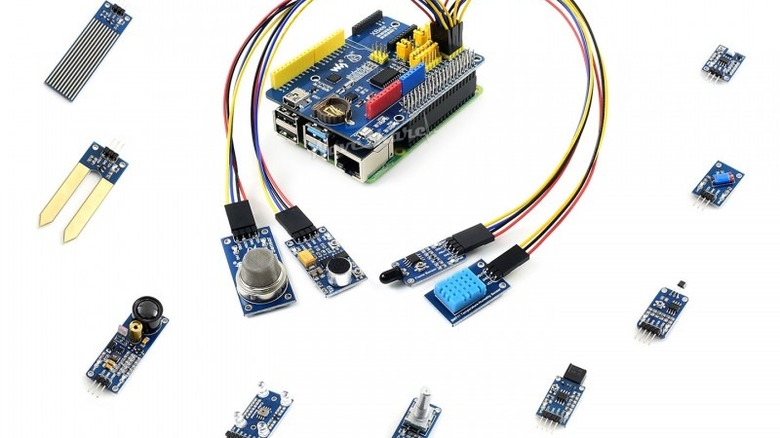
No doubt, some users probably just hook up a Raspberry Pi to use for light word processing and checking email without worrying about what capabilities they can add with additional hardware. Makers who are eager to get their hands dirty have a wholly different experience of Raspberry Pis, delving into GPIO capabilities that turn it from a little computer into a networked IoT powerhouse. The best way to get started down that road is with a set of reliable sensors known to work with Pis or with an add-on board with these capabilities built in.
For less than $60 you can outfit your Pi with a starter kit that includes the most common sensors (fingerprint, water, soil moisture, temperature, and many other sensors) and accessories (displays, motors, buttons, electronic components, etc.) used with Raspberry Pi and Arduino projects. You can also buy the add-ons one at a time if you're more determined to get a project done than to explore. Some sensor HATs integrate common sensors into a single add-on board, so that might also be a good choice for you.
I2C breakout or I/O expander
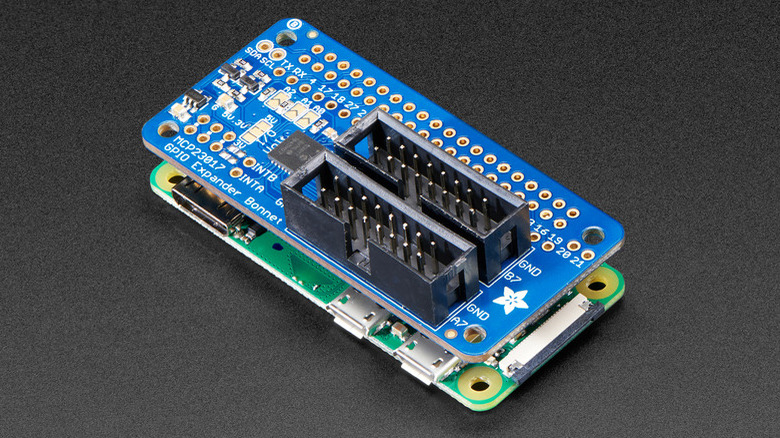
Once you're down the maker road a few miles, you'll discover that you need just a little more stuff attached than the Pi seems to offer natively. Fortunately, there are affordable and simple-to-use breakouts that can extend your Pi instantly, either through communication protocols like I2C or simply by adding more analog inputs. These multiplexers tend to make projects both easier to assemble and easier to code using well-documented libraries.
What exactly you'll want depends on what you want to do. There are many examples of expansion boards that make things simpler, like using an eight-channel relay expansion board to control lights or adding a bunch of potentiometers at once for audio or motor-control projects. There are GPIO expanders, servo and motor controller boards, as well as boards for monitoring multiple analog and digital inputs.
Any time you're using a Pi to accomplish a bunch of similar tasks, you should think about expansion. Irrigation projects might require multiple water sensors and multiple relays to control solenoid valves, but making a DIY MIDI controller might demand a bunch of analog input buttons. Don't worry about hitting the Raspberry Pi's ceiling until you've checked to see what kind of expanders are available for your project.