5 Tips To Make Your DSLR Photos Look More Professional
If you own a DSLR and have been taking photos, only to find that they're no better than what you might get with your phone, rest assured — it's most likely not because of the gear. There are a whole host of factors that go into making good photographs, and with the level of control a DSLR gives the user, you are very well-positioned to make fantastic photographs once you incorporate a little more know-how.
Shooting with a DSLR does not give you the skills and knowledge of a professional photographer, and you won't magically wind up with your photos gracing the covers of NatGeo or Vogue magazines. A seasoned professional can take better photos with a cheap phone or point-and-shoot camera than an amateur could with the best SDLR camera that you can buy because they understand the fundamentals of photography and cameras. They are what set regular photos apart from great ones.
If you want to get the most out of your camera and start making great professional-looking photographs, there are tips you can follow that should make a good starting point.
Understanding light
Every photograph is, at its core, a record of the light in a given place. If there were no light, there would be nothing to bounce off your scene, be focused by your lens, and be captured by your camera's sensor. Light can also be one of the more complex elements of a photograph to control, especially outdoors. Learning what makes for good and bad light, and how best to work with each kind of light, is key to getting professional-looking photos.
When it comes to daylight, many photographers like to shoot at what's commonly known as "golden hour." These are the hours right after sunrise and just before sunset when the light is softer and warmer, making for aesthetically pleasing photos. In contrast, shooting under the midday sun can be more demanding, as the light and shadows are harsher and more defined, and you end up with greater contrast in your scenes.
Even the pros find it difficult to shoot in direct sunlight, often using modifiers such as diffusers or neutral density filters (which also come in handy for long exposures) to make the light more pleasing to the eye. For indoor photography, learning to control both natural and artificial light will be very useful for creating the exact look and feel you are going for. Just be careful not to invest too much in fancy lighting gear and modifiers before you learn the basics.
Think about composition
Taking a photo is much more than just pointing your camera at the first thing you see and firing the shutter. Pay attention to everything that is in the frame and, very importantly, how you are positioning each element within the frame.
When it comes to positioning or framing, there are more conventions than we could cover, and you don't necessarily need to know all of them to make good photos. That being said, paying attention to framing, learning the most common ones such as the rule of thirds, and using the techniques best suited to your subject will improve the quality of your photos. For instance, while the natural tendency may be to put your subject dead center in the frame, reframing the shot to put them closer to the edge of the frame could result in a more aesthetically pleasing photo.
Also, keep in mind that there is more to good composition than framing alone: Light, colors, detail, activity & motion blur, bokeh, etc., all come together in your composition, and thus need to be given due attention. This isn't to say that you should spend every moment obsessing over the tiniest details, especially if it means you miss opportunities to take photos. However, the more you make a conscious effort to compose your photos with care, the easier it becomes to do on the fly.
Don't just stick to Auto

DSLRs come with a host of shooting modes, and the better you know each of them, the better you will be able to leverage each one to get the best photos out of a given situation. By changing modes, you can gain control of most (if not all) of the camera's variables, get hands-on experience with how each one affects a photograph, and get the most out of your camera.
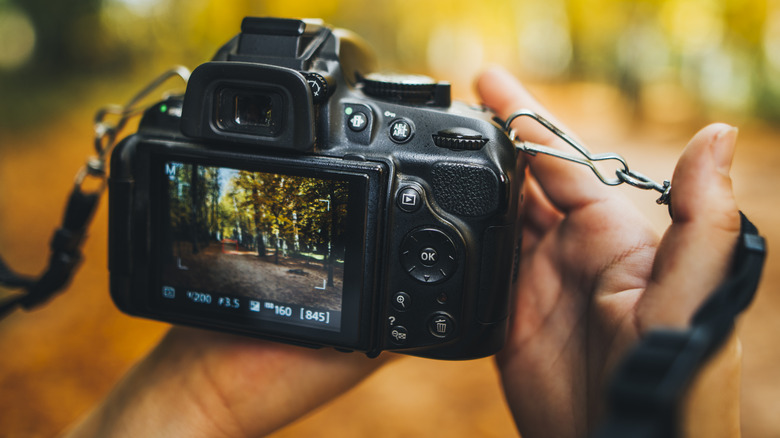
A good way to start would be to learn basic DSLR camera settings and think about the three elements of the exposure triangle: shutter speed, aperture, and ISO. Shutter priority lets you set the shutter speed, while the camera controls the aperture and ISO, and is useful when you want to freeze or exaggerate motion.
Aperture Priority lets you control the depth of field of your image, and Program lets you control ISO. You'll have the most control over each camera function in Manual mode, where you control every element, from the components of the exposure triangle to settings such as white balance.
By exploring and learning to control these features — instead of letting the camera decide what it thinks would be best for a scene — you can better understand how best to get a photo to look how you want. At the end of the day, you are the artist, and the camera is just your tool for making photographs. Knowing it inside out will help you wield it effectively.
Work your scenes
You may have heard of legendary photographer Henri Cartier-Bresson's "Decisive Moment." You may think this means that there will be one perfect time and frame to capture a scene, and if you miss it, your photo is worthless since it isn't the perfect representation of the moment. This is not true.
All the professionals, from Henri Cartier-Bresson, to Annie Leibovitz, to Steve McCurry, will tell you that you must be patient and work a scene to capture the best photos. If you find an interesting scene, look for different angles from which you can shoot it. Start with your first angle and see which other angles might work from the same location — low to the ground, for instance. Walk around the area and see if there are other places you can take the same shot from. If you come across framing you like, you can also wait for interesting things to happen within it.
The more approaches you take to a scene, the better you will understand it, and the better-composed and more creative your photos from that moment and future moments will be. However, always be sensitive to your surroundings, especially when photographing people. Walking around someone and treating them like an inanimate object as you snap photos from ten different angles is less likely to result in good photos. Uncomfortable subjects are unnatural, but more importantly, it's just unethical to put someone in such a position.
Shoot RAW and edit in post
Despite what some might think, editing a photo does not make it any less good or "real." Every professional photographer edits their photos to get the look and feel they want. No photo is guaranteed to match your vision perfectly straight-out-of-camera, so don't be afraid to open up something like Lightroom to make tweaks.
You will want to shoot in RAW to get the most detail out of each frame and give yourself the highest degree of control over the edits you make. This means your camera will save all of the data the sensor collects, leaving it uncompressed and largely unprocessed. You can then make as many edits as necessary, tweaking a wide variety of variables such as exposure, highlights and shadows, detail, and even colors. We would also suggest slightly underexposing your photos, as it is usually easier to bring back details from underexposed areas than overexposed ones.
That being said, you may not need to edit every single photo. You can set your camera to shoot RAW + JPEG, so if a photo looks good SOOC, you don't have to waste time editing and exporting it after the fact. You can then delete any unwanted RAW files to save space. This brings us to the only real drawback of shooting RAW (or RAW + JPEG): file sizes. RAW files will be significantly larger than JPEG equivalents, so be ready to have your cards, and drives fill up quickly.