What Causes 3D Printer Stringing (& How To Prevent It)
As 3D printing has become more commonplace — and more affordable for beginners — printers themselves have seen a number of improvements to print quality, speeds, accuracy, and so on. But just like paper printers, they're not immune to print-ruining errors.
Lots can go wrong when you're printing a 3D model, with "stringing" being one of the most common. The term refers to literal strings of resin being left behind during the printing process, which creates a sort of web-like effect that can ruin the look of whatever it is you're trying to produce. Depending on the severity, these strands can be cleaned up and the project may be salvageable, but it's ultimately much easier to avoid stringing in the first place.
Stringing has a handful of typical causes, all of which are detailed below. So whether you're trying to troubleshoot the issue or want to take preventative measures, here are five ways you can deal with hairy 3D prints. Please note that these tips only apply to filament printers (not resin printers).
Check your filament
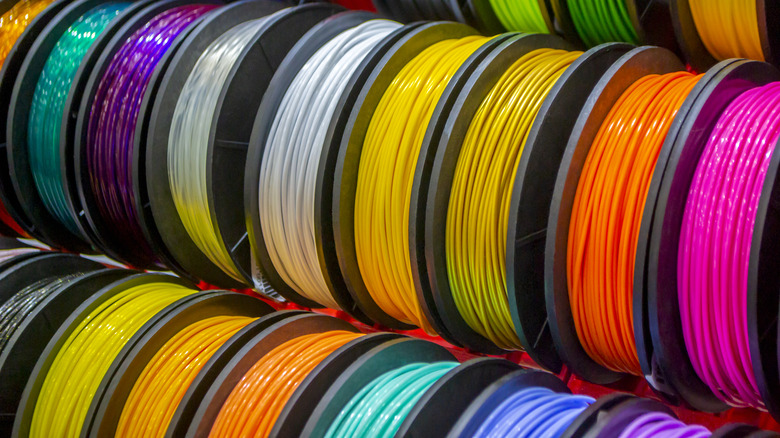
The filament itself can cause stringing in your prints if it meets the right (or technically wrong) conditions. Specifically, you want to avoid letting it build up too much moisture. If your filament is wet, the fast-heating process of printing will cause that moisture to throw off the nozzle's extrusion, leading to uneven placement and the creation of strings.
Proper storage in an airtight container — or at least in a dry area — should prevent or reduce moisture buildup and keep your filament from misbehaving. Of course you'll still want to check all of your filament somewhat regularly (particularly before starting a time-consuming print) to make sure it's doing okay, but keeping it away from dampness in general is highly recommended.
In the event that your filament does show signs of wetness, it's still perfectly usable — you just have to dry it out first. The best way to do this is to use a filament dryer as it's built specifically for this task. If you don't have access to a filament dryer, another method is to place the filament in an oven for a few hours. But before you go tossing your materials in, make sure to look up the proper temperatures and times to use for the type of filament you have. These values can vary between types, and you don't want to accidentally ruin your supplies (or your oven).
Print faster
The actual speed of your printer can also lead to stringing if it's going slower than the optimum. What's tricky about this issue is not all printers peak at the same speeds, so you'll need to figure out what setting works best for the model you have. But the main thing to remember is that stringing in the case of speed will only happen when the process is moving too slowly.
What essentially happens is the extruder (or nozzle) physically moves across the print at a rate that allows more material to seep out and unintentionally attach to your print. By increasing your print speed the filament has less time to accidentally leave excess material behind as it moves.
Try printing something very small and basic as a test (so as to save on materials and time), then slowly increase the speed and try again until the stringing stops. Once it's been dialed-in you should be good to resume your other printing projects without worry.
Keep the nozzle clean

Much like the printer heads in a paper printer, your 3D printer's nozzle can experience clogging. And when the nozzle gets clogged, stringing is one of a few problems you may start to encounter. Unclogging the nozzle isn't a terribly complicated process, but it will require a few basic tools: A wiping cloth, cutting pliers (or nippers), and tweezers. Safety glasses and gloves are also recommended to avoid any potential injury.
- If there is significant buildup, use the nippers to cut away the larger masses of filament first. Be sure to clean the residue off of the nippers as you go to avoid more buildup in the nozzle.
- Use tweezers to carefully pull out smaller bits of filament that may be stuck inside the nozzle.
- If your tools aren't able to remove all of the filament, remove the nozzle and heat it up to melt the filament for easier removal. Be extremely careful when attempting because the nozzle will need to get very hot.
- Once the nozzle looks clean, give it a wipe down with the cloth to remove any remaining residue and then reattach it to the printer.
It's also a good idea to occasionally remove your 3D printer's nozzle when between projects and give it a once-over to see if any filament has started to build up. If there's no buildup, replace the nozzle and have fun!
Adjust printing temperature
Your nozzle's temperature may also cause strings to form if it's set too high — too low and the filament may not be able to heat up enough to be extruded in the first place. If the nozzle gets too hot, the filament will likely get too hot as well. And when the filament gets too hot its consistency will become more fluid-like, which is what can lead to unwanted residue and strings on your prints.
Much like with dialing-in your printer's speed, you'll need to do the same for your nozzle temperature. The actual process for adjusting these values will differ depending on the model of 3D printer you have, but it's a similar process of slowly adjusting numbers until the strings stop appearing — perhaps on a trial print.
Keep in mind that different types of filaments (ABS, Nylon, PLA, etc) can melt at different temperatures, so a setting that works for one may not work for another. It's a good idea to perform a quick test when switching to a different material, just to make sure everything is melting properly and your prints come out smoothly.