10 iPad Pro Features That Will Change How You Use Your Tablet
Ever since Gene Roddenberry's "Star Trek" first lit up living rooms around the world with visions of the Starship Enterprise, people have dreamed of a day when that fiction becomes reality. Who wouldn't want to live in a world with high-speed interplanetary travel, instant short-range transportation, and sleek touchscreen computing at your fingertips? So far, we haven't figured out interplanetary travel or transporters, but we did manage tablet computing.
Tablets feel so ubiquitous that it's easy to forget it's been little more than a decade since most of us got our hands on one. Apple certainly wasn't the first company to try their hand at a tablet — those efforts stretch back at least as far as the late '80s and Hindsight's prototype Letterbug computer — but Apple succeeded in energizing the market in a way no one had before. Riding the momentum of the first iPhone just three years earlier, Apple's first iPad hit shelves with a level of fanfare that made it an instant success. Today, a little more than half of all tablets purchased in the United States are iPads.
If you've got your hands on an iPad Pro, you're looking at a lot of cool functionality right out of the box and readily available on the surface. Then there are other features, not quite hidden but also not immediately apparent, which can take your tablet time to the next level.
Handwriting to text conversion
The most apparent difference between a tablet and a conventional computer is the lack of keyboard and mouse. You can buy a peripheral mouse and keyboard to type things up, but you got a tablet because you wanted to use the touchscreen. The iPad Pro is a cut above most in this regard, thanks to its advanced touchscreen and the Apple pencil.
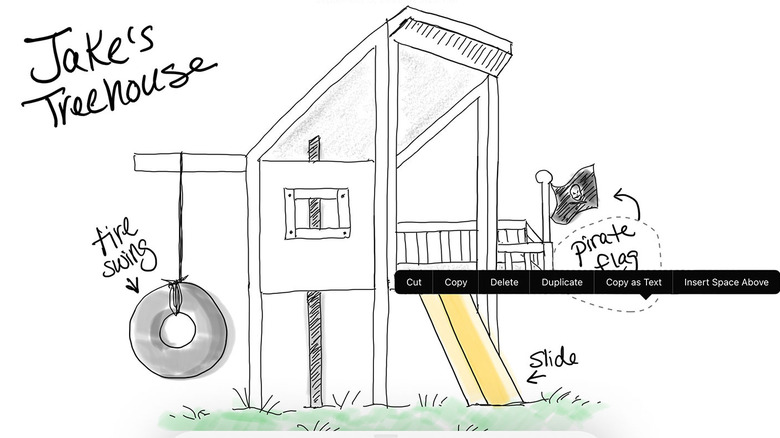
Without a keyboard, your only option for typing is to use the virtual keyboard on the touchscreen itself, which totally works but isn't ideal. Instead, you can ditch the keyboard entirely, write things by hand, and let your iPad Pro convert it into typed text for you.
There are two ways to convert your handwriting to typed text. If you know you're going to want to convert your handwriting in advance, select the pen with the letter "A" on it from your Apple pencil options. Your iPad will convert your handwriting into text in real-time, as you write. If you've only realized you need to convert some handwriting after the fact, you can do that as well. Select the handwriting you want to convert and tap Copy as Text. Then move to the Notes app or another text-based window and paste the converted text.
Picture in Picture
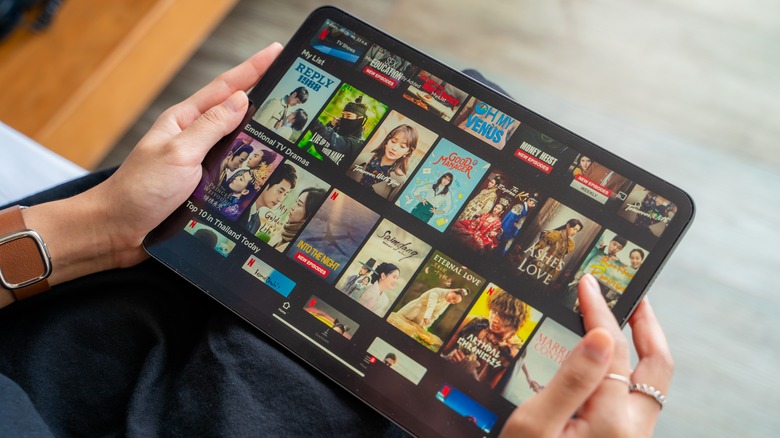
Your iPad is capable of housing just about everything you need for work time and play time. It's convenient, but it also means that every once in a while, your leisure time is interrupted by something urgent. Say you're watching a movie and a notification pops up. You see that it's an important email that needs a quick response. It won't take long, so you pause your movie and exit out of its app. Go back to your home screen, open up your email ... and so on. It's not the biggest problem in the world but it's annoying, and it's fixable.
Your iPad's Picture in Picture feature lets you shrink a video down into a smaller window that floats over the top of whatever else you need to do. To activate it while watching a video, tap your screen and look for the shrink icon. It looks like a large white rectangle with an arrow pointing to a smaller gray rectangle.
Now you can answer emails, pay bills, look something up, or just surf the web without ever having to pause your movie. You can also manipulate the floating window to resize it, move it to another position on your screen, or return to full screen when you're ready.
Multitasking multiple apps

While Picture in Picture lets you watch movies, TV, and YouTube videos while doing other things, your iPad Pro has even more multitasking options. There are two common ways to multitask with apps and one uncommon way, compatible only with certain apps.
Split View is pretty much what it sounds like. If you've ever played multiplayer "Mario Kart," that's more or less what you're in for. It lets you display two disparate apps on your screen at the same time, each of them taking up one half of the screen. Slide Over is similar, but lets you move one app to a narrow floating window on the right or left while displaying another app on the main part of the screen. Split View and Slide Over are compatible with just about any application. Last and least common is Center Window, which is only compatible with some apps. It pulls one app into a floating window front and center, with your other content displayed behind.
The long and short is that multitasking lets you harness the power of two apps at once to get more done in less time. Next time you're composing an email and need to look something up, slide your email client to one side and open a browser on the other. To muss, no fuss.
Drag and Drop
On a desktop or laptop, moving content from one application to another is pretty effortless, thanks to the combined power of the keyboard and mouse. Is there anything they can't do? Maneuvering content around on a tablet, however, isn't quite as simple or intuitive. Fortunately, your iPad Pro is capable of dragging and dropping content across apps using nothing more than your touchscreen.
Start by opening the apps you need in Split View or Slide Over. If you're copying something from a website into a text, put one on the left and one on the right. You get the drill. Before you can Drag and Drop, your iPad needs to know what it needs to move. For images, press and hold until you see it "lift up." If there's a sort of shimmer around the image, you're good to go. If you're working with text, you'll have to highlight it before you press and hold.
Once you're shimmering, slide your lassoed content from one app to the other and drop it in its new home. Your computer's Copy and Paste procedure is tried and true, but it doesn't look and feel like a magic trick. Sometimes change is a good thing.
Sidecar
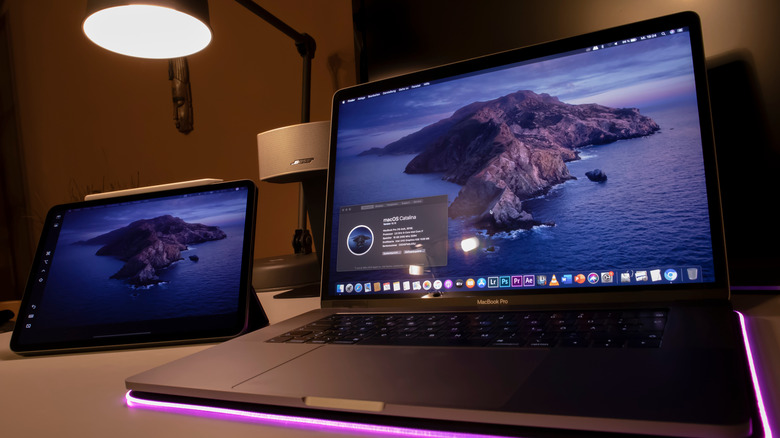
An iPad Pro can make a great standalone computer, but sometimes you need the additional power and peripherals of a laptop. When that happens, you can put your iPad Pro to work as your computer's second monitor, using Apple's Sidecar feature.
Using Sidecar, you can either mirror your Mac's display to share with someone else or you can extend the display to give you a completely independent screen. To get started, you have to meet a few minimum requirements. Your Mac must be newer than late 2015 (check Apple's compatibility list for full details) and needs to be running macOS Catalina or later. You'll also need a compatible iPad. Fortunately, every model of the iPad Pro is compatible with Sidecar.
Next, you need to make sure your Mac and iPad Pro can talk to each other. They must be using the same Apple ID with two-factor authentication, and they must have Bluetooth, Wi-Fi, and Handoff turned on. With all of that taken care of, your iPad will be able to connect with your Mac wirelessly, as long as they're within 30 feet (10 meters). You can also connect them directly with a USB cable, as long as your iPad is set up to trust your Mac.
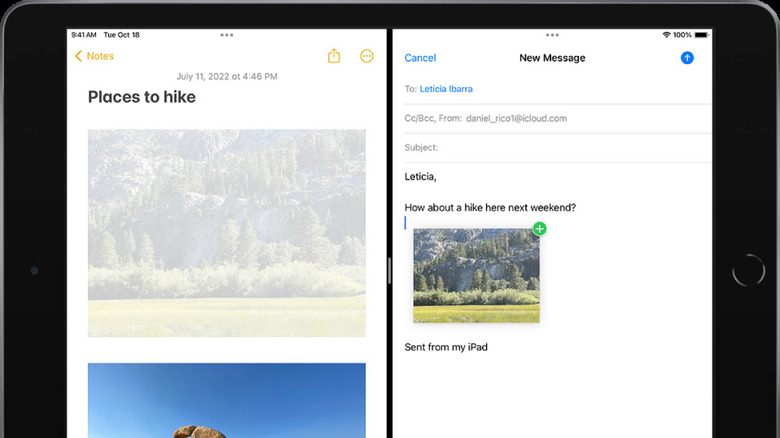
Scan and send documents
Thanks to technologies like DocuSign, signing and returning important documents is a lot more convenient than it once was. But every now and again, you might be called upon to physically sign a document and return it. The tried and true method is to print the document out, sign it in pen, then scan it and return it. It gets the job done, but it's needlessly laborious at this point in our ongoing technological revolution.
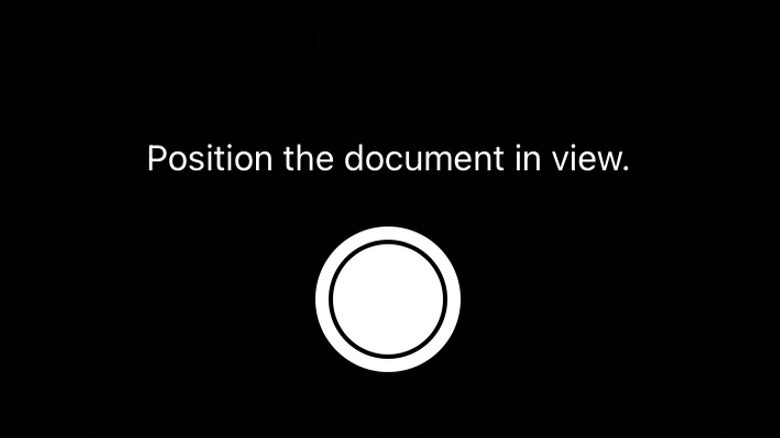
You've got a few options for scanning, signing, and sending documents with your iPad Pro. If you have a physical document, you could sign it with a pen and scan the signed document or you could scan it unmarred and sign the digital replica. If you've been sent a digital document, you can sign and send it back without ever involving the physical realm.
In the Notes app, tap the camera button, then tap the Scan Documents icon — It looks like a printed page with a dotted box around it — and point your camera at the document you want to sign. If your iPad is set to Auto mode, it will scan automatically as soon as it detects something scannable. Otherwise, hit the Shutter icon to scan. To sign, tap the Share button and select the Markup icon (looks like the tip of a pen). Write your signature with your finger or Apple Pencil and send it off. You can also save that signature and stamp it onto documents in the future.
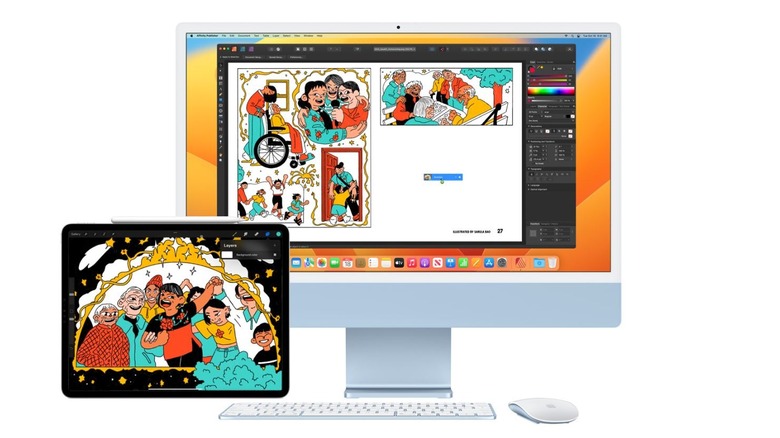
Continuity
If you've ever found yourself trying to move an image or document from your phone or tablet to another machine, you've probably lamented how frustrating it can be. Communication between devices isn't always as seamless as it could be and you might resort to inefficient workarounds like emailing something to yourself, just to get it from one place to the next.
By contrast, your iPad Pro works automatically with other Apple products, almost as if they're all one big machine with disparate but wirelessly connected parts. As long as your iPad and your other Apple devices (iPhone, Apple Watch, Mac) are on the same network and use the same Apple ID, the Continuity features lets you move from one to the other without any of the usual headaches.
You can AirDrop documents, photos, videos, and more to and from your iPad and other devices. With Continuity Camera, you can transfer images directly from your iPad to your iPhone or Mac without needing to do any legwork. That means you could scan and sign a document on your iPad, then move to your Mac to compose the email and send it off. You can even copy something on your iPhone and paste it onto your iPad using the Universal Clipboard. Get your Apple devices talking to one another, and you'll save yourself a lot of headaches down the line.
Quick Note
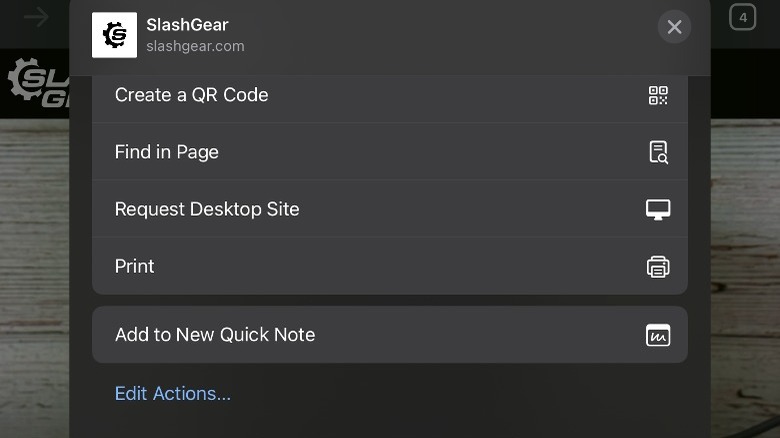
The familiar Notes app is great for dedicated writing sessions, themed lists, and writing down all of the things you swear you'll remember but immediately forget. Sometimes, however, you're in the middle of doing something when you have an idea or learn something interesting. Rather than stop what you're doing, open an entirely separate app, and write down your thoughts, use Quick Note.
It does exactly what the name suggests, provides you with a place to make quick notes without interrupting whatever else you're doing. The quickest way to open Quick Note on your iPad Pro is swiping up from the bottom right corner of the screen. You can also get there by clicking the share button in any app and then tapping Add to Quick Note. You can quickly write down your thoughts, tap done, and you'll be automatically returned to what you were doing before.
Quick Note works over the top of any app or screen on your iPad and, unlike other notetaking solutions, it reminds you of your notes at relevant times. For instance, if you copy text or a URL into a Quick Note, you'll see a reminder prompt the next time you visit that site, taking you right back to your previous notes.
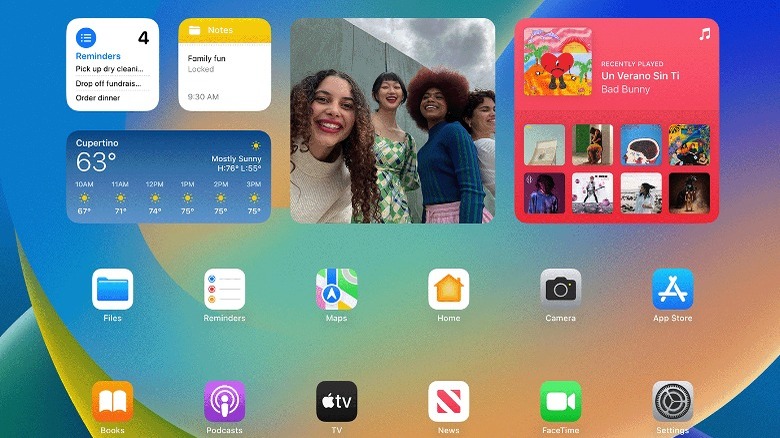
Home screen widgets
If you're an iPhone user, or you've had a previous iPad, you're probably already familiar with Widgets. They're an alternate way of accessing certain apps and getting information at a glance. You probably have some on your phone's Home and Lock screens, showing you the weather or your calendar.
With an iPad Pro, you can take full advantage of widgets, thanks to the expanded real estate, as compared to an iPhone. As long as you're running iPadOS 15 or later, Widgets will work, and you can customize them to give you the information you need when you need it. To add a Widget, press and hold a vacant space on your iPad's Home screen, then tap the + icon at the top left of the screen and select Add Widget. You'll see a list of common Widgets, but you can also search for specific apps.
Perhaps the most useful Widget is the Smart Stack, which lets you put multiple widgets into a single space on your phone screen. It will rotate through each of the stacked Widgets throughout the day, displaying the information it thinks is most relevant. You can also swipe through them whenever you want to. Now you can fill your app library to brimming and keep all of the things you really need front and center.
3D LiDAR scans
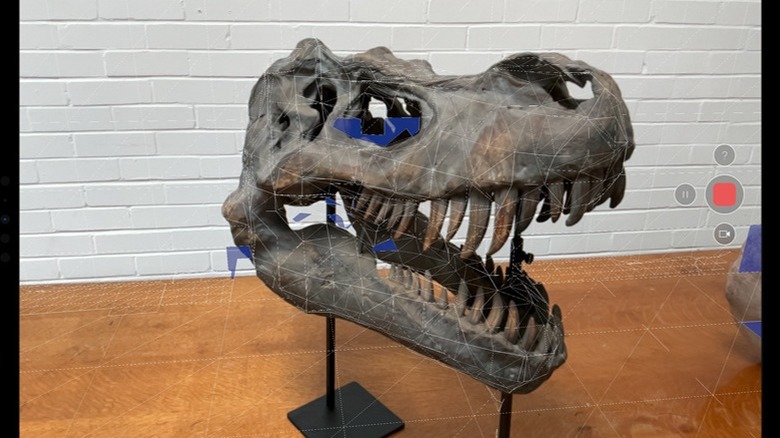
Beginning in 2020, Apple's introduced a number of new features to the iPad Pro. In addition to improved cameras and onboard microphones, your device comes standard with a depth-sensing LiDAR scanner. We got into the nitty gritty of how LiDAR works, but the long and the short of it is a LiDAR instrument sends a beam of light into the environment and measures the time it takes for the light to bounce back and hit a sensor. Because the speed of light is constant, the transit time corresponds with distance. If you send out a whole lot of photons in different directions and measure their return times, you can start to build a pretty accurate 3D map of almost anything.
The LiDAR camera works at a distance of roughly 5 meters and provides photon-level detail almost instantly. The most immediately actionable way to use LiDAR on your iPad is through the Measure app. When the app was introduced, it used augmented reality to calibrate its environment and make estimates of objects or spaces. With LiDAR, the algorithm is replaced by direct measurements of bouncing photons, happening inside your iPad in real-time. The upshot is that you get more reliable measurements for rearranging rooms or DIY projects. But why should it stop there? Considering the rise of affordable 3D printers, nothing's stopping you from making a tiny version of your house and all of your things to play with.