How To Use The Green-Screen Feature On Microsoft Teams

Picture this. You're at home attending a virtual meeting, but you don't have a suitable spot to use as your background. No worries, you could just add a virtual background effect to your video. The only problem, though, is that you end up looking weird and distorted with the effect on.
That's where Microsoft Teams' green screen feature comes to the rescue. With this newly released tool, not only will your background effect look better but your facial features will also be more defined. You can start focusing more on the meeting and less on how you look on camera.
As of this writing, not all users have access to the Microsoft Teams green screen feature. You first need to be part of the Teams Public Preview. Additionally, the feature requires a Windows or macOS device running on either an Intel or AMD chip. If you have Mac M1/M2, you won't be able to use it. After getting the Teams Public Preview and checking whether your computer supports the green screen feature, here's how you can enable it.
Using the green screen feature in Microsoft Teams

To effectively use the Microsoft Teams green screen feature, you first need to make sure that the wall behind you is a solid color, clean, and flat. Your clothes and the items you wish to show on camera should not be the same color as your background. Once you're in the perfect spot, follow these next steps to turn on the green screen feature:
1. Launch Microsoft Teams on your Windows or macOS computer.
2. Join a meeting.
3. On the toolbar at the top, click on the More icon.
4. Select Video Effects from the drop-down menu.
5. Under Backgrounds, click on the effect of your choice.
6. Select the Apply button.
7. Open the Green screen settings under Backgrounds.
8. Turn on the toggle switch next to Green screen.
9. On the preview window, click on the color next to "What color is your background?".
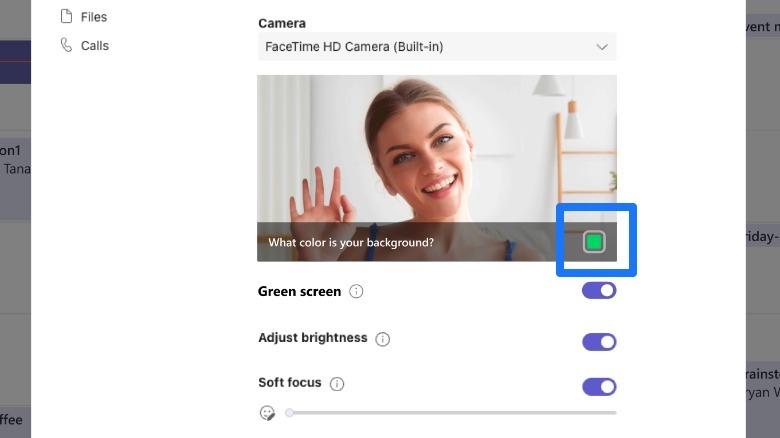
10. Choose the correct color of the wall behind you.
11. Close the window to go back to your meeting.