This MacOS Ventura Trick Makes It Easy To Turn Pictures Into A Transparent PNG

The newly launched macOS Ventura is fully equipped with a lot of features that most Apple users don't realize they need. For instance, if you have both a Mac computer and an iPhone, you can now use the latter as a wired or wireless webcam and take advantage of its camera's powerful features for your video chat sessions. Those who use Safari for work or school can now come up with stronger passwords for websites that require them and also easily share a collection of tabs with other users for easier collaboration and real-time updates. Another new MacOS Ventura feature that may be of interest to photography enthusiasts is the ability to lift the subject from any image and easily remove the background (via Apple).
Being able to isolate the subject of a photograph could be useful for a lot of things. It enables a user to do away with distractions or even replace the backdrop with something more appealing or appropriate. The image capability was first introduced as part of iOS 16, which made it easier for iPhone users to turn photos into stickers of sorts that can be shared across various mobile apps. Now, this photo-editing trick can also be used on any device running macOS Ventura.
Separate an image subject from its background on MacOS Ventura
Apple users should have the ability to isolate a photo's main element when accessing image files and screenshots through various MacOs apps, namely Photos, Quick Look, and Safari. The steps are as follows:
- While in Finder, select an image, then press the space bar to launch Quick Look. Alternatively, launch one of the other mentioned apps and choose a photo to work with.
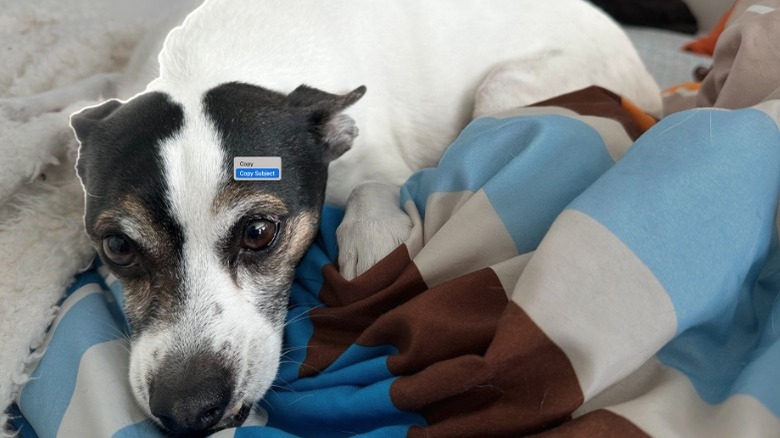
- Hover over the photo in the window and hit Ctrl+Click or right-click on it.
- Place the cursor over "Copy Subject" to see a preview of the subject isolated from the background with an outline.
- Click "Copy Subject" to add it to the clipboard.
 Jam Kotenko/SlashGear
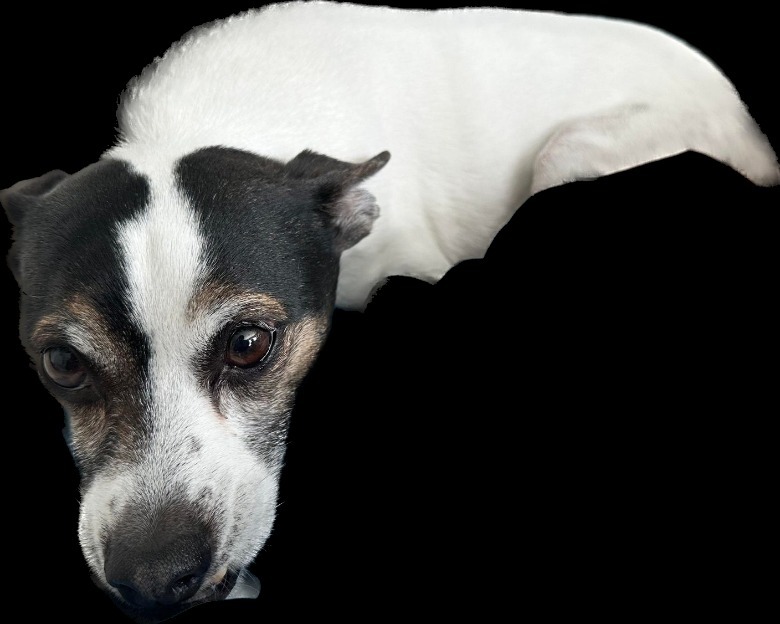
For photos viewed in Safari and other apps, the "Copy Subject" option may take a while to be clickable — it just means the recognition software is analyzing the image and is trying to come up with the best selection results. Also, as you'll notice above, the cutout is not always perfect.
Once it's in the clipboard, the extracted subject can be pasted into a new note, document, email or text message, or post. It can also be shared through a variety of apps. Unfortunately, the "Copy Subject" MacOS Ventura feature doesn't work on Preview, but the app can be used to turn the photo's subject into a transparent PNG.
Create a new transparent image from a lifted photo subject
Preview, like the app name implies, is an Apple app that lets you preview media files on a Mac computer. It can also be used to convert image files into various file types, including PNG, which has a transparent background. Similarly, it can be utilized to create new background-less images from subjects that were isolated from other photos. Here's how to do it after extracting a photo subject and adding it to the clipboard:
- Open the Launchpad app by clicking on its icon in the Dock and pick "Preview." Alternatively, look up and launch "Preview" by using Spotlight to search.
- From the menu bar, go to "File," then select "New from Clipboard." This should place the previously selected and copied image subject onto a blank Preview canvas
- Go to "File" then choose "Save."
- Pick "PNG" from the "Format" dropdown menu to keep the background transparent. Make sure the checkbox next to "Alpha" is marked.
- Type a file name in the "Save As" text field, pick your desired destination folder, and hit "Save" to finalize.
The new transparent PNG file can then be used for a number of things, such as an element in other photo-editing projects, or attached as a file and sent to other people.