The Easiest Tricks To Make Windows 11 Look Even More Like MacOS
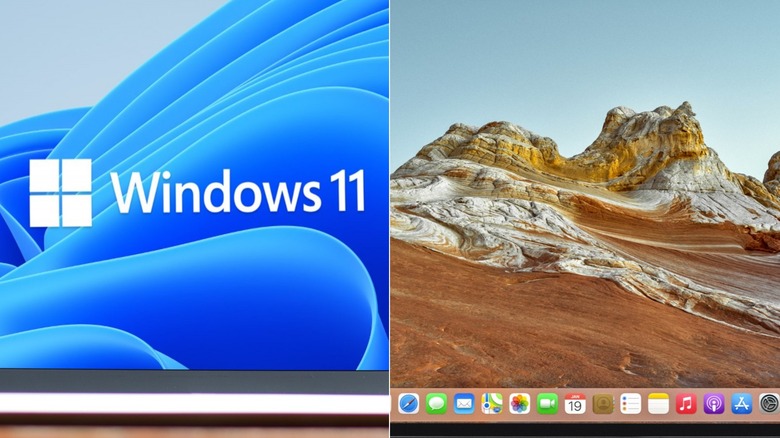
Having been developed by two different tech giants, Windows and MacOS are a world apart. Windows can run on different desktop and laptop setups, while MacOS is exclusive to eight types of computer only (via Apple). Windows has the taskbar and File Explorer, while MacOS has the dock and Finder. Naturally, even the look and feel of Windows are entirely different from that of MacOS.
If you were previously an Apple user and recently switched to a Microsoft OS, you'll most likely have a hard time navigating through the system. This is especially true since there are built-in functionalities in MacOS that Windows doesn't have.
Fortunately, you can find many ways to make your Windows device look like a MacOS. In this post, we'll walk you through some of the easiest tips and tricks to make you feel more at home with Windows. And unlike other risky ways, these ones won't significantly change your computer's system files or potentially break your system.
Create a transparent and centered taskbar
Among the things that make MacOS stand out is its centered dock, where you can conveniently access your frequently used apps (via Apple). In Windows, this is called the taskbar. However, unlike the taskbar, the dock doesn't fill the entire lower part of your screen as it adjusts depending on how many apps you add to it. This makes your desktop look clean and sleek.
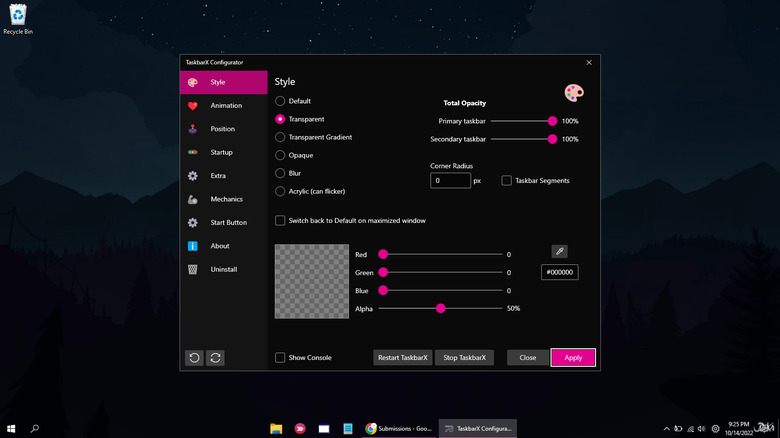
To give Windows the same visual appeal, you can use TaskbarX. The app turns your taskbar invisible, making it appear as if it doesn't take up much of your screen. You can either buy the app from the Microsoft Store or download it for free from its GitHub page. If you go with the second option, here's how you can install the app.
- Download the .zip file for your OS.
- Extract and open the file.
- Scroll down until you see a file named TaskbarX.
- Click on the file with "Application" as the file type.
- If you see a "Windows protected your PC" screen, select "More info" and then, "Run anyway."
- Wait as your app icons automatically move to the center of the screen.
To make the taskbar transparent, go back to the extracted folder and install the TaskbarX Configurator app. You will then find the "Transparent" option under the Style tab.
It is worth noting that the app only works on Windows 10. However, there is a workaround for Windows 11 if you install ExplorePatcher.
Add grouped shortcuts to your taskbar
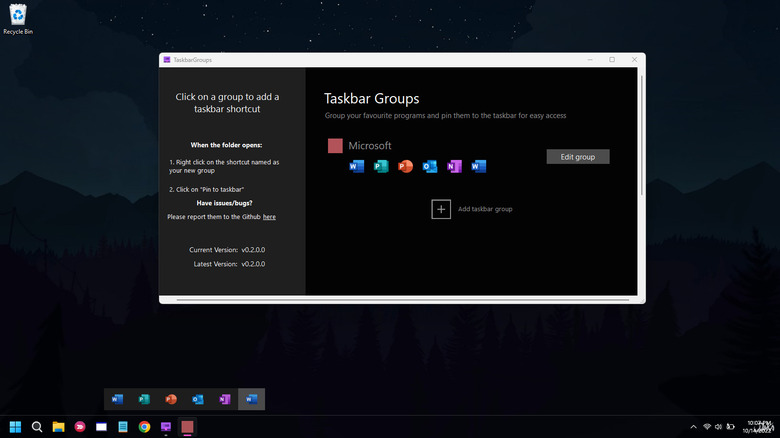
Another taskbar customization you can opt into is installing the TaskbarGroups app. This free app lets you make folders right in the taskbar, similar to what MacOS has in its dock. While it isn't the exact replica visually, it's still a nice addition to your setup. To install the Taskbar Group, follow the steps below (via GitHub):
- Go to the release page.
- Download the .zip file from the latest release available.
- Extract the .zip file.
- Click on TaskbarGroups to open the app.
- On the homepage, click on "Add taskbar group."
- Enter a name for your group.
- Choose a group icon by clicking on "Change group icon" and pick from the photos in your computer.
- Click on "Add new shortcut" to add the programs you want to include in your folder.
- Once you're done adding your programs, hit Save.
- Back on the homepage, click on the group you made. This will open your Windows File Explorer.
- Right-click on the shortcut and select "Pin to taskbar." It should now appear on your taskbar.
Get dynamic wallpapers
Do you love how MacOS desktop wallpaper automatically changes depending on the time of day? You can actually do that in Windows, too. Although this feature isn't built-in for Windows unlike MacOS, you can simply install the WinDynamicDesktop from the Microsoft App Store. It's completely free and very easy to set up. After installing the app, follow these steps:
- Click the system tray.
- Right-click on the WinDynamicDesktop app icon.
- Select "Configure Schedule."
- Here, you can choose whether to enter a location manually, use Windows location service, or set specific sunrise and sunset times.
- Hit OK to exit.
- Right-click on the app icon again.
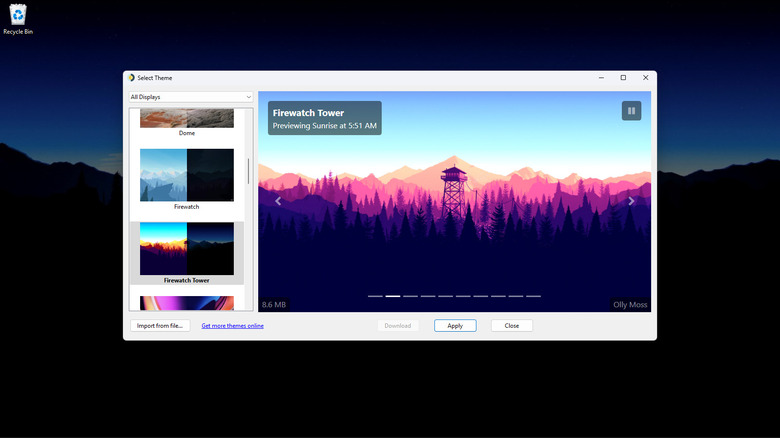
- Choose "Select Theme."
- Pick from the available wallpapers or download a new one and import it.
- Click Apply to save your choice.
- Right-click on the app icon again.
- Click on "Start on Boot" for the program to launch immediately after your computer boots.
Your desktop wallpaper should now reflect the photo corresponding to your current time. This picture will change as you get through the day.
Change the cursor
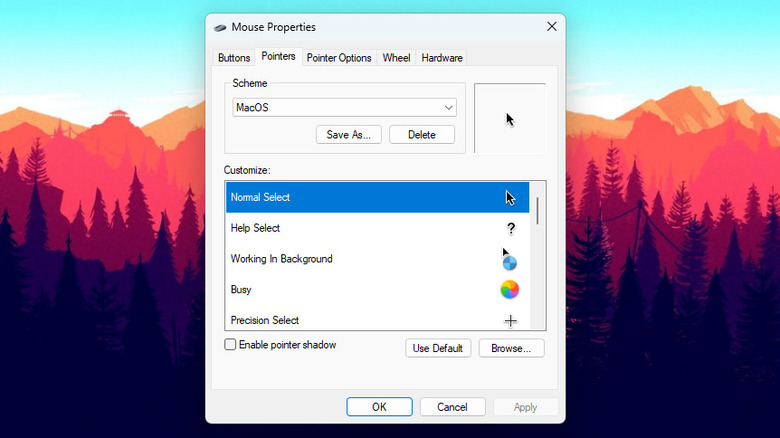
Even though changing the cursor icon might seem like a minor thing, it can actually add to the Mac-like appeal of your Windows computer. To change the cursor on your computer, here's what you need to do (via YouTube):
- Download the free MacOS cursor pack made by How to Creative.
- Extract the .zip folder.
- Open your primary drive where Windows is installed (usually drive C:).
- Go to the Windows folder and open the Cursors folder.
- Paste the extracted .zip folder inside the Cursors folder. Make sure you have administrative rights to do this.
- Close the folder.
- Open your Settings app.
- Go to the "Bluetooth & devices" tab.
- Select Mouse.
- Under "Related settings," click on "Additional mouse settings" to open the Mouse Properties dialog box.
- Go to the Pointers tab.
- Double-click on the items under "Customize" and pick the matching icon from the MacOS cursor pack.
- After changing all of the icons, hit Apply.
- Click Save As to save your settings as a new scheme.
- Click OK.
Use a Spotlight-like search bar
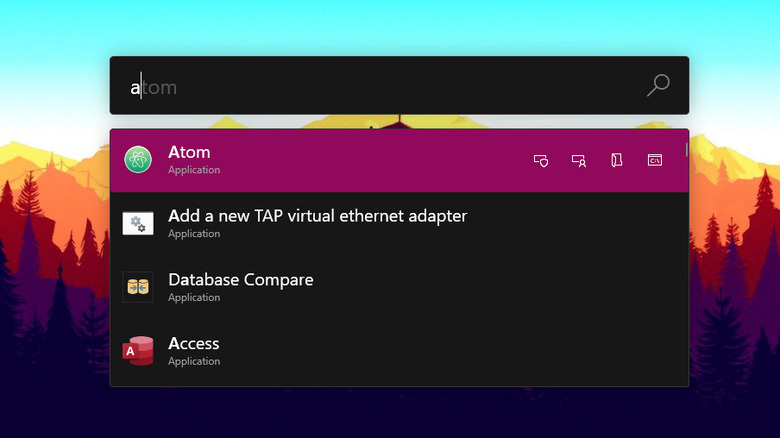
Spotlight is Apple's way of looking up Mac apps, documents, images, and practically any other item on your computer (via Apple). Sure, Windows also offers this functionality via the Start Menu, but Spotlight is more convenient as it pulls up a search bar right in the middle of your screen.
To add a Spotlight-like search bar on your Windows device, you need PowerToys. This Microsoft-developed free app contains a set of utilities that lets users tweak their computer to improve productivity. Here's how you can use PowerToys to add the centered search bar:
- Install PowerToys either via GitHub or the Microsoft Store.
- Open PowerToys.
- Go to the "PowerToys Run" tab.
- Turn on the toggle button next to "Enable PowerToys Run."
- Press Alt+Spacebar to open the centered search bar.
You can also change the keyboard shortcut and enable all types of plugins like Calculator, OneNote, Shell, and Unit Converter.