Install Google Assistant On Android Lollipop Without Root
One of Android's biggest problems, next to security exploits, is its fragmentation. Never mind the dizzying array of Android versions available in the market, fragmentation means that not all devices, even relatively recent ones, will sport the same features. Take for example Google's new favorite pet Google Assistant, which is only available for Android 6.0 Marshmallow onward. Android 5.0, a.k.a. Lollipop, still commands a third of the market but remains Assistant-less. Fortunately, it's not that hard to actually get Google Assistant on your Lollipop device, provided you're willing to make some concessions. And you don't even need to root your phone to do it.
We'll give you the fine print upfront so you know what you're getting into before you commit yourself to the process. Getting Google Assistant to work on Lollipop devices, even and especially without root, is practically a workaround. It's never going to be perfect and there's a chance Google might push an update that will stop this from working. Having Assistant also conflicts with Google Now on Tap, so you'll have to make a choice between the two.
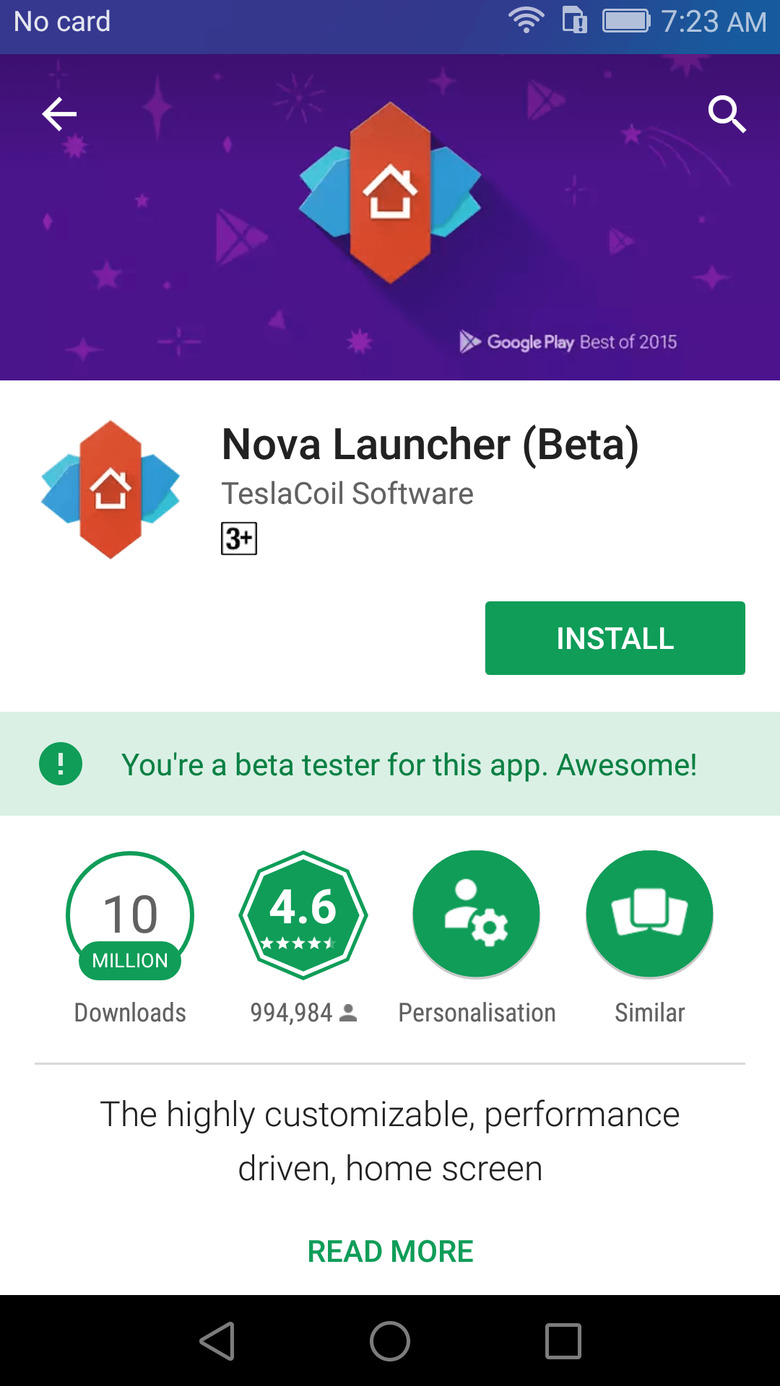
You also need to bid farewell to your favorite Android Launcher. Unless your favorite happens to be Nova Launcher or Activity Launcher, as either of these two is needed for the magic to happen. Being the more popular one, we'll go with Nova Launcher.
If you're prepared for the adventure, then follow the easy steps below.
Credit goes to Nikhilkumar038 on XDA for coming up with the workaround.
Get updated, set things right
The first important step that gets the ball rolling isn't actually installing Nova Launcher. Though you can always do that at the same time. Before starting, or after you've installed Nova, make sure you're apps are up-to-date, particularly Google apps. Or to be even more specific, the Google Search app, as this is the app that contains Google Assistant.
You also have to set your device's language to US English (UK English also seems to work). It might be a pain for those who use a different language or version of English, but it is currently the only kind of English Google Assistant understands.
Install Nova Launcher
Next step is to finally install Nova Launcher. Even the free one will do. Nova is one of the most popular veterans in the Android Launcher market that is still actively developed to this day. It will definitely be worth your while, even if you aren't interested in Google Assistant.
While setting up Google Assistant, you'll most likely want to make Nova Launcher your default Home launcher as you might be going back and forth. Usually, you'll be asked to choose your default launcher the first time you install a new one. But it case your OEM's custom launcher (like Huawei's EMUI) doesn't do that, Nova Launcher's Settings app has an option for you to manually do so.
It goes without saying, you'll also need the Google Search app to be installed, which is the default anyway in Google-certified device.
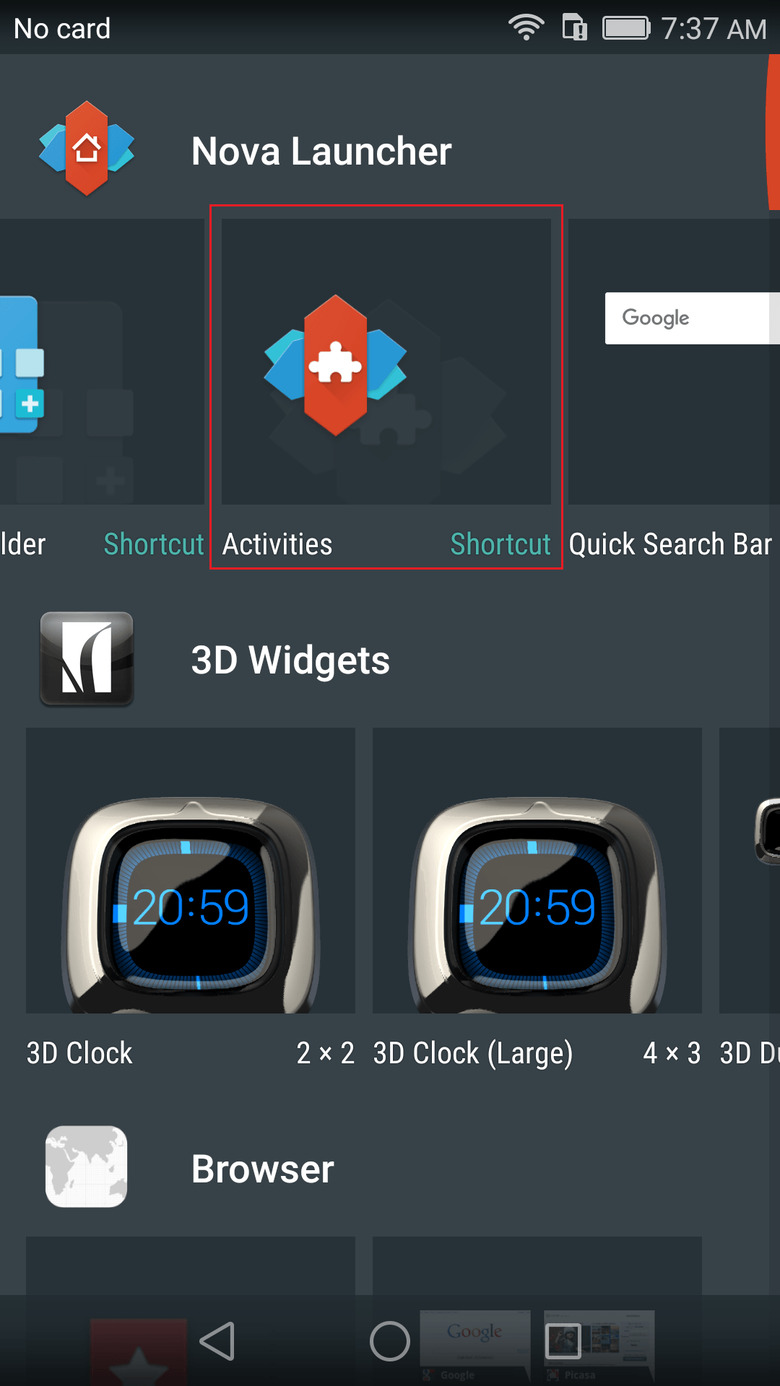
Add an “Activity” widget
Once Nova Launcher is installed, you'll need to add a home screen widget. Not just any widget, mind, but a special "Activities" one from Nova. You do it like any other widget. Simply tap and hold on any empty space on the home screen to go into Edit mode.
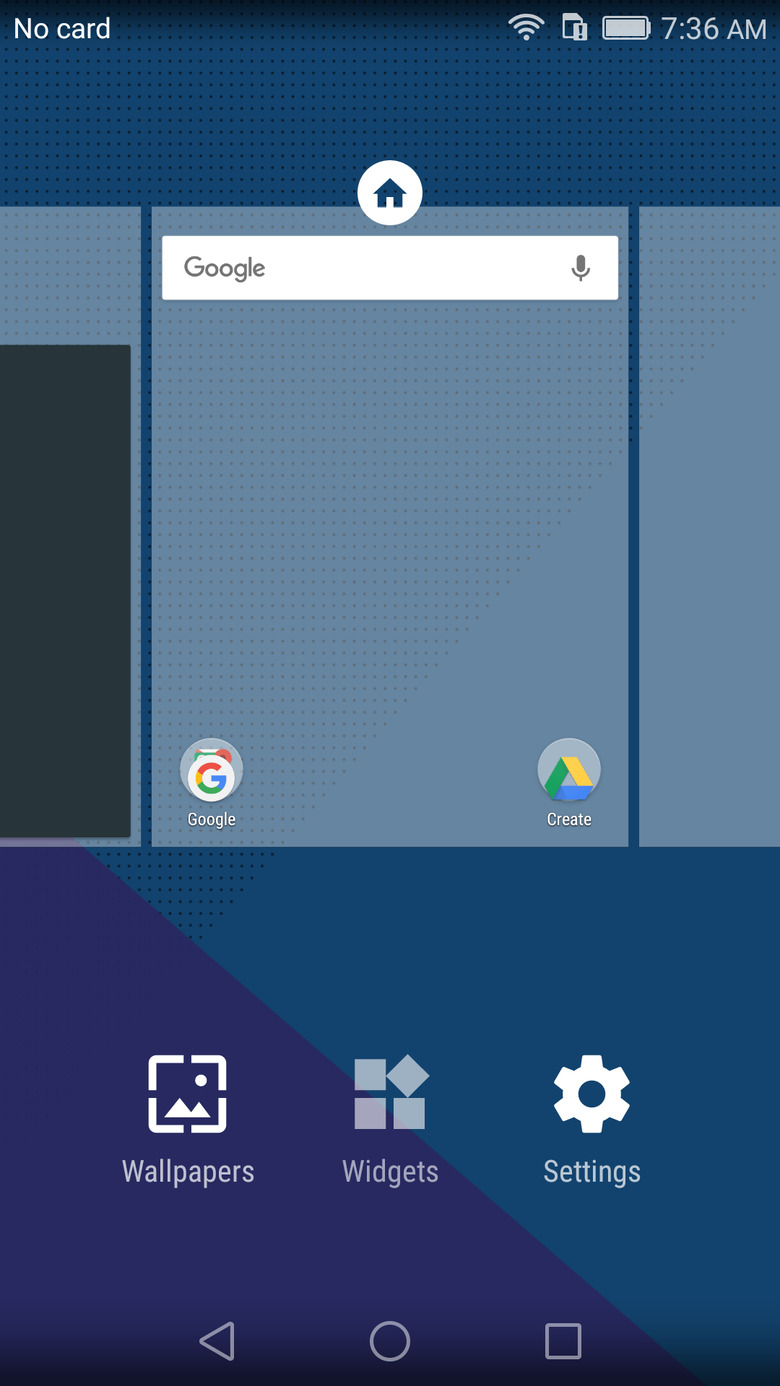
Select "Widget" and look for the Activities widget in the Nova Launcher group. Press and hold to drop the Activities icon anywhere on the home screen.
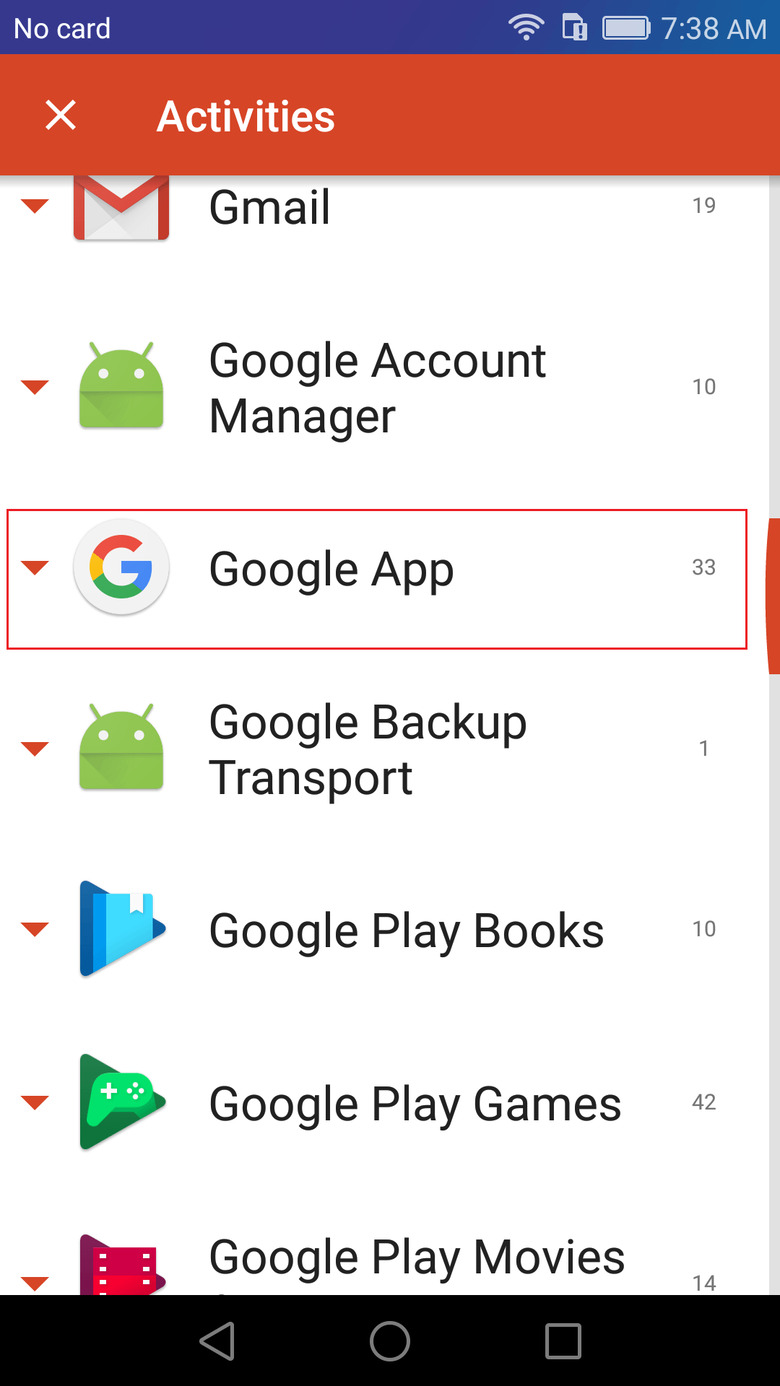
Look for Google Assistant under the Google app
That's the last finger exercise you'll do in this guide, scout's honor! The moment you drop the Activities widget, a Window will pop up with an Activities title. Time to give your eyes a bit of an exercise! Look for the "Google App" entry in the list and tap on it to expand.
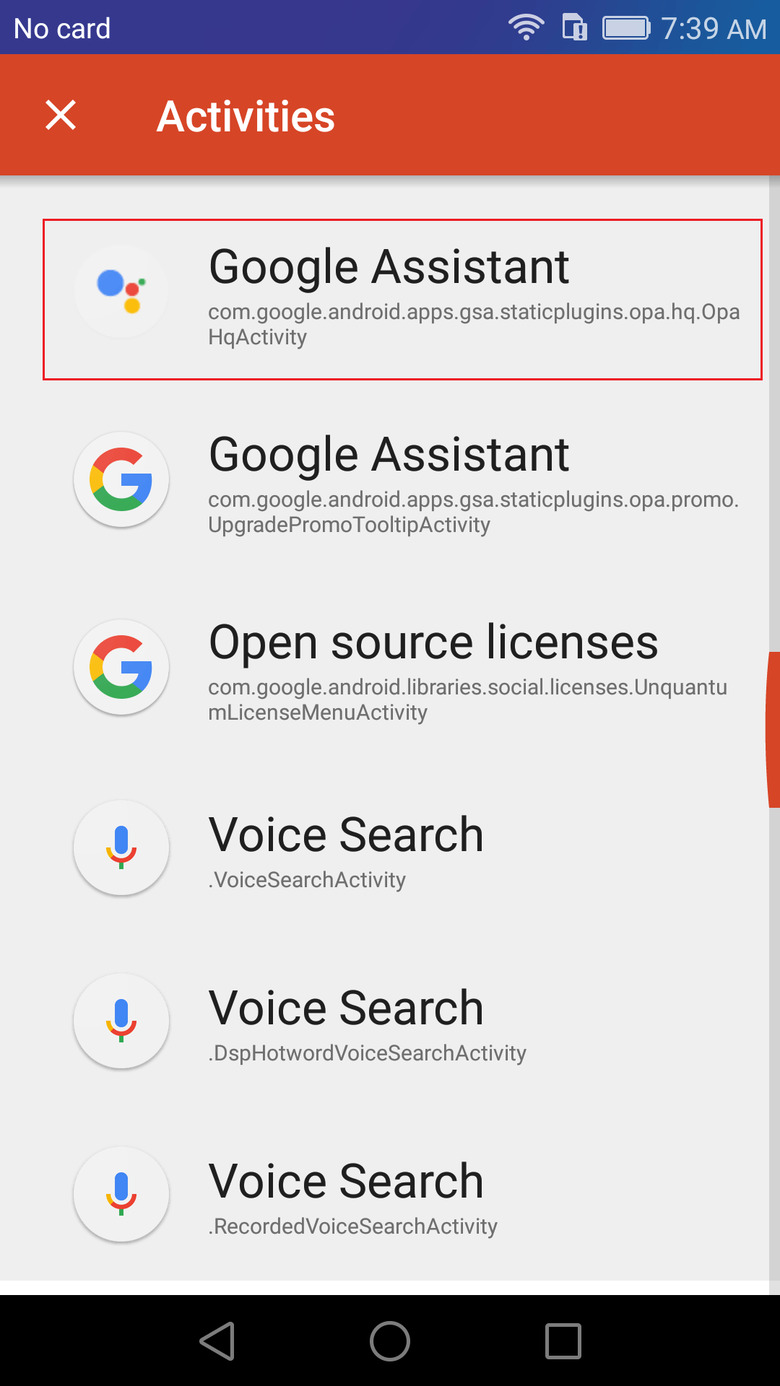
Now look for the Google Assistant entry with "com.google.android.apps.gsa.staticplugins.opa.hq.OpaHqActivity" under its name. Hint: it's near the end of the Google App list, a bit above the Voice Search entries.
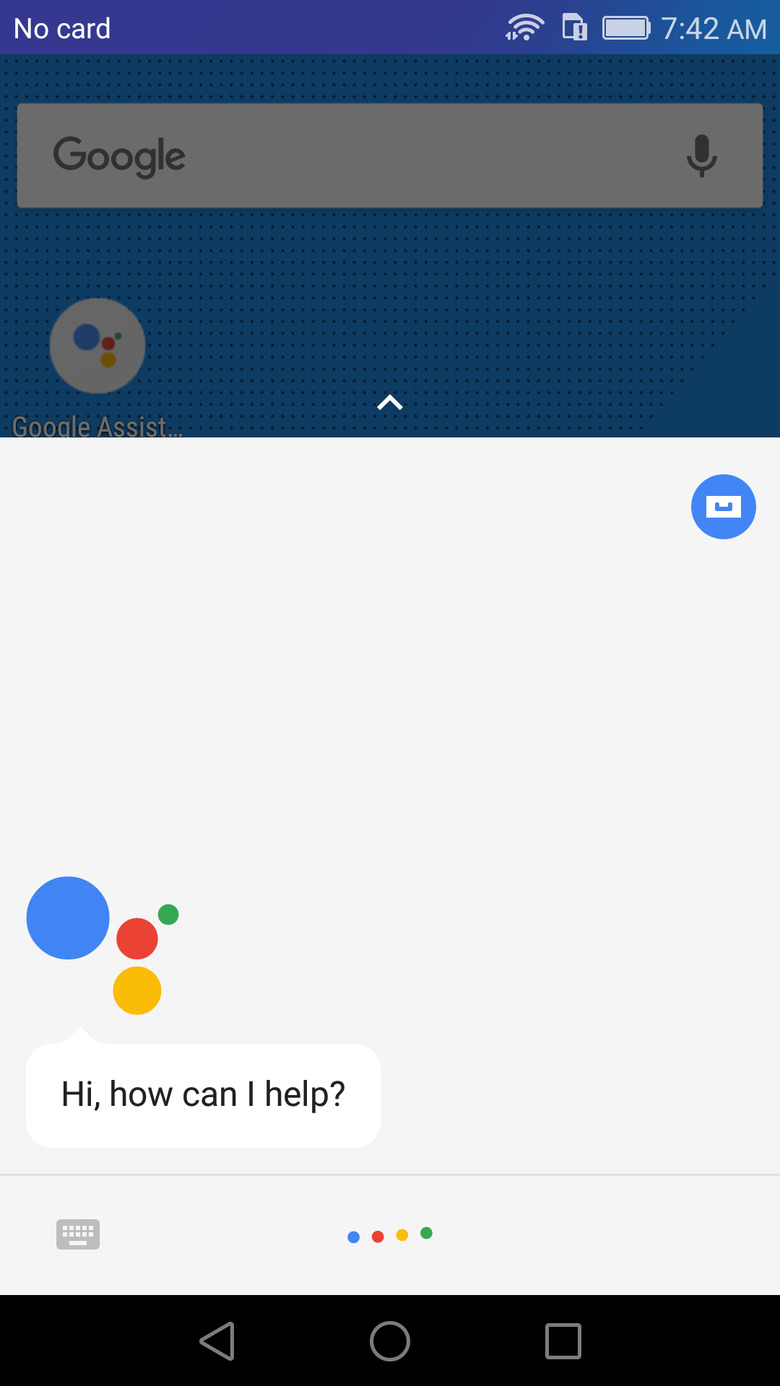
Once you tap on that, you will be taken back to the home screen where you will see a new icon that looks a lot like the Google Assistant icon.
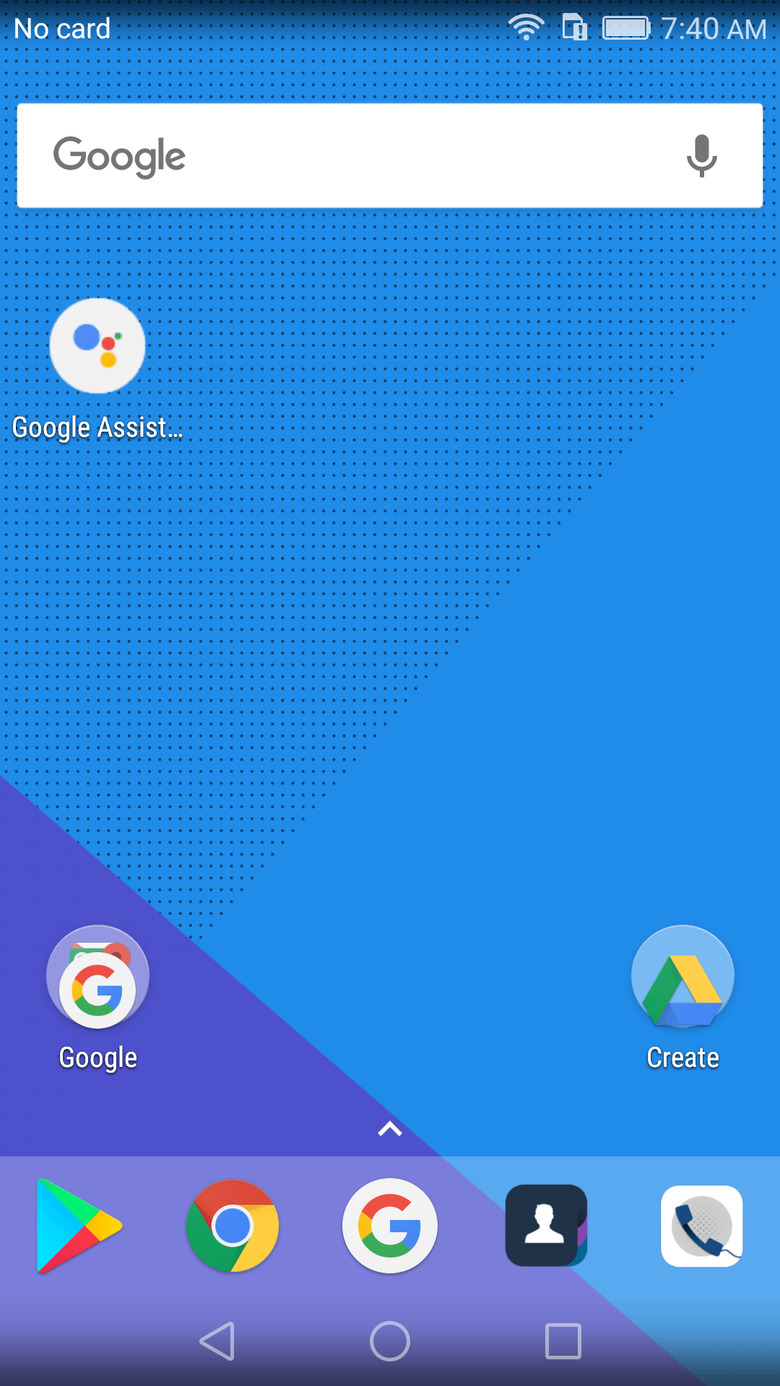
Congratulations! You've gone through the most grueling steps in the process. Now all that's left is actually enabling Assistant.
Add a reminder to activate Google Assistant
Tapping that Google Assistant icon will take you to Google Assistant's window. You aren't done yet, though. Assistant still lies dormant.
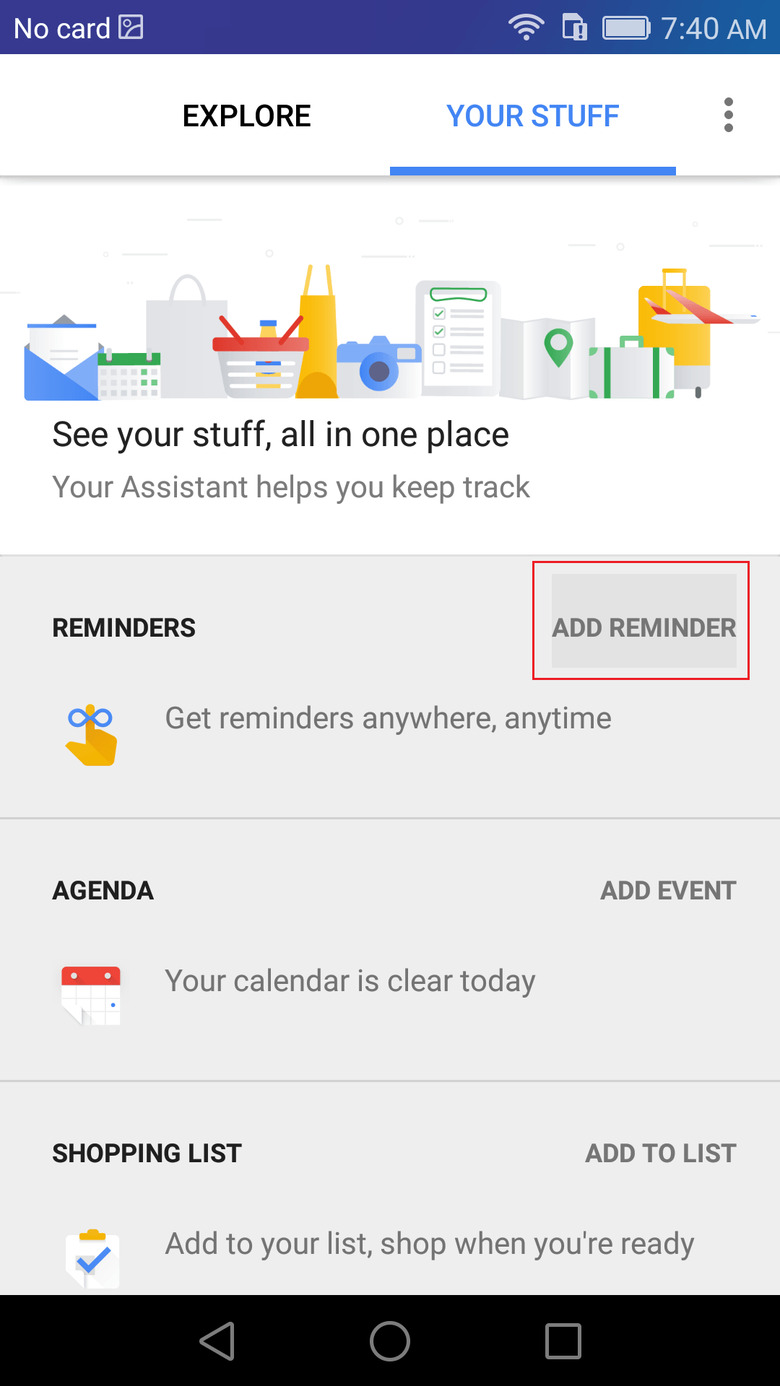
Scoot over to the "Your Stuff" tab, which should show a list of things Assistant can keep track of. If that page is empty, see the next step.
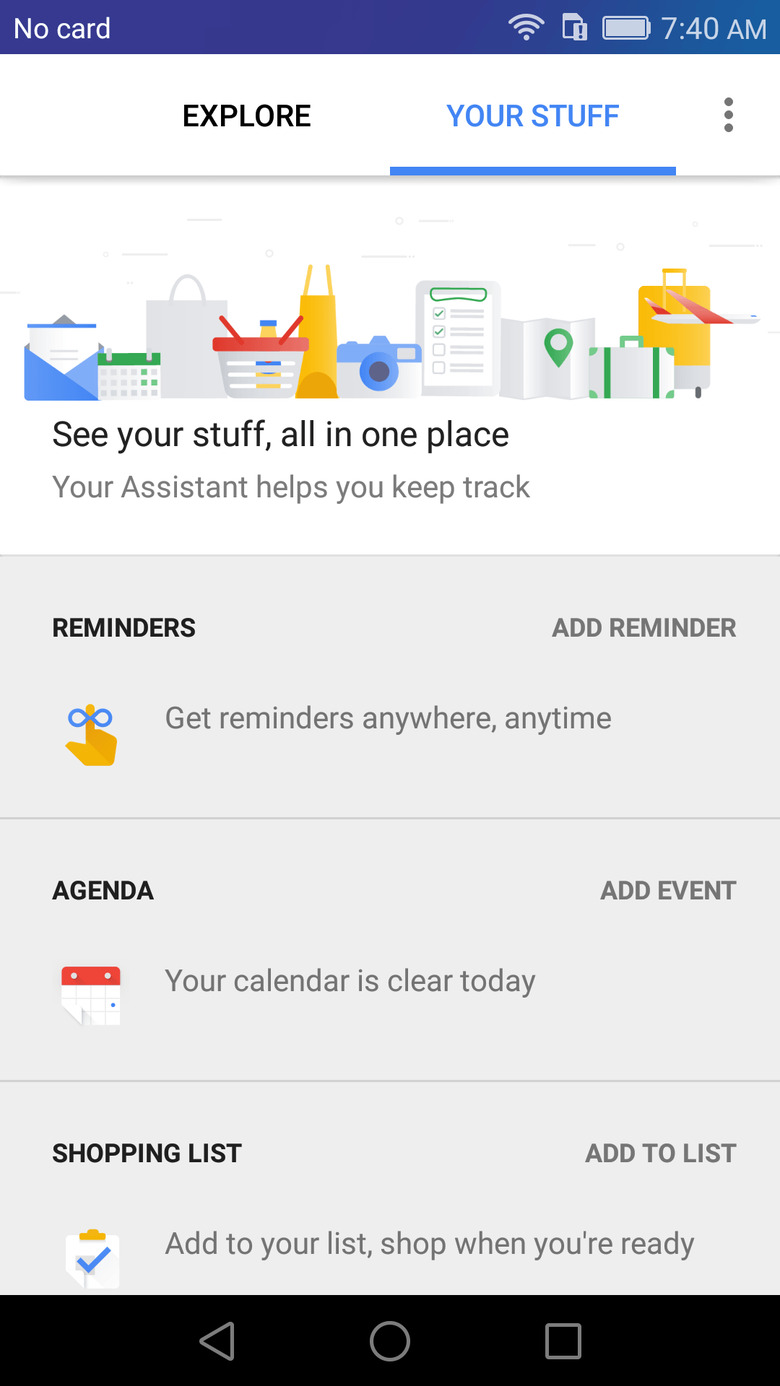
If you followed the steps religiously, you'll see a Reminders entry at the top of the list. Tapping on "Add Reminder" will kickstart the process of setting up Google Assistant's voice trigger.
Anyone who has set up "OK, Google" in Google Now will be familiar with the process.
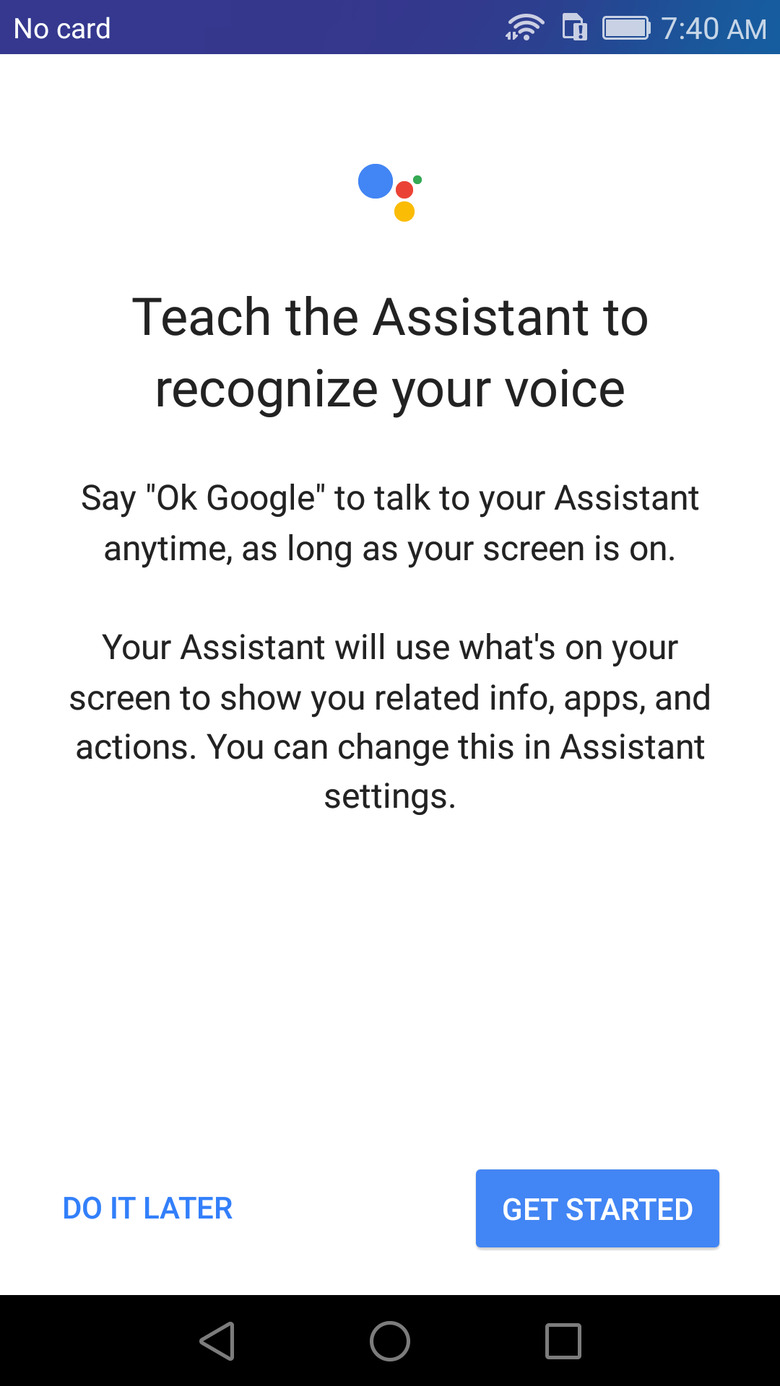
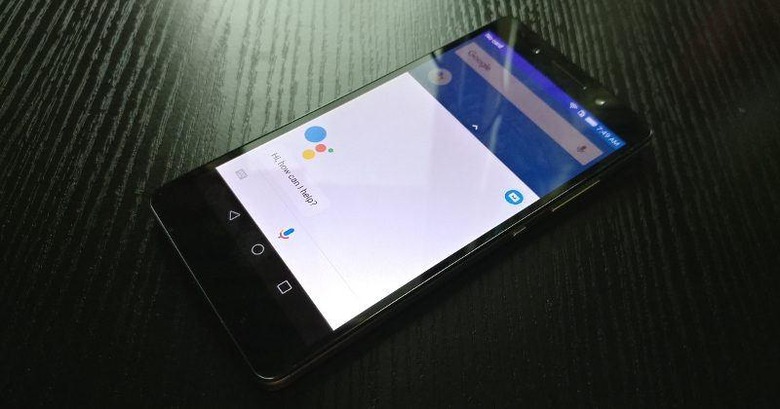
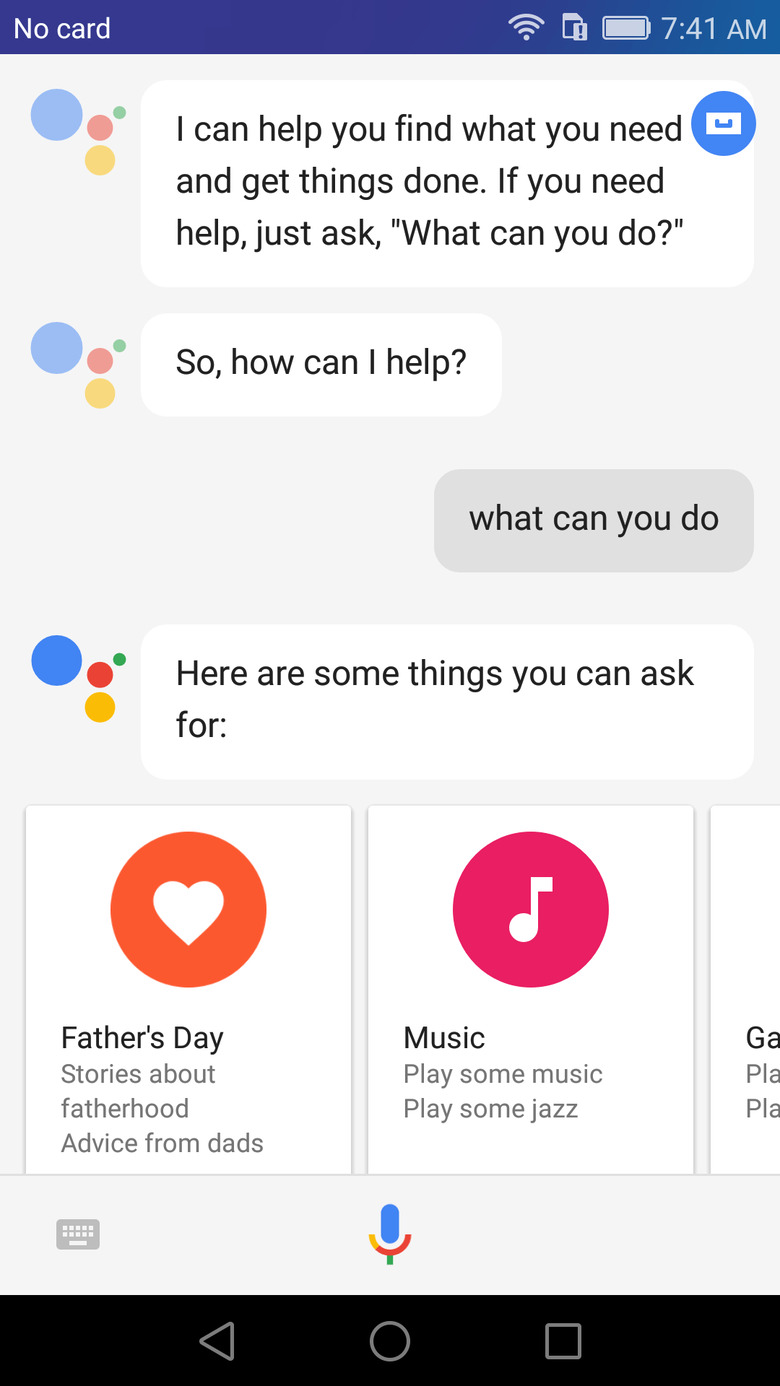
And that's pretty much it! Google Assistant will take you through a tutorial, but you're always free to ignore. Just hit the home button and say "OK, Google" and let Google Assistant work its magic.

When things go wrong
That most likely means you didn't set the correct language. Head on over to your phone's Settings app and pick English (US) from the Language and Input settings. You might also want to clear your Google app's cache in the Settings app, but that's not always necessary.
Do note that every time you change the language, you have to redo your OK, Google voice training, so don't be surprised if Assistant doesn't respond to you after you switch languages.
Long press on the Home button doesn't launch Google Assistant!
And it never will. Not unless you root your phone, which is beyond the scope of this guide. The home button will always launch Google Now and there's no way around that. The only way to activate Google Assistant is either through voice or by tapping on the freshly minted Assistant icon on the home screen.
Enjoy
Now you can ask Google Assistant anything you like (it might not give the answers you want, though) and enjoy it as if you were on anything newer than Android Lollipop. This simple process also works on Android tablets, no matter the version, which are in the same boat as Android Lollipop phones. That is, bereft of the intelligence, and sometimes humor, of Google's smart Assistant.