How To Fix Lag And High Ping In Windows 11
According to Microsoft, Windows 11 makes gaming better than ever before, as it brings all the latest and coolest features to your PC. There's the Auto HDR that gives users a wider color spectrum, DirectX 12 ray tracing that simulates real light behavior, and the Game Bar that lets users access controls with only a few clicks.
However, in spite of all these praiseworthy features, it's not all roses for Windows 11. In fact, if there's one thing that annoys gamers the most, it's when they are in the middle of their best game and the network suddenly dies on them. Ping time starts going as high as 500 milliseconds and leaving them with a laggy interface and an unpleasant experience. If this is also the case for you, there are a few troubleshooting methods you can try to reduce your ping and make an awesome comeback.
Do a network reset
When experiencing high ping with your Windows 11, one of the things you need to check is your network adapter. Maybe you've previously modified its settings or there might have been a problematic update that caused it to malfunction. Either way, you can simply restore it to its default settings by doing a network reset.
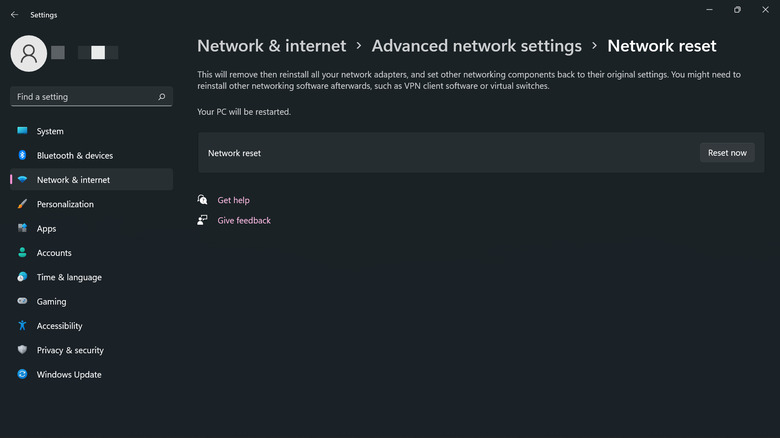
Per Microsoft, a network reset uninstalls the network adapters from your device, reboots your PC, and then reinstalls the adapters with their default settings. To do a network reset, follow these steps:
- Launch your Settings app.
- Select "Network & internet" from the left pane.
- Scroll down to "Advanced network settings."
- Under "More settings," choose "Network reset."
- Click on the "Reset now" button.
- Click on Yes in the pop-up box to confirm that you want to reset your network settings.
- Wait until your device restarts. Your network adapters will automatically be reinstalled.
Switch to a faster DNS server
A DNS server is often referred to as the "phonebook of the internet" as its job is to turn domain names to computer-usable IP addresses. The faster your DNS server is, the faster it returns the IP address of the website or game server you're trying to reach. This means you'll be able to access the site with as little waiting time as possible (thus low ping).
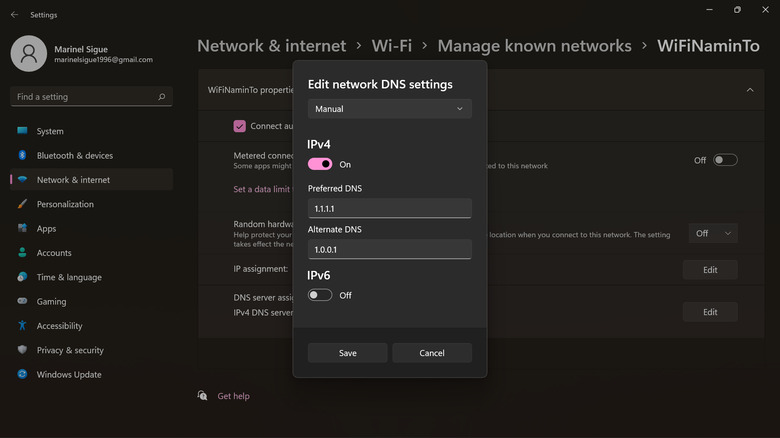
By default, you'll use your internet service provider's DNS servers to reach anything on the web. However, they aren't always as fast as you want them to be. Fortunately, it's easy to switch to a new DNS server that can meet your needs. Two of the highly recommended ones are Google (Preferred DNS: 8.8.8.8 and Alternate DNS: 8.8.4.4) and Cloudflare (Preferred DNS: 1.1.1.1 and Alternate DNS: 1.0.0.1).
Here's how you can change to these DNS servers (via Microsoft):
- In the Settings app, navigate to "Network & internet."
- Choose Wi-Fi (or Ethernet if you're using a wired connection).
- Go to "Manage known networks."
- Select the Wi-Fi network you want to change the DNS server of.
- Click the Edit button next to "DNS server assignment."
- In the drop-down menu, select Manual.
- Choose what Internet Protocol to turn on.
- Enter your new DNS under "Preferred DNS."
- Similarly, add its alternate DNS under "Alternate DNS."
- Hit Save.
Close your background apps
Apart from decreasing your PC's performance, background apps can also significantly increase your ping. Some apps like OneDrive, Microsoft Edge, and your VPNs unknowingly hog your bandwidth while they run in the background.
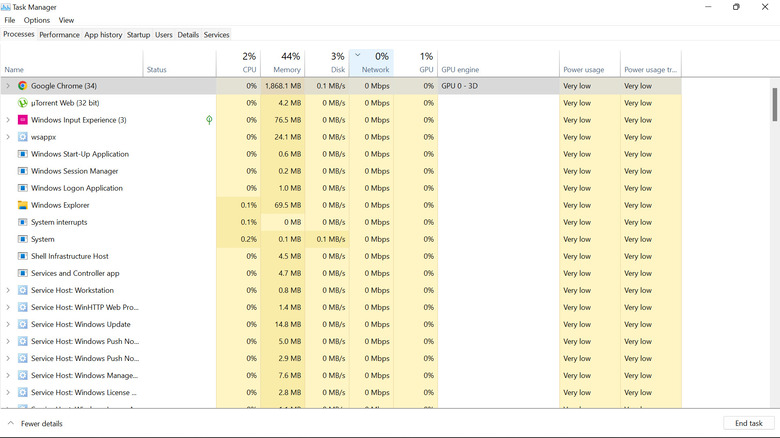
If you don't necessarily need them at the moment, you can simply close them to improve your network performance. The best way to do this is from the Task Manager, where you can immediately see an overview of which apps take up the most bandwidth in your network (via Microsoft).
To close a background app from the Task Manager, here's what you need to do:
- Open the Task Manager either from the Start Menu or using the Windows shortcut Ctrl+Shift+Esc.
- Check the Network column to see how much Mbps each process uses.
- Click on the process you want to close. Note: Only close the apps you are familiar with to avoid accidentally stopping a necessary Windows process.
- Click on the End task button on the bottom-right corner of the screen.
Allow your app through Windows Firewall
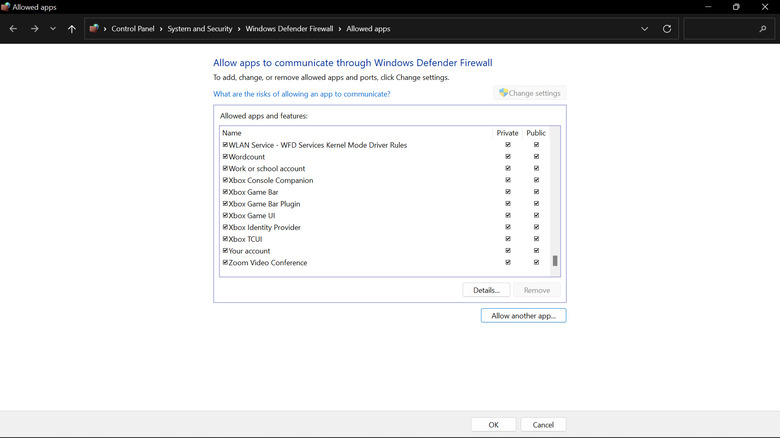
Windows Firewall is a finicky tool that can sometimes be the cause for your game or website not loading. Unbeknownst to you, it might have blocked your game or browser, ultimately preventing your app from accessing the internet.
To solve this issue, all you need to do is manually allow your app through the firewall. Here are the steps to do so (via Microsoft):
- In the Start menu, search for "Allow an app through Windows Firewall."
- Click on the result under "Best match."
- Select the "Change settings" button.
- Scroll through the list and mark the apps you want to allow through Windows Firewall. Make sure to check both the Private and Public columns.
- If you don't see your app on the list, click on the "Allow another app" button and type the path to the app. Then, click on Add.
- Finally, click on OK to save your changes.
Install the latest network driver
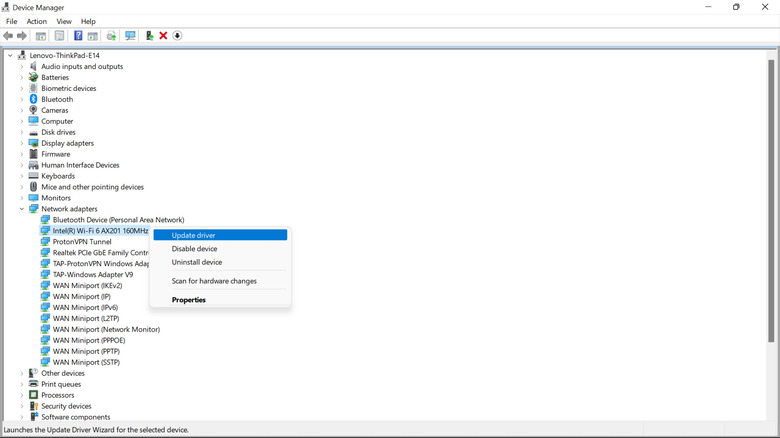
When your network connection doesn't work as intended, it may be because of an outdated driver. Updates generally fix bugs and improve your device's performance, so make sure you're using only the latest drivers.
You can manually update your drivers in Windows by following these steps (via Microsoft):
- Launch the Device Manager app.
- Expand the "Network adapters" option.
- Right-click on your network adapter.
- Select Update driver.
- Click on "Search automatically for drivers."
- Wait for the new update to install.
You can also consider visiting your PC's manufacturer website to download the updated drivers. They usually have instructions for how to install these drivers on your device.
If you've already tried all these troubleshooting tips and still get high pings, try other basic tweaks. Some of these include using a wired network instead of your Wi-Fi, reducing your game's frame rate, and checking whether it's a server issue on the game or website itself.