12 Best Uses For Old Video Game Controllers
We may receive a commission on purchases made from links.
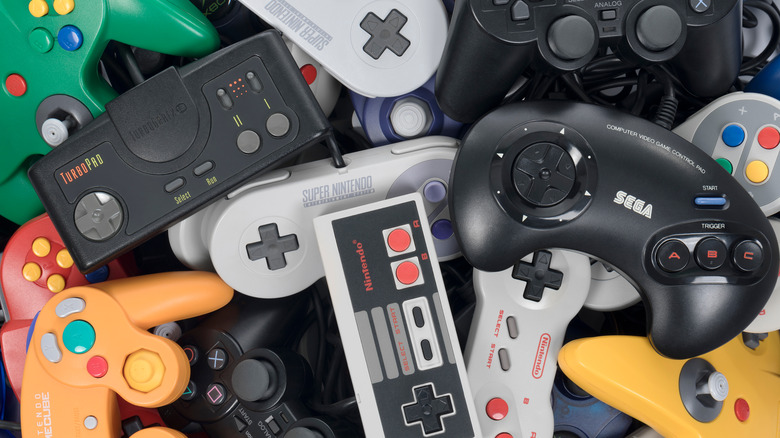
There's something magical about old gaming controllers. Just the sight of them is enough to conjure images of a childhood gone by, well spent playing games alone or with friends, hunkered down on the living room carpet. Maybe it's that we were kids when we got them, maybe it's their hallowed position in the storied history of gaming, maybe it's just that they had more personality than the current slate of controllers. Likely, it's a combination of all these things.
Whatever the reason, you might have some old Nintendo, Atari, or Sega controllers sitting around gathering dust, the final remnants of ancient systems which no longer work. If you just can't find the will to toss your old controllers in the bin, it might be time to find a way to repurpose them.
The below ideas might be the perfect way to get those controllers back in your hand, or at least out of the box in the closet, and honor the countless hours of pixelated fun they offered when you needed it most.
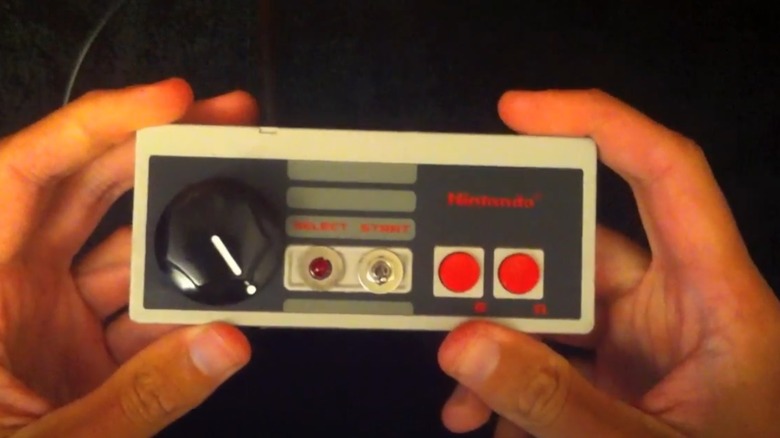
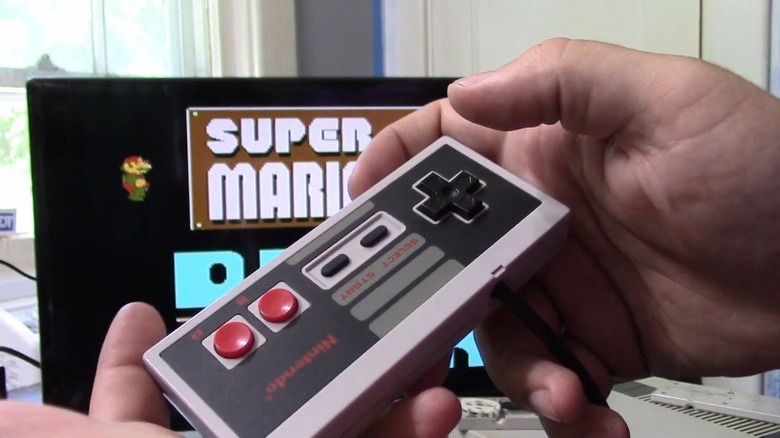
Make your old controller work with your computer
It's certainly possible, at least in some cases, to connect a truly old controller to your computer. If, for instance, you want to play NES games on your PC using an actual NES controller, there are adapters like this one from Raphnet which will translate the signal from your old gamepad to a USB port on your PC. That said, any time you're combining old and new tech you might run into trouble, and we can't confirm the compatibility of your old controllers.
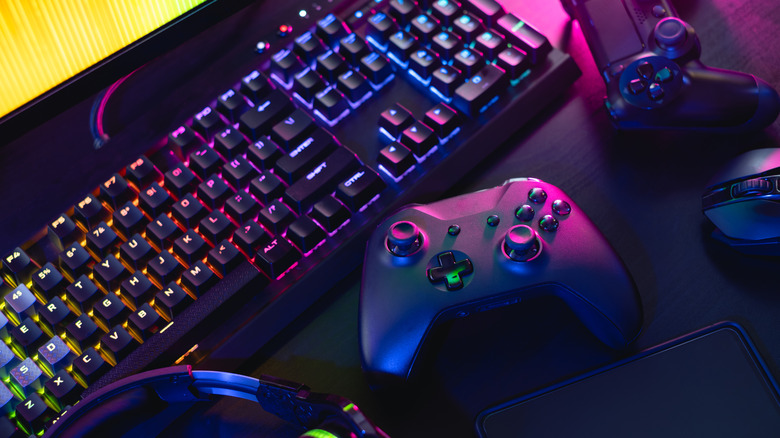
If the controller you're using is at least moderately recent, you're going to have a much easier time. Controllers for the Xbox One, PS4, and Nintendo Switch can all connect to your PC or Mac despite being older than you probably realize. The Nintendo Switch is five years old at this point and the Xbox One and PS4 both came out in 2013, nearly a decade ago as of the time of this writing.
As explained by Gizmodo, your Xbox One and PS4 controllers can connect directly to a PC or Mac using a USB port with little if any additional tinkering. In some instances, you may need to download some support software like DS4Windows or 360Controller. Your Joy-Cons can connect via Bluetooth, which may require an adapter if your computer isn't already Bluetooth capable. All told this is a quick and easy way to use old controllers when you've moved on to a new system.
Atari 2600 Joystick TV Remote
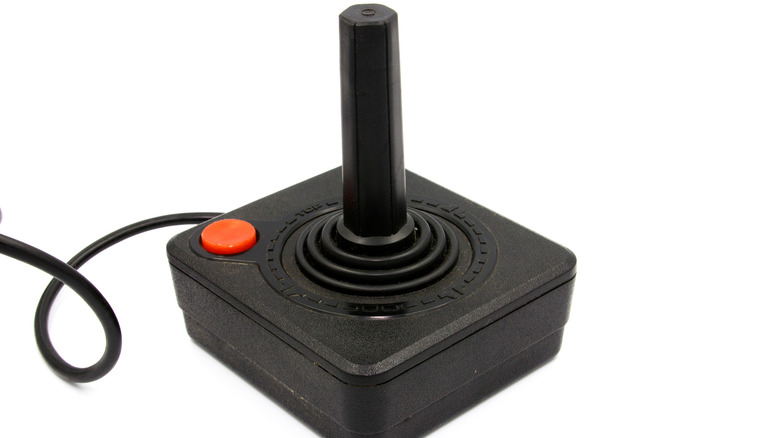
Now we'll move into the truly unusual uses for old game controllers. To be clear, this project doesn't use the original Atari 2600 joystick controller. Instead, if you've got one of those all-in-one Atari game systems from the early 2000s that came with games built-in, you can repurpose it to control your television.
This project comes courtesy of Abbtech from HackedGadgets, and you can check out a more detailed rundown of how it was done in this YouTube video. The controller usually takes 4 AA batteries to power it, but you're going to remove two of them to make room for the circuit board from a miniature TV remote control. The other two batteries will remain to provide power to your new retro remote.
After adding a couple of infrared LEDs to send the signal from your remote to your TV, you can program the buttons for any actions you want. In the tutorial from HackedGadgets, the fire button turns the TV on and off, while the joystick is used for volume control and changing channels.
You won't get all of the functionality you're used to out of a modern TV remote, but this Atari 2600 joystick remote can't be beat when it comes to its cool factor.
NES controller belt buckle
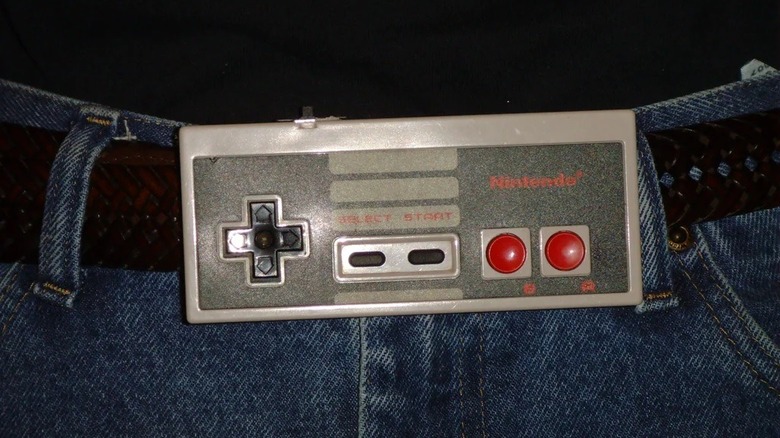
If you grew up watching "Captain N: The Game Master" or if you're just a fan of retro accessories, you might find yourself in need of an NES controller belt buckle. You've probably seen plastic or metal facsimiles for sale online or at the mall and that's a perfectly serviceable option if you only want the aesthetic. However, they just carry the same nostalgic power as actually strapping an old NES controller to your waist.
Turning your old controller into a belt buckle is as easy as cutting off the cable and gluing a buckle on the back. If you're happy with the look, you can do that with a few dollars, a few minutes, and a bottle of super glue. Job done. If you want to take it a step further, check out this project from Instructables which incorporates sound effects from your favorite Mario games.
It works by replacing the guts of your controller with those from a Super Mario Bros. sound effects keychain. The keychain and controller work the same way, using the buttons to complete a circuit. Wiring the controller buttons to the control board from the keychain results in a different sound effect each time you press a button. Now you can make music at dinner by pressing the Konami code on your waist at the dinner table.
N64 desk caddy
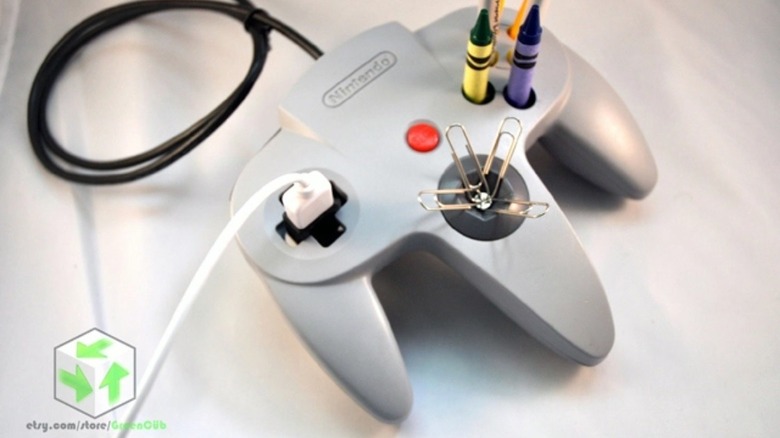
While gaming controllers are primarily built to fit nicely in the hand, all the better for hours of gameplay without cramping, they're also designed to sit stably on a coffee table or desktop. That makes them perfect for desk caddies with just a few modifications.
This particular desk caddy was designed by Graeme Abraham for sale on Etsy but their shop has since closed. Still, with a little ingenuity, we can use his design as inspiration and add a little nostalgia to your workspace. Of course, you're not limited to an N64 controller, this design will work with just about any old controller as long as there's some clearance between the bottom of the controller and your surface.
The buttons are the perfect size for holding writing utensils, allowing you to store multiple pens, pencils, or other small tools by drilling them out. The addition of a small magnet can hold paper clips or other small metal objects. If you're feeling adventurous, you can replace the D-pad with a USB charging port to keep your phone topped off while you work or surf the web. What's great about making one of these yourself is they're fully customizable to offer the storage and capabilities most useful to your working situation.
NES controller wallet

Many classic games from Mario to Sonic were all about gathering coins while navigating 2D side-scrolling worlds in search of a lost princess. Collecting rupees or rings offered up additional lives or upgraded weapons and armor. Gathering riches wasn't the point but it definitely didn't hurt.
Accumulating money in the real world isn't as easy as running around town and jumping into pipes (although, we haven't tested that theory so who knows?) but storing your coins, bills, and cards inside an old NES controller can make life feel a little more like a video game.
As outlined in this project from Instructables, you can turn an NES controller, or any old controller, into a cool retro wallet with just a few supplies from around the house or the local craft store. The best part, there's no sewing required, so you can pull this off even if you don't have access to a sewing machine or the requisite skills to use it.
Using a screwdriver, open up that old controller and strip out everything that made it useful, leaving it an empty shell of its former self. Making a wallet requires some sacrifice. From there, all you need is a pre-made zipper attached to a bit of fabric, available at most craft stores, some ribbon, and a few dabs of glue. Keeping your money in a Nintendo controller may not level up your finances but it probably won't hurt.
NES controller Phone dock
When your phone is ready for a battery power up, look no further than a charging dock made of an old NES controller. This upcycling idea is yet another option popularized by an Etsy seller and highlighted on This Is Why I'm Broke, which is no longer available. Don't let that stop you, however, we're not looking to buy more controllers, we're looking to use our old ones.
With a few basic tools and a spare charging cable, you can turn your NES controller (or any other controller you'd like to use) into the perfect charging dock for your phone. While it's not totally necessary, we recommend taking your controller apart and emptying its insides before you proceed, just to make your job a little easier.
Once that's done, a couple of strategically drilled holes will allow you to feed your charging cable into the controller and back out again so that it sticks out just enough to stick your phone in place. A bit of hot glue can secure your cable so that it doesn't pull out when moving your charger around and you can even use some of the bits you've harvested from the controller's guts to create some framing to more stably hold your phone in place.
Get creative, we're not doing rocket science here, we're basically jamming a cable into a hollowed-out controller. Have fun with it.
NES controller MP3 player
Now that the iPod is dead, we have a unique opportunity to get creative with our next dedicated MP3 player. Sure, you could buy any number of other cheap MP3 players (and you might have to before this project is done) but why not make your music listening experience even more retro by putting it inside of an old NES controller?
If you've got an old MP3 player lying around as well, great! If not, you can make one using a Raspberry Pi, just make sure the model you choose is small enough to fit into your NES controller. If you're working from an old MP3 player, you're going to need to dismantle it, along with your controller. From there, the goal is to get the MP3 inside your controller and attached to the buttons. For step-by-step instructions, refer to this project from Instructables Circuits.
Running the headphone jack through the hole originally meant for the controller's cable cleverly re-uses the existing port and avoids needing to create yet another hole. By the time you're done, you'll have something akin to an iPod shuffle, which uses the NES controller buttons to flip through songs in your music library.
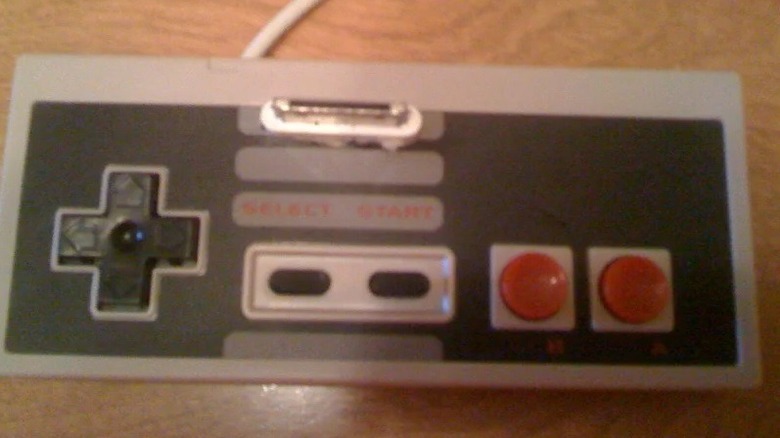
NES controller computer mouse
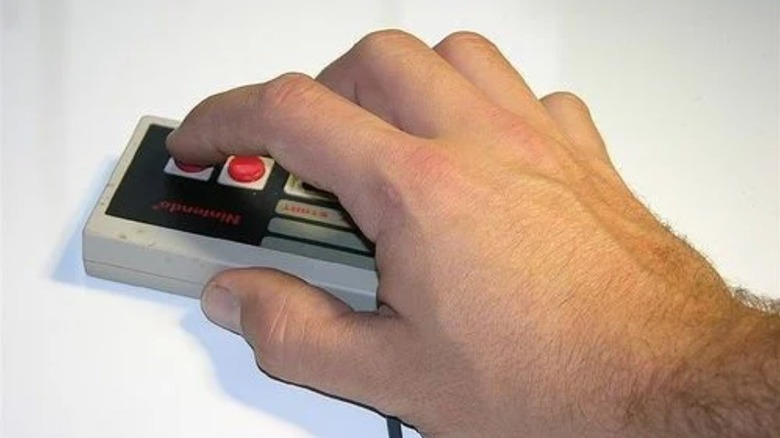
What is a computer mouse except for some motion tracking and a couple of buttons? If you've got an old NES controller, you're halfway there. To get this done, you're also going to need an optical mouse you're willing to kill. Once again, we're sacrificing two pieces of old tech in order to get one really cool new one. Luckily, you can buy an optical mouse just about anywhere for around $20, not a huge investment to have the coolest computer peripheral on the block.
Once your NES controller is emptied out, you'll need to cut or drill a hole in the back to allow for motion tracking. Then, you're basically going to put the guts of your sacrificial mouse inside the controller. Wire up the left and right-click to the A and B buttons and you're off to the races.
One major benefit of using a controller for a mouse is you have a few extra buttons to play with. If the mouse you cannibalized has the added functionality, you can assign your Select, Start, and D-pad buttons to perform other functions like controlling your computer's volume, quickly closing your browser window, or opening up the tab you accidentally closed.
NES controller doorbell

Don't put away your super glue, X-ACTO knife, and soldering kit just yet. Once again, we're about to cannibalize some technology. Watch your fingers. This project takes advantage of the buttons in the NES controller and turns it into a wireless doorbell, (via Techeblog).
Once you've got your controller hollowed out, you're ready to replace its guts with those from a wireless doorbell. If you want to get real fancy, you could put a camera doorbell in there and point the camera out of one of the button slots. However, that might require that you fiddle a little too much with a moderately expensive doorbell. If that's outside of your comfort zone, you can pick up a cheap wireless doorbell online or at any big box store for as little as $10.
The wiring here should be simpler than the MP3 player project, all you're doing is moving the controls for the doorbell button to one of the NES controller's buttons. Then put everything back together and stick it to the outside of your home. If your doorbell allows for custom chimes, we recommend programming your favorite NES game music for a little extra flourish.
Make some music
If you're the kind of person who likes making music and wants something retro looking to inspire your next midi album, check out this NES controller transformed into a synth machine. As explained by Trendhunter, the prototype built by Michael Rucci produces electronic sounds when the A or B buttons are pressed and a knob replacing the D-pad lets you tune and distort them to your liking.
This project will require some knowledge of making synth machines, or at least a good tutorial, and Rucci didn't provide one. Though, we're willing to bet if this is the option that's catching your eye, you've probably got at least a passing interest in synthesizers.
If not, these DIY kits, (via Pressing Plant) can get you started and there are plenty that are small enough to work with the casing of your old controller. We recommend considering the Atari Punk Console Kit, not just because of its fitting name, but because it has a low profile, it's affordable and is waiting for you to put it into the controller case of your dreams.
Make a left-handed controller
About 10% of the human population has a preference for using their left hand instead of their right, (via Live Science). As a result, most everything on Earth is designed for right-handed people, leaving the lefties to fend for themselves. If you're part of that subset of humanity, you might have always felt as if you were at a disadvantage when playing video games. If that's the case, you can use your old controller and flip it on its head to make the left-handed controller you always dreamed of.
The NES controller is perfectly suited for this project, as a result of it simplified button layout. Turning it upside down puts the D-pad on the right side with the A and B buttons on the left, while leaving the Start and Select buttons in the middle where they belong. The only problem is everything is inverted. You could take the time to train your mind to push up when you mean down and vice versa, or you could reprogram the controller to work the way you want it.
This project from Hacksaday essentially swaps the button layout so that it works when flipped upside down. There's even a version that lets you switch back and forth between the left- and right-handed layouts with a switch.
Make it wireless and use it on your modern console
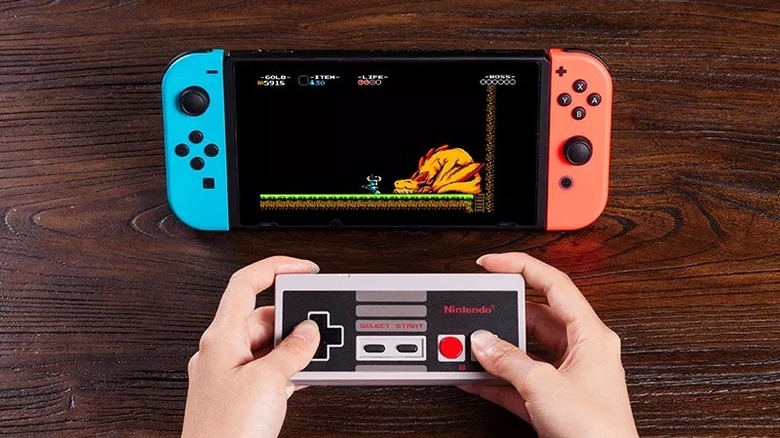
Perhaps the best way to breathe new life into your old game controllers is to get them playing games again. Now you can use your old controller on modern systems to play modern games, using these DIY controller kits from 8BitDo.
They offer an array of controller kits for the NES, SNES, Sega Saturn, and original PlayStation, each of which is only $19.99. To use them, you'll remove all of the internal gadgetry from your old controller and replace it with the kit. Not only will that get the controller working again, but it will also make it wireless.
Using its newly acquired Bluetooth connection, your old controller becomes a modern wireless controller with all of the same comfort and design you loved in your childhood. Now you can play modern games with an NES or Sega controller, at least as well as is possible with the limited button layout. It's only a matter of time before someone plays Skyrim this way. We can't wait to see it.