How To Set Up Linux On Your Chromebook

Chrome OS began as a simple browser-based operating system that only ran progressive web and Chrome apps. Over the years, Google's OS has evolved well past its humble origins. Modern Chromebooks support Android apps and the Google Play Store, making them far more versatile than their predecessors. But you can also install Linux on Chrome OS to turn your Chromebook into a true powerhouse.
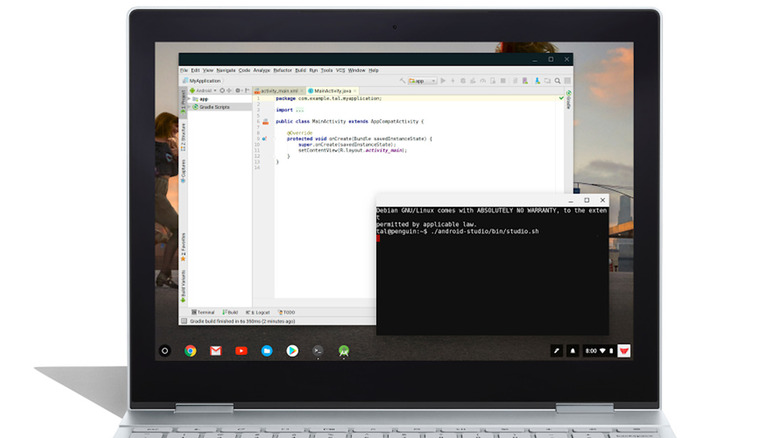
To be clear, Chrome OS is built on Linux, so third-party workarounds for access to the Linux kernel have existed for years, though Google only officially announced the support in 2018 (via Google Blog). The company allows developers and enthusiasts to run Linux-exclusive apps in an integrated, user-friendly environment. The Linux system is "sandboxed," meaning the apps cannot damage or alter your Chrome OS. It's based on Debian 10 (Buster), which uses the APT package manager to install and update your apps (via Google). Note that Linux on Chromebook doesn't offer hardware acceleration or camera support yet. Here's how to set up Linux on your Chromebook.
How to set up Linux on your Chromebook
The official Linux project for Chrome OS, Crostini, is supported by all Chromebooks released since 2019, though it works on some older machines too. You can check if your device has Linux support on the official website. Google keeps Linux disabled by default, so you'll need to toggle it on manually and perform the installation.
-
Click the gear icon on the notification panel to bring up the "Settings" menu.
-
Navigate to Advanced > Developers and turn on the "Linux development environment."
-
Hit "Install" on the next window.
-
Enter a username and select the disk size allotted to Linux. You can use the "Recommended" option or customize it (depending on the intended use for the Linux installation.) This can always be extended later.
-
Chrome OS will automatically download and install the Linux image. The process should take around 10 minutes.
-
Once installed, you'll be greeted by the Linux terminal. Here, you can apply updates, install apps, and launch them with the APT package manager.
We'll also enable permissions to share local files between the two operating systems. To that end, the folders or files can be copied to the Linux files window, or you can share them directly with the Linux container. Right-click on a folder in the "My Files" tab section and hit "Share with Linux" from the context menu.
Linux with the Crouton project
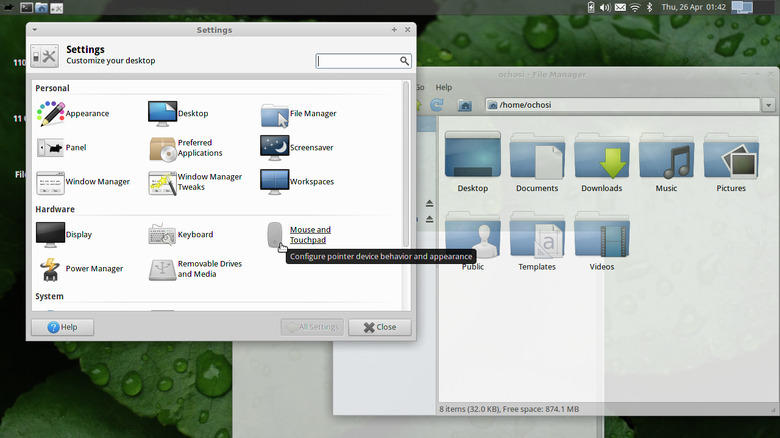
If your Chromebook doesn't support Crostini, or if you want the full-blown Linux GUI experience within Chrome OS, consider the Crouton project. Unlike the traditional dual-booting or virtual machine solutions, Crouton generates a chroot directory for an Ubuntu or Debian desktop, and the Linux installation (and all its files) is contained inside that chroot environment. It natively runs the Linux GUI without any lag. Plus, you can conveniently cycle between the two operating systems since only the host OS is booted. The one caveat is that Crouton-based chroot lacks the integrated security and polish of the official Crostini environment.
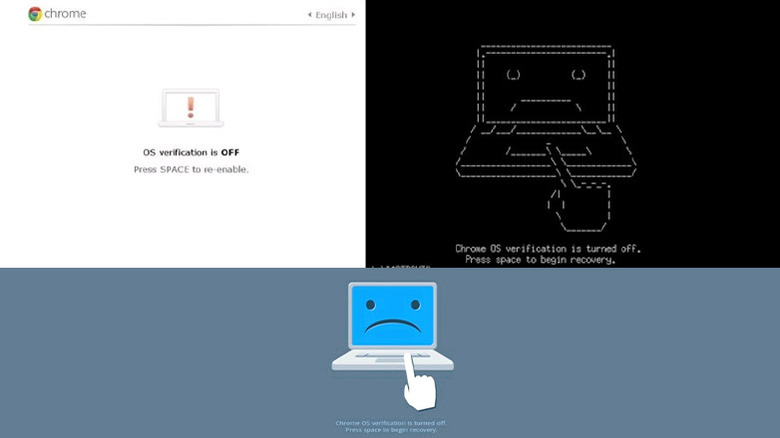
Crouton's chroot can directly access all hardware, which means better support for hardware acceleration and your devices (via Github). But note that Crouton is an unofficial script that cannot be installed while your Chromebook is in OS verification mode. You'll need to enable Developer Mode, which erases all files and user data on the machine (unless they're synced to the cloud.) We recommend you back up your files before proceeding. Some Chromebooks have a physical switch to enable and disable the Developer Mode. You can search the official Chromium website for Developer Mode instructions specific to your Chromebook model.
How to install a Linux environment with Crouton
-
To enter Developer Mode, hold the Power + Esc + Refresh buttons until the Chromebook boots into Recovery. Be careful not to press only the Refresh and Power buttons because it will reset your machine (via Google).
-
Hit Ctrl + D, then press Enter to confirm the "turn off OS verification" prompt.
-
Wait for the transition to finish and reboot into Chrome OS.
-
Download the Crouton script from GitHub. The GitHub repository also features a Readme file with detailed tips and warnings.
-
Hit Ctrl + Alt + T to pull up the Chrome OS developer shell in Chrome.
-
Type "shell" next to crosh> and press Enter.
-
Run this command in the terminal: "sudo install -Dt /usr/local/bin -m 755 ~/Downloads/crouton". This copies the Crouton script you downloaded to the appropriate directory (via Github).
-
The installer also lets you pick from several desktop environments. We recommend Xfce because it's fast and lightweight. To browse the list, enter the following command: "sudo crouton -t list."
-
To install Ubuntu with the Xfce environment, run "sudo crouton -t xfce" in the terminal.
-
Set a username and password when prompted.
-
Once the installation is complete, you can switch to your new Ubuntu desktop with "sudo startxfce4".
-
Use the shortcuts Ctrl + Alt + Shift + Back and Ctrl + Alt + Shift + Forward to cycle between the Chrome OS and Linux environments. You can also hit the logout button in Linux, and it'll drop you back into Chrome OS.
How to recover your Chromebook

Since the workaround isn't officially supported, it can (on rare occasions) break the Chrome OS installation, but you can always recover the OS back to its original state using the built-in Recovery (via Google). Recovering the Chromebook permanently deletes all local files on the device, so you should back up your data if it's accessible. Files synced to Google Drive will remain unaffected. You can also try hard resetting the Chromebook before performing recovery. To do this, sign out and hold down Ctrl + Alt + Shift + R. When the "Reset this Chrome device" dialog pops up, hit the "Powerwash and Revert" button. Confirm if prompted.
Powerwashing restores Chrome OS to factory defaults (via Google). If it doesn't fix the issue, you'll need to perform a full recovery. Recovering Chrome OS erases and reinstalls it, either locally or remotely. Remote recovery doesn't involve access to a second computer or a USB flash drive because it's performed over the internet, but the traditional method requires extra hardware.
Remove all external devices and enter Recovery Mode by pressing and holding the Esc + Refresh keys. Hold down the Power key until the window shows up on the screen and let go. For a Chromebook with an active internet connection, pick the "Recover using internet connection" option. The Recovery will automatically download and install a fresh copy of the Chrome OS.
Recover with a flash drive
The traditional recovery takes a few extra steps. You'll need a second PC with the Chrome browser, a USB drive with at least 8GB of storage, and your malfunctioning Chromebook.
-
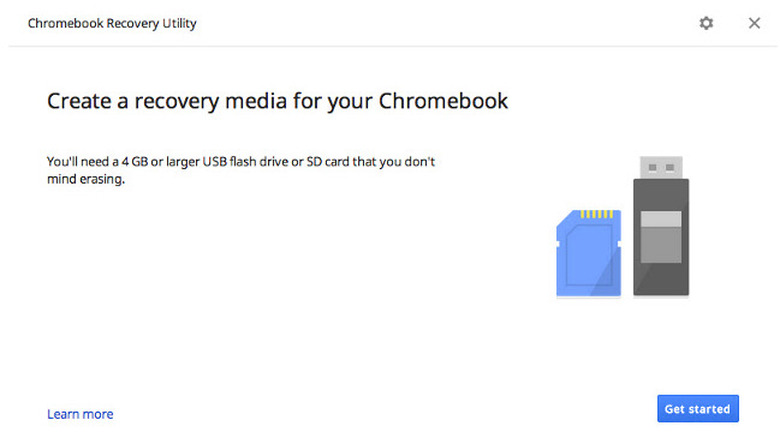
Fire up Chrome on the second PC and install the Chromebook Recovery Utility extension from the Chrome Web Store.
-
Select the utility from the extensions button and hit "Get Started" on the next window.
-
You'll be asked to identify the model of your Chromebook. Either manually specify the model number (find it on the bottom of your machine) or pick from the list.
-
Press "Continue" and plug in the USB drive.
-
Create the recovery media. Note that your flash drive will be erased.
-
Remove the USB drive and insert it into the Chromebook you want to recover.
-
Choose the "Recover using external disk" button and wait for the system recovery to finish.
-
You can also use the Chromebook Recovery Utility to reset the USB flash drive.