The Best DIY Methods For Removing Car Scratches
A car's paintwork is both a style statement and a vital piece of the car's body. You can pick a color or paint job that matches your tastes, then buff it until it gleams. The paint also protects the car's body from the elements, ensuring your panels won't quickly rust away.
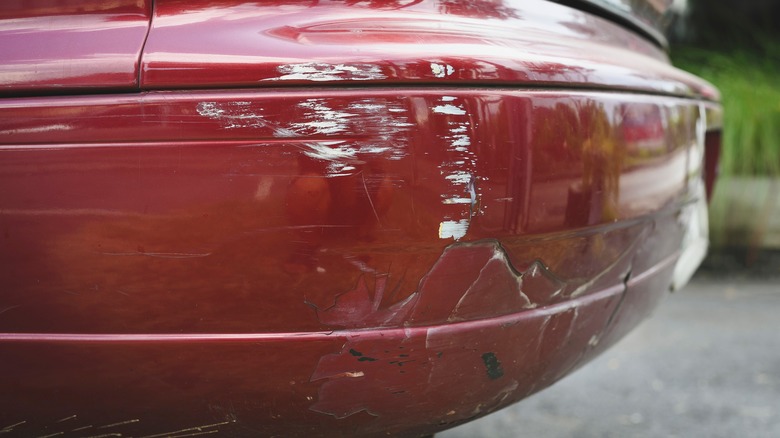
However, your paint job is also in the firing line. It's vulnerable to accidents, vandalism, the sun, and even little bits of stone flicking up from the road. Before you know it, that pristine paint job could be a series of chips, scratches, scuffs, and gouges. Your otherwise perfect car could look like a beater, and the only way out is a costly trip to the body shop. Or is it?
Instead of spending hundreds or even thousands of dollars getting a panel resprayed, you could just fix it yourself. Depending on the damage, a total respray may be the only option. But for most scratches, scuffs, and chips, you can get excellent results with the right paint, tools, and a bit of elbow grease.
Understanding how cars are painted
Painting a car isn't like painting a fence. While a fence might get a few coats of creosote, a vehicle requires several layers of different substances to achieve the perfectly smooth glossy finish you usually see on a vehicle. And the first step doesn't involve any type of paint at all; it might feel more like washing the dishes than painting a car. The panel you are painting needs to be spotlessly clean. A speck of oil, dirt, or untreated rust can ruin the finish. So the panels are thoroughly cleaned and rust-treated first.
Then a coat of primer is applied, which adds protection and helps the paint adhere to the car's body. You can use a primer to even out the panel's surface, but as manufacturing methods have improved, the necessary thickness of the primer coat has decreased. The actual "paint" is applied following the primer and the car's color coat. Then a clear coat is added to help protect the paint and give the glossy finish you see on most cars. The clear coat is up to five times thicker than the primer and color coat combined, making minor repairs very easy (via The Ultimate Finish).
Getting the correct paint is vital
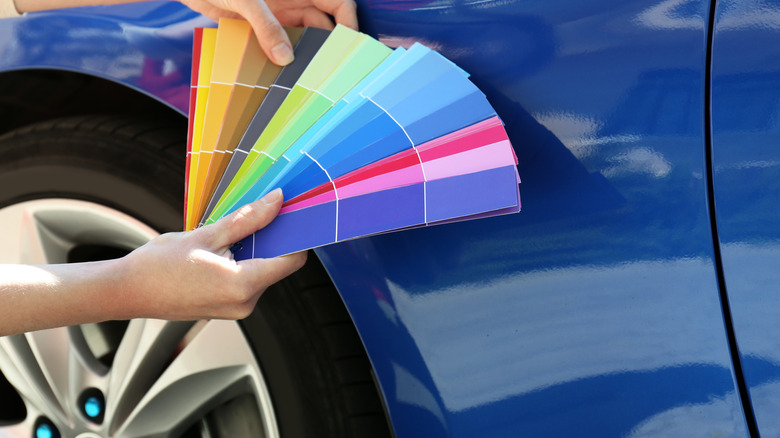
Matching your repair with the car's existing paint is where it gets more complicated. Things would be easier if the world revolved around that phrase Henry Ford may or may not have said, and all of the world's cars came in one color. But they don't; you can get any color you can think of, which is great for customization but may make repairs a bit trickier. Not all scratches and scuffs damage the car's paint, but if you need to replace paint, you will need an exact match. Even a minor color difference will make your repair far more obvious.
If your car is painted in "British racing green," you can't just grab any green paint; you need British racing green. Ideally, you need the exact British racing green your manufacturer uses to rule out the possibility of even minor differences. Your car's dealership is the easiest place to do this — they'll either have the exact paint you need in stock or will be able to order it for you. If you want to track it down on your own, the car's paint will come with a color code. This will allow you to find an exact match. Your car's color code appears in a few places — it will be on the car's service receipts, in the manual, and printed on an information sticker somewhere on the car's body.
Repairing light scuffs and scratches is easy
A scuff or a scratch to the car's clear coat can look bad. But good news. Damage to the clear coat is easy to repair, and those repairs yield the best results. The clear coat is smooth and shiny because it is a very even and consistent surface. Scuffs and scratches disrupt that, so the light will come off at a weird angle or bounce around in the scratch instead of bouncing off evenly. Light heading in multiple directions is what makes some scratches appear white.
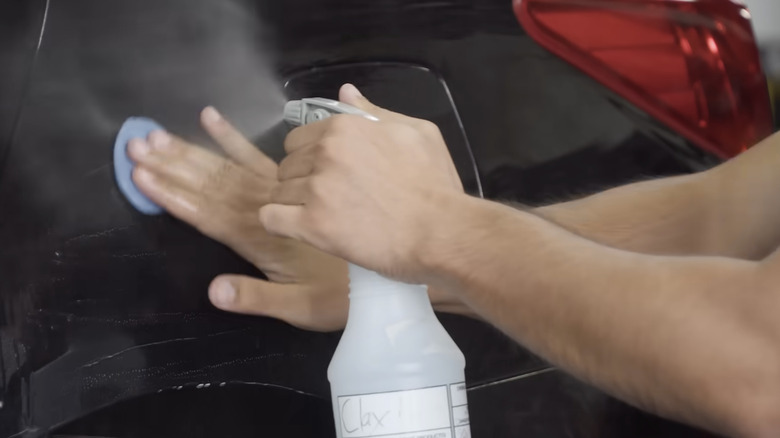
To fix a scratch or scuff on the clear coat, we just need to get the surface smooth and even again. To do this, you will need a very mild abrasive, usually a polishing compound like T-Cut. Bad scuffs and scratches may require you to go over the damaged area with sandpaper, starting with 400 grit and working your way up to 1200 grit in increments of 2-400. As we mentioned earlier, the clear coat is usually the thickest paint layer — but sandpaper is designed to even out a surface by removing material, so be careful.
When you've used your 1200 grit sandpaper, use a polishing or finishing compound and keep buffing until the scratch disappears. You can even use toothpaste, but that is an incredibly mild abrasive, so you will be there for hours and stink of mint afterward. If hours of hand buffing is something you want to avoid, consider buying or renting an electric buffer. However, handheld sanders should be avoided as they increase the chances of taking off too much material. The video above shows how a bit of elbow grease can remove a scuff from your paintwork.
Touching up chips and deep gouges is possible
When the damage goes beyond the clear coat, things get more complicated — achieving a finish just as good as a resprayed panel becomes more difficult as the damage becomes more expensive. Still, with the correct technique and some effort, you can produce an almost flawless-looking repair that is virtually impossible to spot from more than a few inches away.
The first step is to ensure the area you intend to repair is smooth and level. Any dents should be pulled out at this point, and you should use filler to fix deep gouges. The area should then be sanded smooth, and rust compound can be applied to any deep-set rust you spot. Thoroughly clean the site before applying paint primer — warm soapy water is all you need for the cleaning step. Once the primer dries, it is time to apply the paint. Source an exact match as described above. You don't need to buy a lot; most paint sellers have small "touch-up" pots available, which are ideal for minor repairs. Apply a layer of paint to the damaged area, keep it even, and avoid any blotchy patches. Finally, add a layer of clear coat. If the finish doesn't look perfect, sand it down until smooth using the same method you would use for a light scuff or scratch.
One thing to note with this and all other repairs that will involve wet paint or clear coat, dust will destroy your work. Ideally, you should perform the repair in a clean environment without wind — anything that reduces the chances of dust or dirt hitting your wet paint helps. The video above shows how you can repair deep scratches on your vehicle.
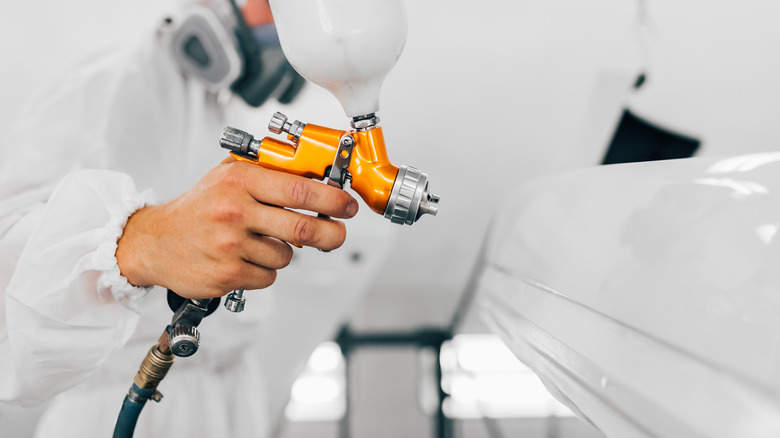
Cheap airbrush kits can yield better results than small brushes
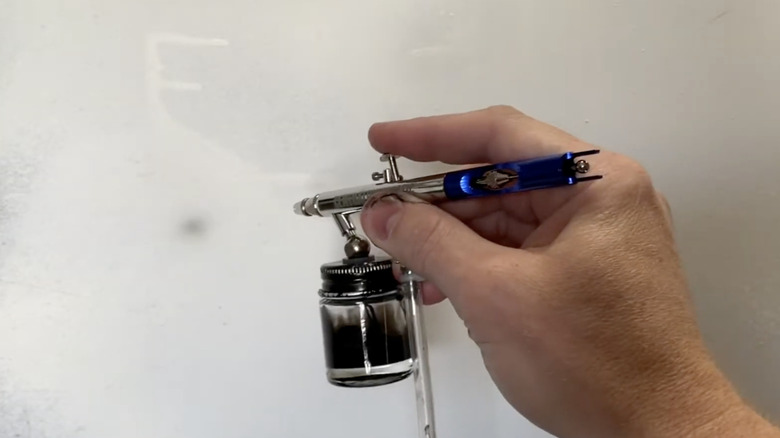
If you want to feel like you work in a body shop and give your repair an even better finish, consider buying a cheap airbrush kit from Amazon. Airbrush kits are available for as little as $40, and most of them include a mini compressor — some even come with a compressor that will plug into your car's 12-volt port.
There is a technique involved when using an airbrush. It isn't difficult to learn, but practicing a few times before taking an airbrush to your car is recommended. An old car panel is ideal for practicing on, but you can use an old cardboard box if that's all you have. The main thing is getting to a point where you can apply a thin, even coat of paint to a surface with each stroke.
Mask around the area you intend to paint with masking tape and newspaper. The paint you are using also must be mixed with paint thinner at a 50/50 ratio. When airbrushing, the idea is to add multiple thin layers until the correct amount of paint covers the repair. Don't try to apply a lot of paint at once. Around seven thin layers should be enough, with around 20 minutes of drying time between each layer. The video above shows a basic airbrush repair.
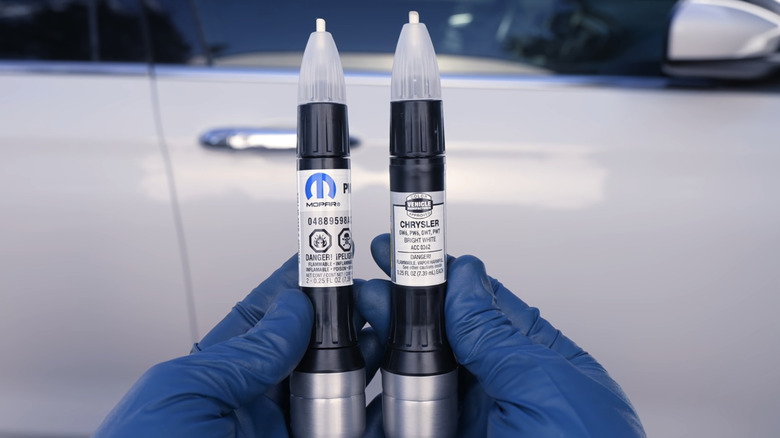
Paint pens may be easier to use
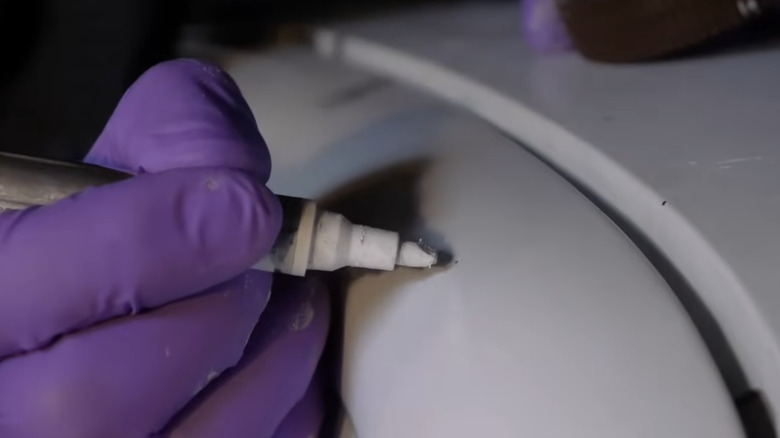
If you are comfortable drawing and coloring with a Sharpie, touching up your car's paintwork with a paint pen may be best. As above, you will be cleaning and sanding around the scratch, but the primer, paint, and clear coat can be put on with what is essentially a specialized paint marker. As with the other methods, the color for the actual paint layer will need to be an exact match for your vehicle.
Although similar, there is a slight difference between paint pens and your standard Sharpie. Pressure will make paint leak out of the end of the pen and pool. That pool of paint can now be spread across the repair with the pen's tip. Applying the right amount of pressure is the only challenging part of a paint pen repair — everything else just requires patience, sanding, and polishing.
If you are using a pen to apply your clear coat, you need to press lightly and be careful; there is a danger of the clear coat stripping off the paint you have already applied if you press too hard. It may be worth practicing on paper before trying a paint pen out on your vehicle. A bit of practice can help you get comfortable with flow rates and pressure. The video above is a detailed look at how you can touch up your paintwork with a paint pen.
Spray paint is challenging, but works best for full panel repairs

If the paint is damaged across the whole panel, the easiest and best way to repair it is to strip that panel down to the metal and repaint it. A full panel respray can cost close to a thousand dollars, but you can get similar results with spray paint and the correct technique. This is probably the most challenging method on this list. While you should use appropriate safety gear for every method we have mentioned — you will need a respirator and safety goggles if you are using spray paint.
The panel will have to be stripped down to the bare metal, and any damage or rust will have to be taken care of before any painting happens. Make sure the panel is clean, as dirt, grease, or grit will ruin any chance you have of producing a professional-looking paint job. Then mask around the panel and ensure you're in an area where dust won't blow onto your work. You can also use a tack cloth between steps to remove dust and fibers that have settled on the car.
Apply two coats of spray primer, with 15 minutes between coats, and smooth the primer layer with wet 600 grit sandpaper. At least three coats of paint will then need to be applied, followed by three layers of clear coat. When the clear coat has dried, the panel must be buffed smooth. A detailed video on spray painting your car has been embedded above.