The 4 Dos (And 3 Don'ts) Of Cleaning Your Camera Lenses
No matter how careful and clean you are with your gear, inevitably you'll get some dust, fingerprints, or other gunk on your lenses. If you're in the field or on a shoot, you might be tempted to just take your shirt to quickly wipe the gunk away, and while that's not one of the absolute worst things you could do to your precious lenses once, it's certainly not advisable over the long run. The glass that makes up the front element is actually quite fragile, and it scratches quite easily. Over time, if you're using a t-shirt or other piece of clothing, you WILL end up scratching the lens.
If for some unavoidable reason you have to use your shirt once, burn this piece of advice into your long-term memory: The number-one rule for cleaning — you never want to wipe a dry cloth on your lens! Apply some kind of liquid before wiping.
Just what is the right way? Let's take a detailed look at how to properly clean your precious lenses.
How NOT to clean a lens

Many people tend to use their own breath. Given that it's the easiest way to provide moisture to the front element before wiping, blowing on the lens with your breath should be ok, right? Not really!
While a common sight amongst some photographers, especially newer hobbyists, remember that simply using your own breath will ultimately damage your lenses. Some people say your breath is slightly acidic and damages the glass, while others say your breath leaves basic deposits behind. Either way, it's not a good idea.
Furthermore, your breath is water-based, so if you have fingerprints or other oil-based smudges, it'll do nothing but smear it around your lens. It won't actually get rid of the oily residue — you'll need special lens cleaning liquids for that.
Paper towels and other cleaning supplies that are wood-pulp-based is too abrasive for cleaning sensitive photo equipment and ends up damaging the lens.
Inspect the lens visually
You've noticed a bit of dust or gunk on your lens and want to get rid of it asap. How should you quickly and safely do this? The first thing to do when cleaning your lenses is a quick visual check-up. Use a good overhead light or another bright light source, and do an inspection to see where the particles are.
Take the front lens cap off and look on the front element for dust specs, fingerprints, or smudges. While inspecting the front, look along the inside of the filter thread to see if there's any dust hiding in there.
Next, hold the lens up to the light and look from various angles. Inspect carefully to see if there's anything along the corners, on the lens, or any residue, scratches, or smudges. Remember where these distractive elements are.
Finally, take the rear lens cap off. Inspect the rear lens element carefully, using the same technique as above — look from different angles, look in crevices, on the lens itself, and inspect this part even more thoroughly, as it's closer to the highly-sensitive sensor. Any dust or grains of sand can cause a lot of trouble if it gets on the sensor. Next, hold the lens up to the light and let it shine through the entire lens — again, carefully look for any particles or mold that should not be there.
After this visual inspection, it's time to break out your toolkit and get to work.
Use a blower bulb to remove dust
The first cleaning tool in your arsenal should be a blower bulb to remove the dust. I cringe every time I see new photographers or even seasoned hobbyists holding up their lenses and blowing on them.
You might think, "What's wrong with that? Air is air, right?" In principle, yes, but aside from the potential acid components in your saliva or base particles in your breath, breathing on the lens could increase condensation, which over time is not good for the lenses and can even cause mold to grow on the lens. Additionally, if you blow on it, you could add worse things than what you wanted to get rid of. Some of the bacteria in your breath could — over time — end up damaging the fine coating on the lens. Air is one of the best ways to quickly clean a lens, however.
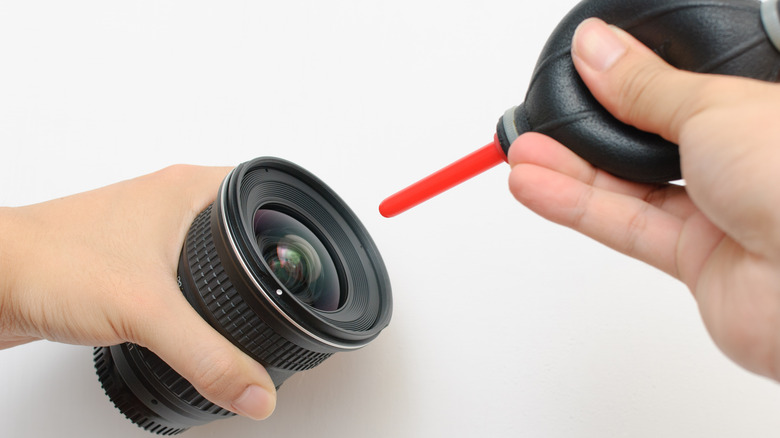
Enter the mighty blower bulb. This basic cleaning item should not be missing in any camera bag.
These come in various shapes and sizes, but the basic blower bulb has a larger, bulbous end attached to a nozzle to focus the stream of air. A very simple concept and design, but highly effective.
For some surface-level dust particles, and as your first step in the cleaning process, the safest way to clean your lenses is to use a blower bulb to get rid of any loose dust and other such debris. A blower bulb does exactly what you would think it does — by squeezing the bulbous end quickly, it blows out quick bursts of air.
How to properly use a blower bulb
Here's a tip from this long-time photographer: Rather than holding the lens facing up while using the blower bulb and essentially blowing the dust up and off the side, try holding the lens in such a way that the front element essentially faces down at an angle, and you're blowing air from a lower angle up towards the lens, so that the dust actually falls out of it.
Once you've done the front element, clean the inside of the lens cap the same way. Put the front cover back on and repeat the same steps on the rear element, and you're done. Quick and easy!
I was shown this inverted technique by a long-time, old-school photographer and have been doing it that way ever since. Works like a charm every time.
Ok, so that takes care of a basic cleaning. 90% of the time, this quick routine will help to ensure the longevity of your equipment. But we're not done yet. There's more deep-cleaning ahead.
Use a lens brush or Lens Pen
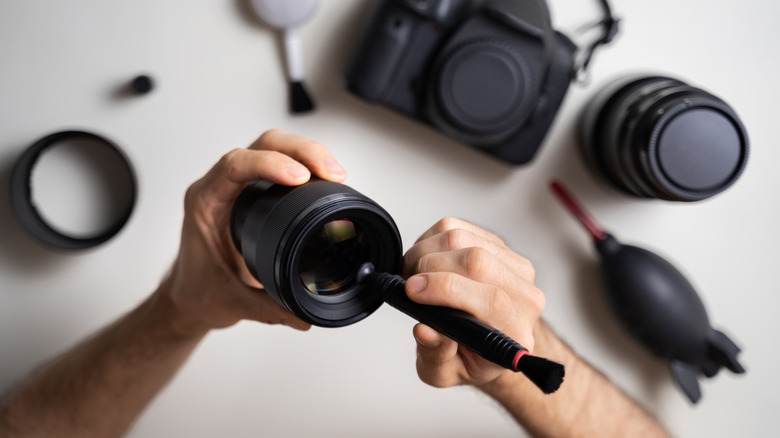
In the instance that a blower bulb does not take care of quick lens cleaning needs, follow up with a lens brush.
There are special lens brushes available in any good camera store or online. At one end there's a small soft cleaning tip. At the other is a retractable brush. I recommend the original Lens Pen, but alternatives such as Ted Pella work just as well. Should you have some regular brushes at home, any brush with soft camel hair should do the trick.
Use the brush end to gently brush the front element. Try to avoid touching the brush tip with your fingers. The oils on your hand can get on the lens and over time, can cause damage to the outer coating, as many photographers have pointed out.
Give your lens a quick once-over on the front and the back.
I like to start in the center of the lens and brush outward. Once again, hold the lens downward at an angle so the small particles can fall down, out of the lens, and gently brush from the inside out. If you have a Lens Pen, you can follow this up by turning the pen around and giving the lens a quick wipe with the special cleaning element on the other side. These pens are another invaluable item that should be in any camera bag.
After this, your lens should be as clean as the day you got it.
Use lens tissues or a microfiber cloth
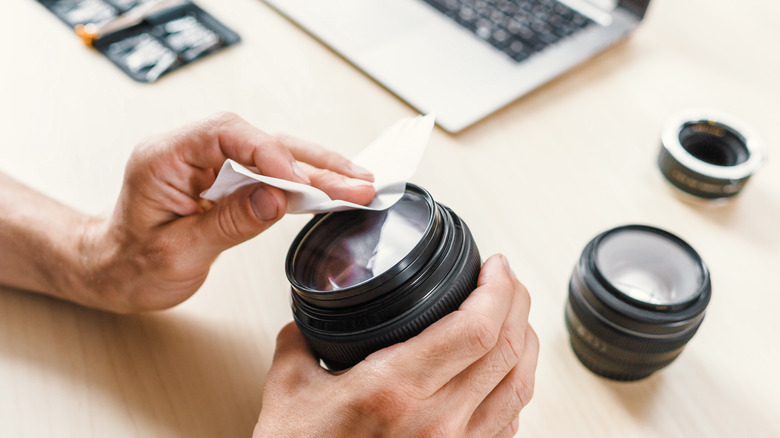
If dry cleaning your lens doesn't work and you need a wet-cleaning solution, special wet lens tissues are a good way to clean your lenses quickly and efficiently. You can get these at any camera store, optician, or online. These tissues are relatively inexpensive and are one-use items that only work well straight out of the package. Once dried, they can actually damage the lens.
These come in small, individually-sealed packages, which makes it easy to throw a couple in your bag before an outing. I usually get them in bulk and keep three to five in my bag just in case.
Another indispensable item to have is Microfiber cleaning cloths. These are the de-facto option for any kind of lens wiping. There are two basic textures to choose from — a smooth tight-weave "silky" texture, and a cotton(y) soft, towel-like finish. I used the smooth, silky ones almost exclusively for years, but ultimately found that they don't absorb cleaning liquid as well as the towel-like ones.
Either way, keep them clean, as they will likely be used for multiple cleanings. This not only protects your lenses, but also helps in assuring that you don't re-apply dirt, grime, or other particles that may scratch your lens.
You can wash Microfiber cloths quite easily, just remember to avoid using liquid fabric softeners, as they may leave a chemical residue on the cloth and create streaks on your lens.
Now, about getting rid of streaks.
Use a lens cleaner
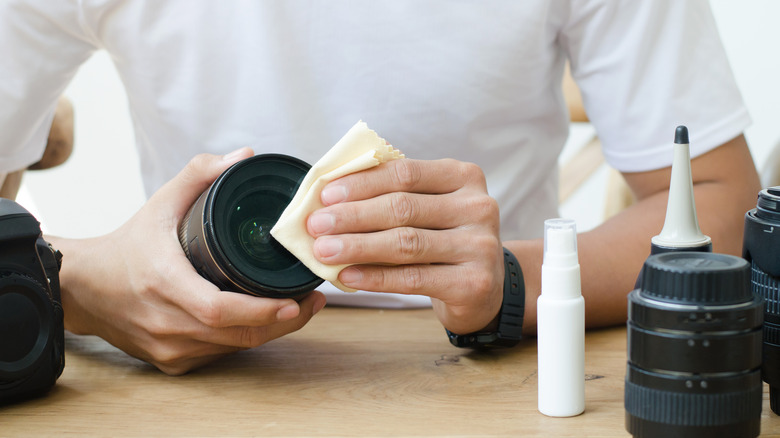
If there's a tougher particle or smudges on the lens, then you should use an optical lens cleaner to get smudges and other gunk off. Despite using an alcohol base, lens cleaners are safe to use as long as they come from a reputable company. Lens cleaners mainly use isopropyl alcohol-based solutions mixed with mild soap and water, which when carefully applied will get rid of any lingering dirt, debris, or persistent smudges.
Don't spray the cleaner directly on the lens, as that damages the coating more easily. Instead, spray the solution onto the cloth and then carefully clean the front element of your lens with it using circular motions outward from the center.
If at all possible, avoid cleaning the back lens element unless it is absolutely necessary. In over 18 years in professional photography, I have NEVER had to clean the back element of any lens with a lens cleaner. Being so close to the sensor inside the camera, this part of the lens is crucial and thus should be extra-protected. Try to avoid any kind of wet-cleaning solution, if possible. In my experience, prevention is better than any cure, so I have always been extremely careful with the rear element of my lenses.
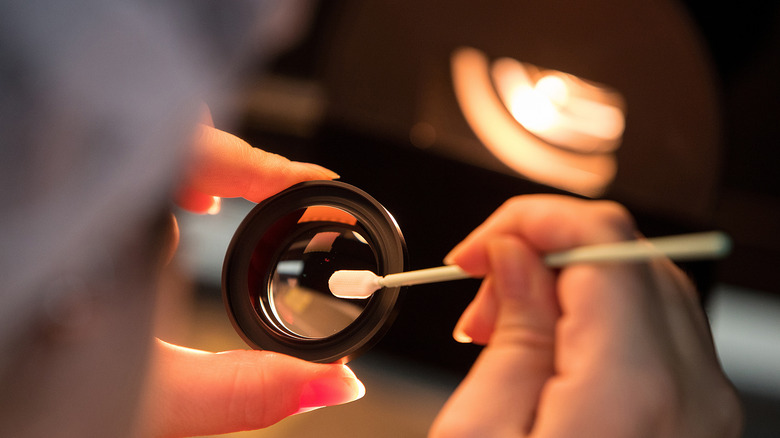
While you're at it, take out some cotton swabs, spray the tips with the solution, and quickly clean the lens contacts. This removes dirt, grime, dust, and anything else that can hinder the communication between the camera and the lens.
Don't neglect your bag
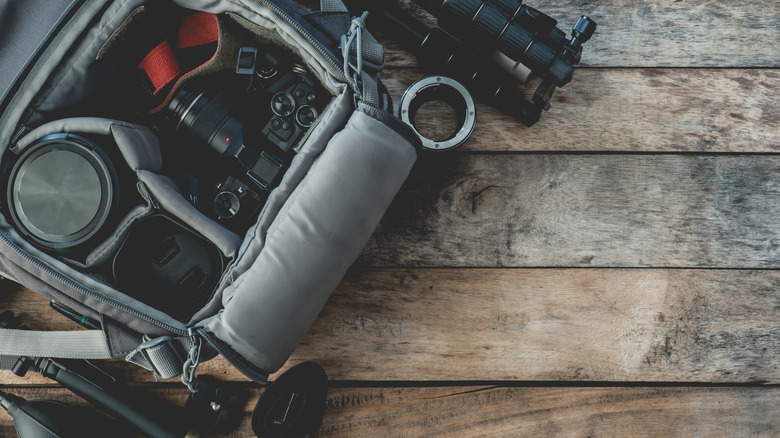
Cleaning your lenses is vitally important to keep your gear in good shape, but it doesn't stop there. The cleanest lens in the world will not stay that way for long if the inside of your camera bag has more dirt, dust, and grime than a steer wrestler's locker at a rodeo.
Over time, especially sand and dust — which are quite abrasive — can do some damage to your lenses if they get into the wrong places. To keep things tidy and in good working order, make it a habit to also give the inside of your bag a quick once-over whenever you do a lens cleaning session — especially after a shoot at the beach!
Cleaning bags is not as intricate as cleaning lenses though, so really all you need is a quick shake-out, and perhaps a brisk vacuum of the outside of the bag.
For some deep-cleaning, you can use a regular cloth on the outside, and — depending on the material — a bit of soapy water, followed by some clean, warm water on a cloth throughout the inside of the bag. I personally use an old, soft toothbrush for the zippers as well, and after letting the bag dry in the sun for a bit, it's as good as new.
Prevention is better than the cure

Lenses really are one of the most important pieces in the photography puzzle. They can be tough, but mishandling a lens during cleaning, or using the wrong cleaning methods or materials can quickly cause damage. Once your lens is already damaged, there is no turning back. That's why you should handle your camera and lens with utmost care. A few, quick, seemingly insignificant steps such as making sure that you place the lens cap back on the lens immediately after shooting to help protect the front element from dust and debris, can make a huge difference.
Though the digital age pretty much completely eradicated the need for UV filters, many photographers still use them as extra protection. If you know you're going to be in an extra-dusty or moisture-rich environment (especially for any Burning Man-type events, or in a storm), a protective filter will do wonders for keeping your lenses clean, healthy, and ready for instant use.
Personally, I'm not a big fan of filters, but in these kinds of situations, they are indispensable, indeed. Filters are another relatively cheap, efficient way to keep your lenses clean, so make sure you also have at least one in your bag.
Bringing it all together

We hope this article taught you everything you wanted and needed to know about cleaning camera lenses. The main takeaway is to remember to keep cleaning to a minimum and only clean when necessary, and to focus on preventive techniques like lens caps and filters instead. It's also important to use the correct tissues and lens cloth cleaning materials for the best results.
By keeping your camera bag stocked with the basic cleaning supplies discussed here, you'll be prepared for the unexpected when out in the field. Each of these techniques is easy and fast, and is doable almost anywhere, indoors or out.
Using these techniques in your cleaning routine is sure to give you the best photography results, preserve your gear, and perhaps even help you create that Pulitzer-winning photo you have been dreaming of – without using frowned-upon techniques like your own breath.