6 Common Mistakes People Make When Rebuilding Engines
We may receive a commission on purchases made from links.
Although engines last longer today than they did years ago, when it finally does give out, you have several choices. The most expensive route is to have your dealership's service department install a new factory engine. You can expect the total cost for this repair to be at least a few thousand dollars. A cheaper option is to take it to an independent repair shop, perhaps after finding a used engine at a salvage yard. However, restoring your engine this way is fraught with unknowns. As a result, many car owners take the hands-on and wallet-friendly approach of opting to rebuild their own engines.
This might seem like an impossible job, but if done carefully and thoroughly, it will provide you with tremendous satisfaction and an engine that is good for many more years of service. However, this daunting task does come with pitfalls that still trap experienced mechanics. Here are some common missteps to be wary of while rebuilding your engine.
Using the wrong castings
When getting started on an engine rebuild, you might be tempted to take the first core that comes your way. This project will usually take at least a few full days of work to finish, so take your time at the outset and make sure you get castings that match your application and are as close as possible to the final specs you desire.
This might mean waiting weeks for the right block and heads before starting your rebuild, but it's important to start with the proper foundation. If you want the stalwart 350-cubic-inch Chevy V8 to drop in your now-parked 1967 Chevy Camaro, don't settle for a 327 just because the nearest salvage yard has one. Finding the right castings at the beginning of your restoration will reduce the chances of having additional problems down the line. Also, finding an engine with a bore and stroke very close to the one you want will cut down on the amount of time and effort required to hone the cylinders to your desired specifications.
If you're having trouble finding the castings you want locally, try searching online. On Car-part.com, you can search through thousands of used parts dealer inventories to find the exact engine you want, and many of those yards are willing to ship those used blocks and heads to your door.
Going cheap
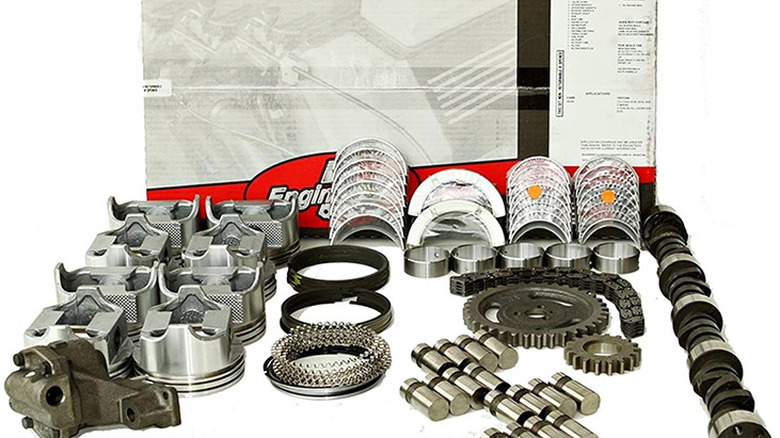
Locating the right base from which to build your engine gets you partway to your goal. However, it's equally important to choose high-quality parts to go inside the block and heads. Going cheap here will only cost you more later, so take your time to choose a rebuild kit for your engine and be sure to buy from a reputable vendor.
A complete lower end kit should include pistons, rings, connecting rods, an oil pump, a timing kit, a camshaft, bearings, lifters, freeze plugs, and gaskets. For rebuilding your top end, you'll need valves, rockers and rocker arms, new valve seals, and valve guides. In addition to the actual engine parts, you might also want to invest in some Harbor Freight finds that will come in handy during the rebuild, like an engine stand or a brush kit.
A valuable added investment is a factory service manual (FSM). These reference guides have manufacturer-approved procedures for dozens of repairs, including engine rebuilds. If you're lucky, you might find a free FSM for your vehicle in PDF form with a quick internet search. Vehicle-specific Facebook groups and web forums are also good places to look for factory service manual downloads. If you can't find a free version, you might want to drop a couple of hundred dollars on one from The Motor Bookstore, which has factory-issued service manuals from dozens of popular automakers. For an engine rebuild, you're best not to trust the repair manuals you can buy at parts stores, as many consumers report that they are not comprehensive or accurate enough to help do this job properly.
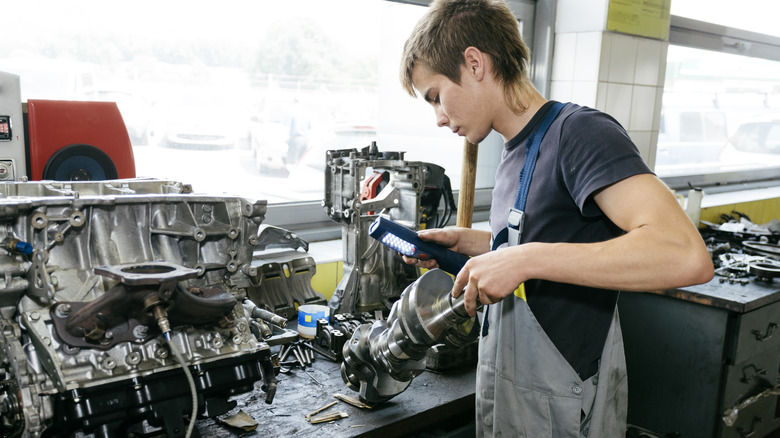
Working too fast and being disorganized
Once the wrenching process begins, it's tempting to work as quickly as possible to get your engine humming again. However, it's better to be as deliberate and careful as possible, especially if you're somewhat new to rebuilding engines. One small mistake made in haste could mean you end up re-doing the entire project later and with much more at stake.
Organization is also key. Start with a clean, uncluttered workspace and use a pen and pad to take notes and draw diagrams as you take your engine apart. Use cardboard boxes or a magnetic parts tray to store and organize the small parts. Labeling everything carefully as you go will help avoid the need to play guessing games during reassembly.
Having a cell phone or digital camera close by will also help you catalog parts during the disassembly process. If you can, record the entire teardown and watch it when you're ready to begin putting your engine back together. You might just catch something that would have caused you lots of trouble further down the road — literally or figuratively.
Improper use of sealant
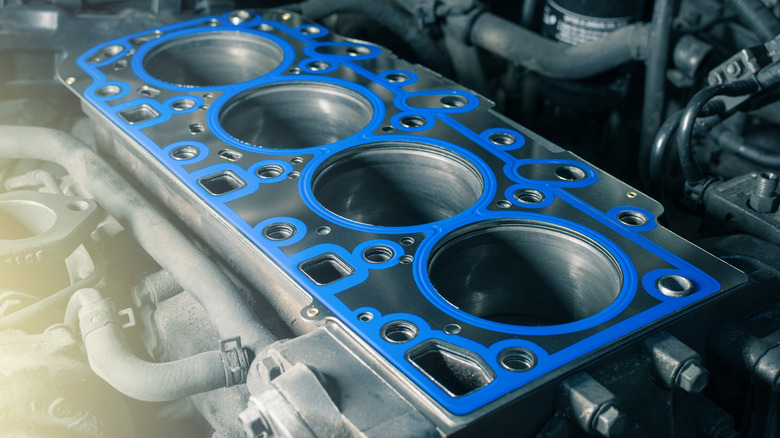
Once the painstaking process of reassembling your engine is underway, it's critical to use the correct type and amount of room temperature vulcanizing adhesives (RTV) or sealant where needed. Improper technique here could lead to oil and/or coolant leaks, which can both be catastrophic.
A common mistake with sealant is overdoing it. You only need a thin coat of sealant on one side of cork or paper gaskets, and synthetic gaskets require no sealant at all. Do use copious amounts of assembly grease like Super Lube or similar products from Permatex or Lucas Oil on the springs and inner edges of cam and crank oil seals to help them slide into place smoothly, along with a thin layer of sealant along the seal's outer edge. For rocker arm studs or bolts that penetrate coolant passages, use just enough Teflon thread sealant to fill the grooves, but be careful here. Using too much can result in pieces of dried sealant breaking off and blocking small passages or jamming your thermostat, while not using enough could cause oil to leak into the coolant.
Reusing old fasteners
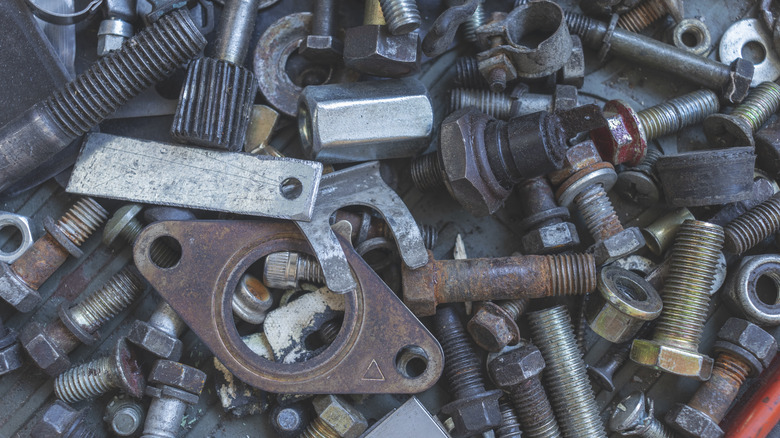
You might be tempted to use your original fasteners when reassembling your engine. After all, they were good enough for the factory, so they should be good enough for you, right? While in many spots this will be fine, some fasteners stretch when torqued down fully the first time and won't hold components in place properly if used again. This is especially true of bearing cap bolts and cylinder head fasteners. ARP makes fastener kits for domestic and imported engines using materials a grade higher than those used for aircraft, which are stronger than automotive-grade bolts, studs, nuts, and screws.
Most new fastener kits cost just a couple hundred dollars. This is one place where you definitely don't want to skimp, as a broken bolt is another potential point of critical failure. Kits also come clearly labeled, which will prevent mixups during reassembly. You can also purchase original equipment manufacturer (OEM)-quality fasteners from your dealership's service department, but assembling a complete kit at the parts counter will be tedious, time-consuming, and ultimately more expensive than an aftermarket kit.
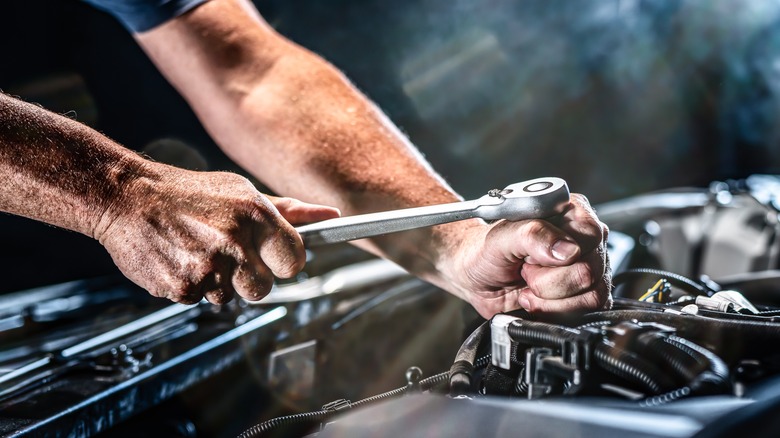
Inconsistent torque on fasteners
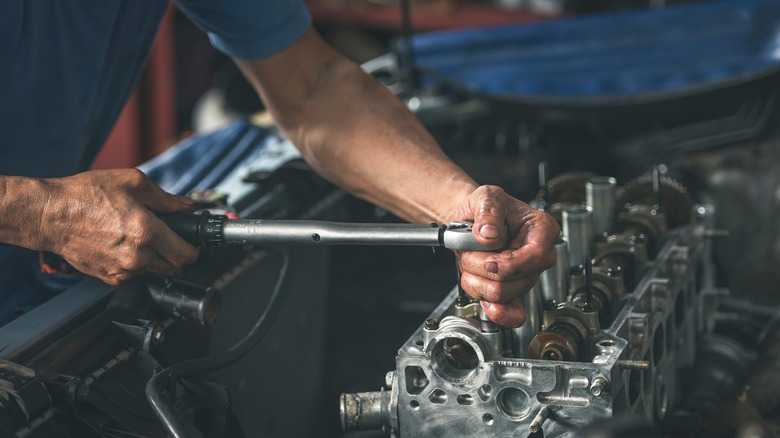
Experienced shadetree mechanics might be tempted to rely on feel when reassembling an engine, but this is one task for which you'll definitely want to invest in a reliable torque wrench. For most DIY auto repair jobs, "tight enough" is usually good enough. But for engine reassembly, precise torque and proper fastening order are critical to smooth, leak-free operation. Don't worry, though. You don't need to break the bank on overpriced Snap-on tools and wrenches. In a recent list of some handy AC Delco tools for DIY mechanics, we highlighted a digital torque wrench that retails for less than $150.
Locking down bearing cap, cylinder head, and rocker arm bolts properly is particularly important, and when reattaching the head to the block, be sure to tighten the bolts in the right order as well as to the correct torque spec. If you don't have a factory service manual for your vehicle, give the dealership's service department a call for the correct torque numbers and tightening pattern for your head bolts. Don't overlook the details here and your engine will be more likely to continue working for years to come.