3 Maintenance Tips And Tricks For Classic VW Beetles

The Volkswagen Beetle dates back to World War II, when Adolf Hitler wanted a "people's car" and enlisted Ferdinand Porsche to design the Type I that was first imported to the United States in 1949. VW went on to sell more than 23 million units worldwide (via Volkswagen). The Type I Beetle was initially a primitive, underpowered rattletrap, but throughout its lifespan grew more powerful and gained features like fuel injection and an automatic transmission. It stayed in production until the late 1970s, and the model was revived as the New Beetle in 1998 with modern upgrades like air bags and a turbocharged engine.
The New Beetle had a two-decade run before VW dumped it from its lineup in 2019. Classic Type I Beetles are mechanically simple and remarkably easy to maintain, and there is substantial aftermarket parts support, along with a huge supply of Beetles in salvage yards around the world.
Classic Beetle engines also weigh less than 300 pounds, which makes an engine swap doable without an engine hoist. A well-maintained classic Beetle can give you years of fun, reliable cruising (although you won't be the fastest car on any road). Here are a few tips for maintaining a Type I Beetle that can help you get the most out of this timeless classic.
Regular oil changes and tuneups are critical

Regular oil changes are important on any vehicle, although some modern vehicles can go as long as 15,000 miles between changes. The recommended interval for changing the oil on a Type I Beetle is 3,000 miles, which was once the standard for most car engines. You should check the oil level with each gas tank fill-up, as Beetle engines can be prone to oil leaks, and running any engine without sufficient oil in the crankcase is inviting disaster. Air-cooled engines like the Beetle's vibrate more than water-cooled engines, which can throw timing and valve clearances off or damage ignition points. The recommended tuneup interval for classic Beetles is 10,000-12,000 miles, but if performance becomes even more sluggish than normal or fuel mileage drops off suddenly, do a tuneup regardless of how long it's been since your last one.
Any VW Beetle tuneup should start with a compression test, as this can reveal issues with improperly adjusted or malfunctioning valves or damaged engine components. Compression ratios for Beetle engines range from 6.0:1 to 7.5:1 and the target PSI is calculated by multiplying the compression ratio by the atmospheric pressure. A tuneup should also include replacement of the distributor cap and rotor and ignition points. Spark plugs and wires don't necessarily need to be changed at every tuneup, but pulling the plugs is a good way to get an idea of what is happening inside the cylinders of your engine.
Learn how to adjust valves
Improperly adjusted valves will make your engine perform poorly and burn more fuel than necessary. The process for adjusting the valves on a Type I VW Beetle is fairly simple and can be done with a 13mm wrench, flat blade screwdriver, and a 0.006 inch feeler gauge. You'll also need a 30mm socket and handle to rotate the crankshaft, and it's a good idea to change the valve cover gaskets while you have the covers off. The engine must be completely cooled off when adjusting valves, and this is a good time to change engine oil and distributor components as well.
The valve covers are held down by a metal clamp that can be slid forward to release the cover. Remove the distributor cap so you can see where the rotor is pointing, and turn the engine by hand until the rotor tip is lined up with the mark on the distributor. The valves for cylinder no. 1 should now be closed. Slide the feeler gauge between the valve stem and adjusting screw; there should be slight resistance but you should be able to slide the gauge back and forth.
If the valve needs adjustment, loosen the locknut and turn the screw in the appropriate direction before re-tightening the nut. Rotate the engine until the distributor has moved 90 degrees to set valve clearance for cylinder no. 2, and repeat for nos. 3 and 4.
Engine timing is important and easy to adjust
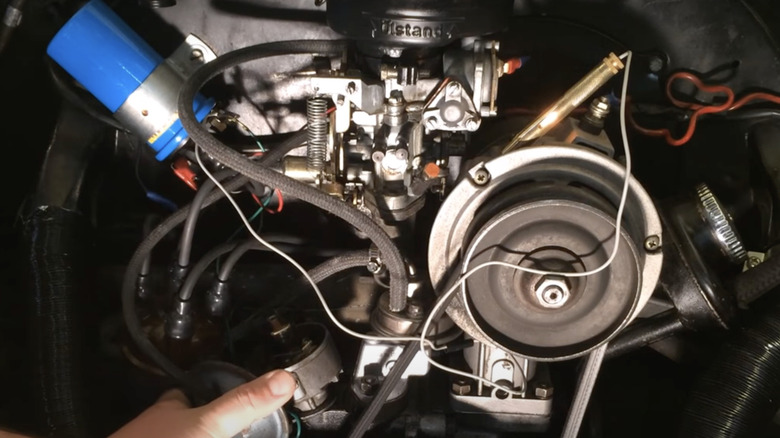
Correct engine timing is also critical to efficient engine operation. You can adjust the timing on a classic VW Beetle with a simple 12 volt test light (a timing light is not necessary). Before adjusting the timing, it's important to make sure that engine compression is adequate and consistent across all four cylinders and valves are adjusted properly. Warm the engine up, and pop the clips holding the distributor cap on and remove the cap. Rotate the engine by hand until the rotor tip is aligned with the mark on the distributor and the top dead center mark is lined up with the seam between the halves of the engine block.
Loosen the distributor hold down bolt a few turns so you can turn the distributor. Ground the tip of the test light and connect the clip to the negative terminal on the ignition coil. Rotate the distributor counterclockwise until the test light comes on, and move it back and forth slightly to make sure you've found the sweet spot. Tighten the clamp bolt down, replace the cap, and you're ready to go!