What You'll Need To Get Started On Your Own Raspberry Pi LED Sign
There are a variety of creative uses for the Raspberry Pi that can be incorporated into specialized projects that include visual elements, automation, and more. According to Eben Upton, CEO of Raspberry Pi (Trading) Ltd., the company has sold tens of millions of Raspberry Pi units since its start in 2012. One of the more popular uses for this tiny computer is controlling LEDs to create your own text, display logos, and you can even program custom light shows.
Programmable LED signs retail anywhere from the $200 range to more than $2,700, depending on size and capability. Considering the cost, it's understandable why many people might opt to make their own signage using a Raspberry Pi. However, just like any other project, you'll need specific materials to get your LED sign up and running.
You can take different approaches, and the complexity of this build can quickly escalate from beginner to something far more advanced. The essential parts required for your Raspberry Pi LED sign include an LED matrix, an RGB bonnet or Pi HAT (Hardware Attached on Top), an appropriate power supply, and some material to construct the housing. One of the best aspects of this platform is how adaptable and inexpensive the technology is, and there are many fun Raspberry Pi projects that won't break the bank.
Matrix, Pi HAT, and power
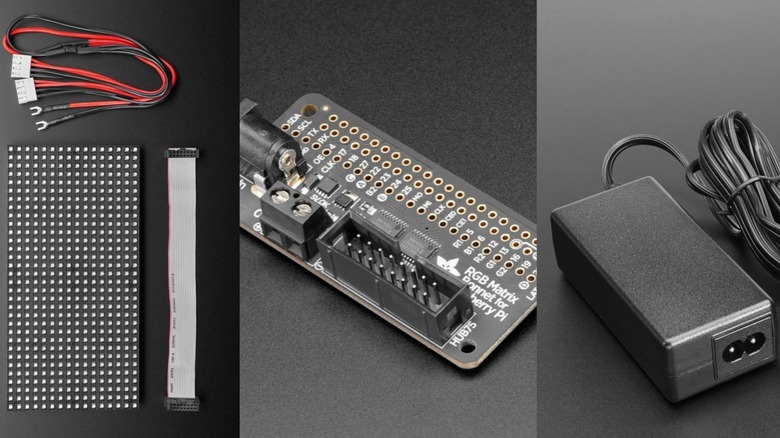
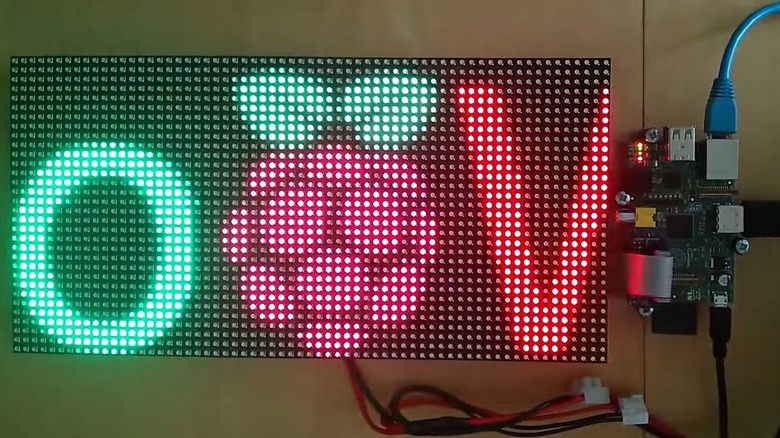
If you want to use many colors, you'll need to purchase an RGB LED matrix. These come in different sizes, such as 16x32, 32x32, 64x32, 64x64, and more. Matrix panels are comprised of several LED lights laid out in symmetrical rows, and multiple panels can link together to create even more extensive displays. These panels run anywhere from $15 up to over $60 and are available from various manufacturers.
Another component you'll need for a straightforward LED sign build is a Pi HAT. A Pi HAT is a term used to describe additional hardware attached to the top of a Raspberry Pi unit. Beginners can especially benefit from using a Pi HAT because it reduces complexity with plug-and-play functionality. The HAT connects your Raspberry Pi to the matrix panel and retails for around $15.
Last but certainly not least, you'll need an appropriate power supply to give your sign life. According to Adafruit, each matrix panel might require up to 4 amps each, due to the number of LEDs present. A 5-volt, 4-amp power supply should be sufficient for a small sign and cost around $15.
Enclosure materials
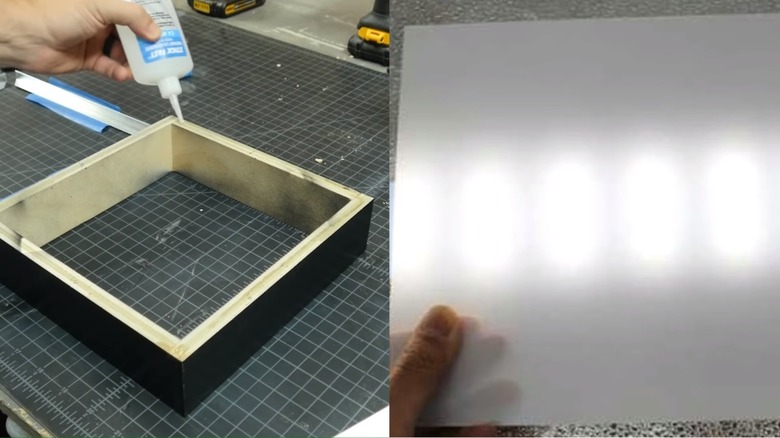
If you want to secure the components and hide the wiring of your LED sign, consider building a box to house the electronics. This enclosure can be as simple or elaborate as you desire, but the most basic will consist of a four-piece square or rectangle made from lumber. Many big box hardware stores carry several varieties of premium plywood already cut into appropriately sized pieces. Using either a small brad nail gun, glue or a combination of these two, you can create an attractive housing for your sign.
Alternatively, if you have a 3D printer, you can print an attractive frame at home.
You should also include a semi-transparent screen in front of your LEDs. One material that works well is styrene sheeting, which is available at both hardware and hobby stores. The white styrene sheet will allow your LEDs to shine through, but help hide the inactive parts of the panel. Now, you're ready to start putting it all together, programming your sign, and enjoying the fruits of your labor. If you're just getting into SBCs (single-board computers), the best Raspberry Pi starter kits can give you an excellent foundation for building future projects.