5 Easy DIY Storage Options To Help Organize Your Tools
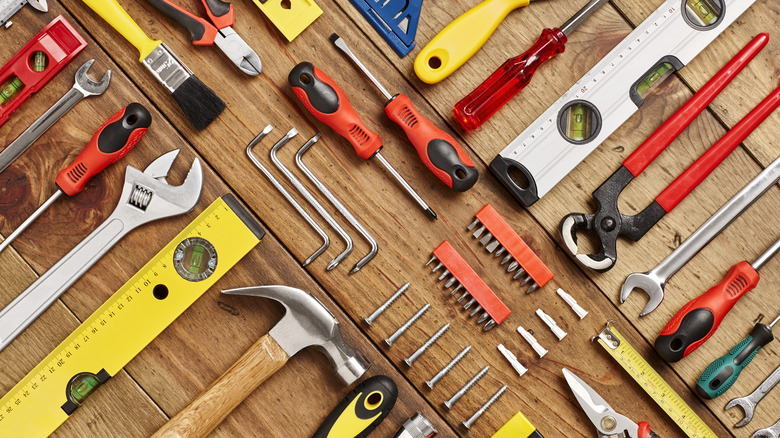
Having the right tool for the job is one thing, but being able to find it in a hassle-free and timely manner is another challenge. That's why every meticulous craftsman should make it their mission to have a strategic system in place to help keep track of every piece of equipment they have. Arguably, the best way to do that is by taking the necessary steps to ensure their tools are stored and organized in the most efficient way possible.
While this may at first seem like an epic endeavor to undertake that would require expert assistance, high costs, and a lengthy amount of time, consumers looking to make their lives a bit easier when it comes to everything from quick fixes to serious repairs should be aware that there is a solo way to go about experience the dream of next-level organization that involves not a lot of cash and nothing more than a "can do" attitude.
There are many do-it-yourself alternatives when it comes to crafting a space that inspires and facilitates a more productive and enjoyable workspace. Each project is infused with personal flair and ingenuity, turning chaotic collections into harmoniously arranged arsenals of craftsmanship.
The beauty of DIY tool organization lies in its flexibility and creativity that takes a pile of tools and transforms that unattractive mess into a beautifully orchestrated display, where each hammer, screwdriver, and wrench is a testament to one's dedication to order and efficiency. The process itself is a rewarding journey, sparking joy and pride with every tool placed in its new home. Here are five DIY storage options to get people started.
Pegboard tool wall
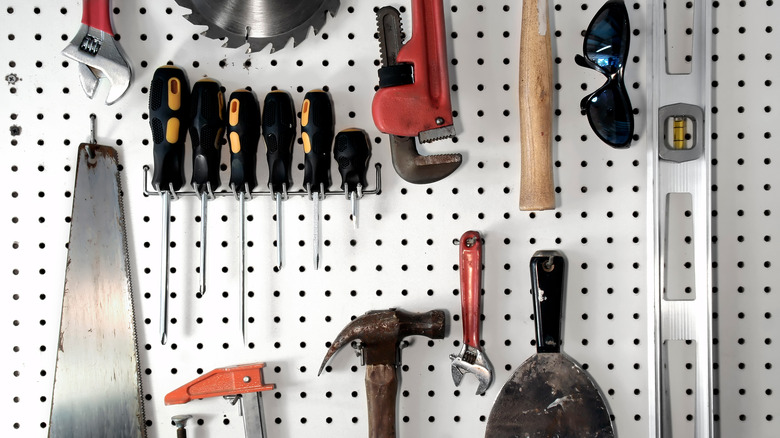
The installation of a pegboard tool wall should be high on anyone's list for those out there looking for ways to better manage their stash of equipment because it perfectly represents a fusion of functionality and simplicity, revolutionizing the way tools are organized in any workspace. A pegboard system allows for a clear display of every piece of gear a person has at their disposal, making identification and retrieval effortless.
Then, there is the customization potential, which happens to be immense, as hooks and shelves can be rearranged to accommodate various tools and equipment sizes. The adaptability aspect of this DIY project is out of this world and makes it a perfect solution for not only evolving hardware collections but also ensuring that the organization system can grow and change in tandem with the user's needs. And the visual appeal most certainly adds a difference-making professional touch that successfully showcases one's attention to detail.
Setting up a pegboard tool wall is a pretty straightforward and rewarding DIY project, which can be easily accomplished with minimal equipment and expertise. The basic requirements include a pegboard panel, appropriate mounting hardware, and an assortment of hooks and holders. The process involves mounting the pegboard securely to the wall while also verifying that it can support the weight of one's hardware collection.
Once installed, consumers can enjoy the fun of arranging and hanging various tools and accessories and witness the satisfying transformation before their eyes. There is no denying that the simple set-up and the immediate impact make the pegboard tool wall a popular choice for DIY enthusiasts looking to bring order and efficiency to their work areas.
Cordless drill organizer
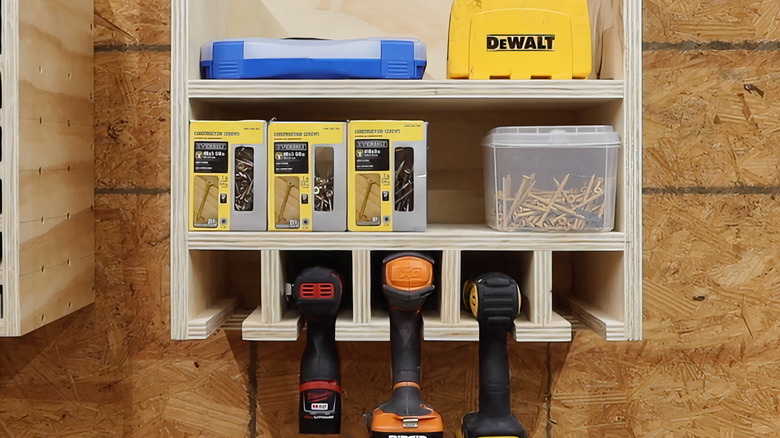
Having an exceptional arsenal of cordless drills at the ready in a convenient, easy-to-get-to-spot whenever needed is undeniably an effective method of storage and looks pretty cool if executed properly. Not only is this specialized organizer apparatus specifically tailored to neatly store and display various cordless drills, but it can also serve as a fitting place to maintain any accompanying batteries and chargers.
Each one has a dedicated slot that ensures each drill is readily accessible, thus ultimately eliminating the difficulty of having to rummage through drawers or boxes. It won't take long for consumers taking on the task to realize that putting together a DIY cordless drill organizer streamlines workflow, protects the equipment from damage, cuts down on overall clutter, and greatly enhances the chances of the equipment's longevity. As mentioned, the visual aspect and professional style add the additional benefit of demonstrating a person's commitment to care and precision.
The process of carefully crafting a DIY cordless drill organizer is surprisingly simple and requires basic woodworking skills and tools. The project typically involves constructing a wooden frame with slots or shelves sized to fit each drill and its accessories. The configuration can be customized to fit the number and types of drills owned, making it a versatile solution for any collection size.
Once the basic frame is constructed, it can then be mounted on a wall or take up residence on a workbench, depending on space availability and personal preference. The bonus to the practical benefits is the satisfaction one will feel when the success of building a personalized cordless drill organizer is really drilled in and appreciated.
Magnetic bit rack
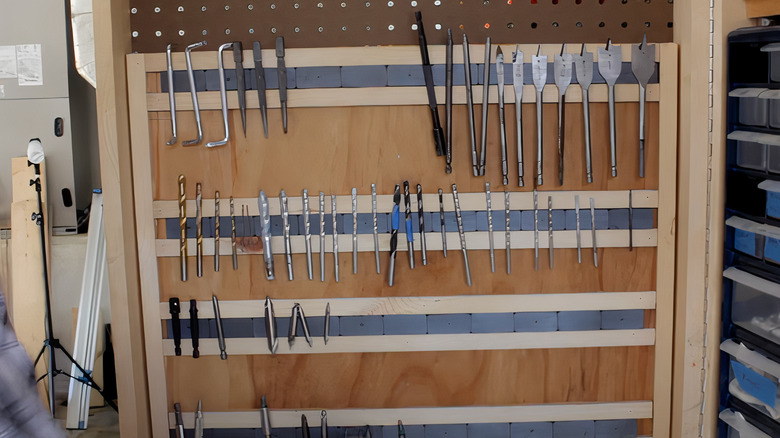
Anyone looking for a practical and elegant solution for storing and organizing drill bits and other small metal tools should strongly consider adding a DIY magnetic bit rack to their respective workspace. The innovative approach leverages the superior power of magnets to keep these easily loseable items secure, ensuring everything stays in place and reducing the likelihood of loss or accidental drops.
The hassle-free storage option eliminates the need to endlessly search high and low for that specific size drill bit or that tiny Phillips head, saving precious time and reducing unnecessary frustration by making these vital pieces of equipment incredibly accessible and arranged by size or type. Not only will this do-it-yourself project prove to make tool selection more efficient and intuitive, but more importantly, the sight of a neatly arranged setup also provides an element of professionalism and order to any workspace.
Constructing the perfect DIY magnetic bit rack is an unexpectedly easy project that can be completed with basic materials and tools. The core component is a magnetic strip, which can be attached to a portion of wood or directly mounted onto a wall or workbench.
Once the installation process, which generally involves mounting the strip securely and ensuring it is accessible for daily use, is completed, the organizational addition provides a reliable and space-saving solution. The ease of fabricating and installing this magnet-based tool-holder makes it a worthwhile project for those looking to bring a higher level of order and functionality to their equipment storage.
Tape measure hanger
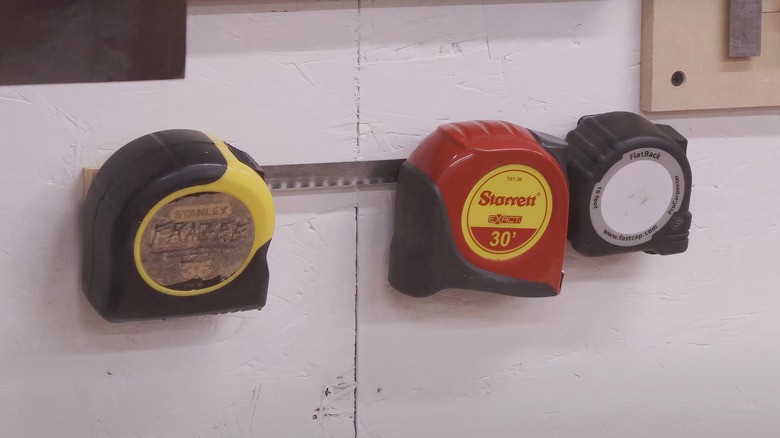
Accuracy and precision are the telltale signs of someone who knows their way around a tape measure. But more often than not, people have probably encountered the problem of being unable to find one when needed. It's not easy keeping track of these elusive tools, which is why adding a means to secure such necessary elements should be a part of anyone's ambitious organizational strategy.
The answer to this dilemma is a DIY tape measure hanger, a simple yet effective solution that provides a dedicated spot for storing tape measures, making them easy to locate and retrieve. The minimalist approach to storing these necessary devices also saves valuable space by keeping them off workbenches and out of drawers, where they can often be buried under other items. With each one designated to its own hanging sector, these easy-to-install hangers will help keep things moving smoothly no matter the project as a valuable contribution to a more productive environment.
Assembling a DIY tape measure hanger is not a complex ordeal and, fortunately, doesn't require an abundance of building materials or, more importantly, effort. The design involves a series of hooks or clips attached to a board, which is then mounted somewhere convenient on a wall, shelf, or workbench. The flexibility in cultivating these compact storage additions allows for a slew of possibilities when it comes to customizing a workstation to accommodate the number and types of tape measures occupying a craftsman's set of preferred pieces of equipment.
The installation process is typically quick, involving basic tools like a drill and screws. Once set up, the hanger serves as a permanent, easily accessible home for tape measures, ensuring they are always at hand when needed.
PVC tool holder rack
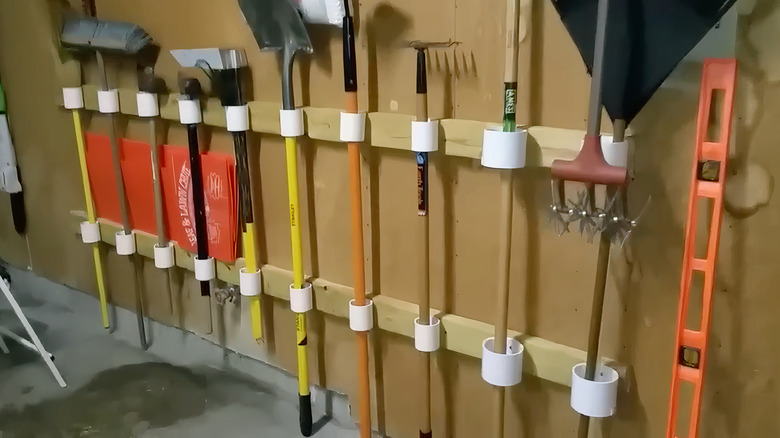
When trying to find a versatile and cost-effective remedy for organizing a wide range of tools, the obvious resolution is to construct a PVC tool holder rack. The do-it-yourself storage option made from durable and lightweight polyvinyl chloride pipes is perfect for storing everything from a variety of garden tools to an assortment of workshop implements. The material is known for its resistance to corrosion and wear, making it ideal for environments where tools may be exposed to moisture or heavy use.
Taking this approach allows users to avoid the limitations of similar store-bought models and the ability to customize the size and arrangements to fit their specific equipment perfectly. In addition, not only does this self-made system of organizational greatness save valuable amounts of space, but it also makes locating and accessing items needed easier than ever.
When making a DIY PVC tool holder, consumers should know that completing the project requires basic tools such as a saw for cutting the PVC pipes to the desired lengths and a drill for securing the rack to its desired location. The simplicity of the design means that even those with minimal experience can complete the project. The process involves cutting the PVC pipes into sections, arranging them in a desired pattern, and then securing them together using PVC glue or screws.
After assembly is completed, the finished product can be mounted, instantly transforming a cluttered area into an organized, functional space. The impeccable presentation serves as a bonus that helps make any workplace more productive and enjoyable while simultaneously fostering an environment where creativity and efficiency thrive.