Raspberry Pi 4: How To Enable & Pair Bluetooth
When you think of wireless Raspberry Pi applications, what usually comes to mind are projects powered by Wi-Fi, such as a remote plant monitor or smart energy tracker. However, Raspberry Pi boards come with more wireless capability than just typical Wi-Fi. They are also integrated with another handy feature: Bluetooth. This short-range wireless technology has been integrated into the boards since the Raspberry Pi 3 came out in 2016.
Admittedly, not many Raspberry Pi projects make use of this feature as you essentially need another Bluetooth-enabled device (most devices nowadays typically come with just Wi-Fi features). However, if you're only using your board as a basic desktop, you'll find Bluetooth to be useful in cases like connecting to an external speaker or transferring files to your phone or computer remotely. We'll take you through the simple step-by-step process of how to enable and pair your Raspberry Pi 4 with an external Bluetooth device.
How to enable and pair Bluetooth using the GUI
The easiest way to pair your Raspberry Pi 4 with any Bluetooth-enabled device is by using the desktop version of the Raspberry Pi OS, which comes with a graphical user interface (GUI). If your board is running on the latest version, Bluetooth is already enabled by default. Follow these steps to connect your Raspberry Pi 4 with your other Bluetooth device.
- Turn on your external Bluetooth device (e.g., speaker, headset, phone).
- Make sure the device is discoverable.
- Boot your Raspberry Pi board.
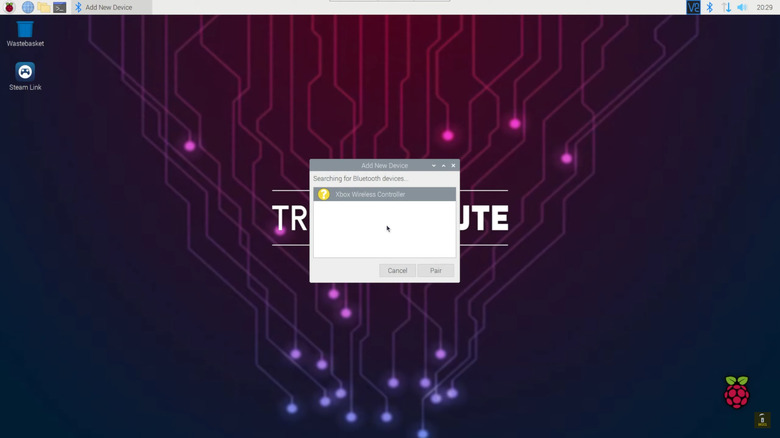
- On the home screen, click on the Bluetooth icon on the top right of the screen.
- Select "Add Device" from the drop-down menu.
- In the "Add New Device" screen, click on your external Bluetooth device.
- Select the Pair button.
A pop-up should appear momentarily indicating that the pairing was successful. If you are paired with a Bluetooth speaker or any other audio device, you need to right-click on the speaker icon at the top of the screen and choose your audio device from the list. Otherwise, you're good to go.
How to enable and pair Bluetooth using the command line
If you have the Raspberry Pi OS Lite that doesn't come with a GUI, you can still use the command line to connect your Raspberry Pi 4 with an external Bluetooth device. Here's how to do so:
1. Verify that the device you want your board to connect to is powered on and discoverable.
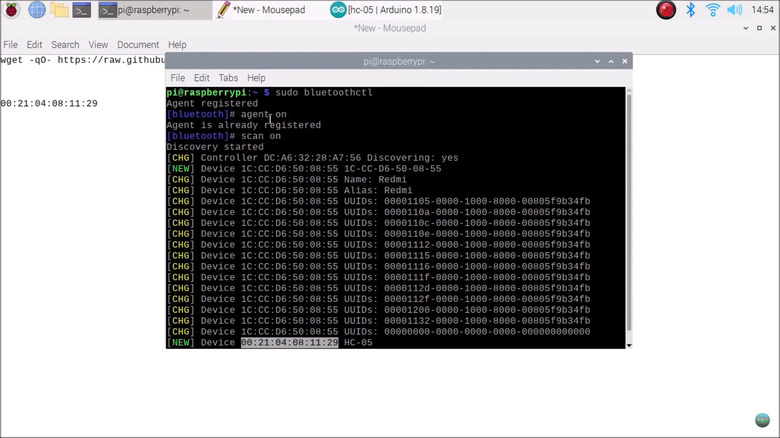
2. On the command line, type sudo bluetoothctl to enter the Bluetooth command-line tool.
3. Type agent on.
4. Start scanning for nearby devices by typing scan on. This will give you a list of all the discoverable external Bluetooth devices.
5. Take note of the MAC address of the device you want to connect to. This is in the format of XX:XX:XX:XX:XX:XX, found in the third column of the list. If multiple external devices showed up on the list, you will usually see the name of the device next to its MAC address to help you pinpoint your device of interest.
6. To pair with the device, type pair (e.g., pair 52:A8:17:6C:5G:C6).
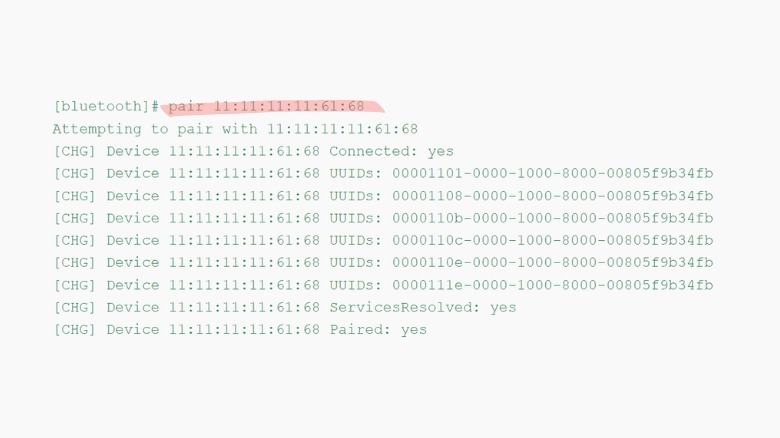
7. To exit the Bluetooth command-line tool, type exit.
This will automatically connect you to your external Bluetooth device. However, once you disconnect from the device, you will have to reconnect by typing "connect." To avoid typing this command every time you lose connection, you can replace "connect" with "trust."