8 Best Uses For Old Computer Mice

We may receive a commission on purchases made from links.
Humans generate massive amounts of e-waste each year. You won't be surprised if a substantial portion of that is made up of inkjet printers. But while consumer printers are notoriously disposable, the humble computer mouse seems above the fray. In a world of planned (or at least de facto) obsolescence, mice seem to outlast expectations. For every broken one you've owned, you have probably had a handful that simply never died. So what to do with these nifty little input devices when we finally replace them with slicker models?
Mouse hacks come in two basic varieties. Experimental exercises are usually devised for learning about some aspect of technology. Practical applications are surprisingly difficult to come by but do occasionally pop up on blogs and maker zines. But the real magic happens when the two are combined and, by experimentation, you come up with something new and useful. Occasionally these efforts lead to hacking that's a little more black hat than mere pranks and mouse jiggling, but of BadUSB, wickedest of peripheral inventions, we shall not speak nor give direction.
A mouse-sized history of mouse hacking
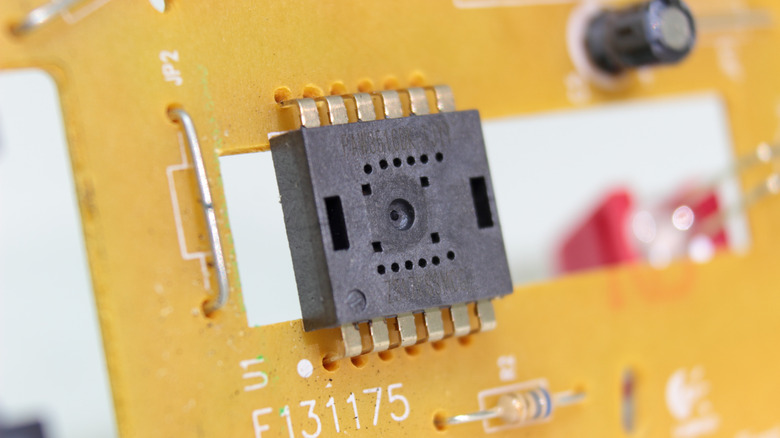
It's hard to say when computer mice first gained the attention of hardware hackers, but the hobby seems to have begun in earnest in the mid-to-late 2000s when the optical mouse, with its little camera shooting thousands of terrible frames per second, started entering that e-waste stream. When hardware hackers realized their cheap optical mice contained a camera and lens — in fact, a complete image acquisition system — the first step was to figure out what was going on under the hood.
In a nutshell, an LED lights a surface; and a moving sensor photographs the surface through a lens. An onboard digital signal processor (DSP) interprets the images, figures out the direction and magnitude of any movement, and writes any changes in position to the X and Y registers. The most common of the chips that did this work acquired only one pixel per video frame but also had a debug feature that allowed developers to easily stitch the images together into something like a low-resolution, painfully slow video feed
This stimulated a lot of interest in hacking together things like spy cams, scanners, microscopes, and anything else you could point at a subject. The earliest efforts might have been underwhelming, but these were experiments. The practical applications would come along soon enough. The useful output at this early stage came in the form of encouragement, tutorials, microcontroller libraries, and the like.
Make a new mouse with your old mouse
Of course, not every project is so complicated. The simplest form of hardware hacking might be taking something apart, then putting it back together again in a slightly more useful or interesting form. There's nothing experimental or necessarily useful going on here... you're just building a new mouse using the inner workings of an old mouse.
Scores of such projects have been documented online, with mouse innards shoved into everything from Tic Tac containers to Nintendo controllers. And, since time is a flat circle, some have inadvertently rebuilt the original computer mouse. In a 2020 tribute to mouse co-inventor William English, Hackaday writer Kristina Panos referred to the original mouse as a "pinewood derby car of an input device," which perfectly describes more recent, more elegant, and less inventive efforts in making a mouse less ergonomic and more aesthetically pleasing.
But you can also go the other way and invest a lot of time and money in modding a $13 Bluetooth mouse into an exceptional gaming device (via Tyler Richard's hackaday.io project). This is major surgery, installing a new PCB and a PixArt PWM3389 sensor, which was also used in the Logitech G Pro and the Razer Basilisk. The bill of materials is some 40 items long, and while most items are well under $1, a few are around $10, and many come packaged only in multiples. This only makes sense if your goal here isn't to save money but to build a customized device while presumably learning how to customize it even more for your own needs.
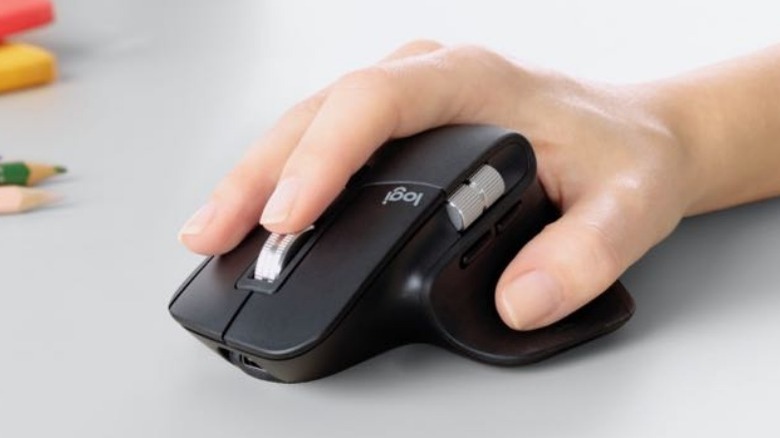
Richard, the project's creator, aimed to improve on his store-bought Logitech MX Master 3. The custom mouse is more responsive, has seven customizable buttons, and has a bunch of tricks up its sleeve.
Make new buttons for your old mouse
Behold, the rapid-fire gaming mouse. Whatever it might lack in ethics, it makes up for in virtually violent harmlessness. Or harmless virtual violence. Something like that.
A few versions of this have appeared over the last decade or so, for both wired and wireless mice (via Instructables here and here). If you categorize it as not a mouse project but a "cheat at games with a 555 timer" project, this hack reaches back to the era of the N64 and the Atari 2600. Most of the challenge comes from squeezing everything in, but fortunately, there aren't a lot of components to cope with.
The entire thing consists of some wire, a 555 timer, two resistors, a capacitor, a button, and a (possibly unnecessary) transistor. You might need to remove some plastic from the mouse casing, and you will almost certainly need to bend the legs on the transistor and the button. And though the project's creator doesn't, you might want to put the 555 in a socket to protect it from heat damage during soldering. What's happening here couldn't be simpler. The 555 is basically modifying the left button voltage to have the frequency of a button being clicked rapidly.
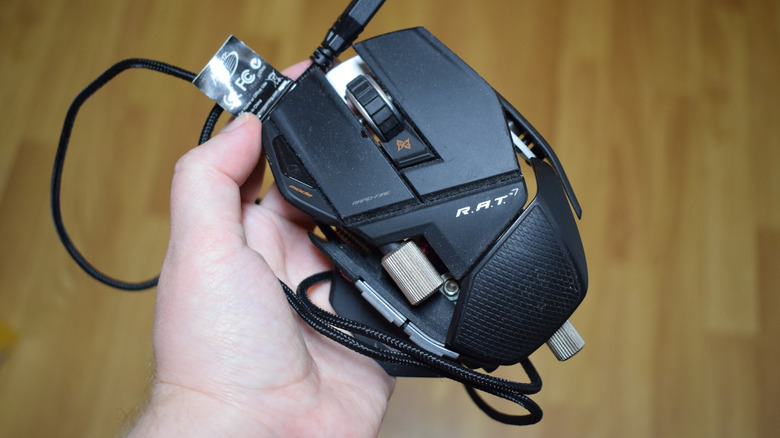
You'll also need to unpuzzle whether your left button circuit is high or low when clicked, so as with most projects you'll need a multimeter along with the usual soldering supplies. Or you could just buy a R.A.T. instead.
Make a completely different controller
Your computer's device manager or system profiler might identify your mouse as a "human interface device," but you probably think of it as simply a pointing-and-clicking device. Of course, shuffling a lump of plastic around and occasionally pushing a button is hardly the only kind of pointing and clicking out there, and mice can be transformed into several others. For example, the macropad (a small keyboard for executing macros) is normally the domain of the mechanical keyboard community, but YouTuber Solderking tore apart a gaming mouse and remapped its 12 macro keys onto a 3D-printed keyboard. Or you could just buy a fancy $50 version from Adafruit – some assembly required — when it's back in stock.
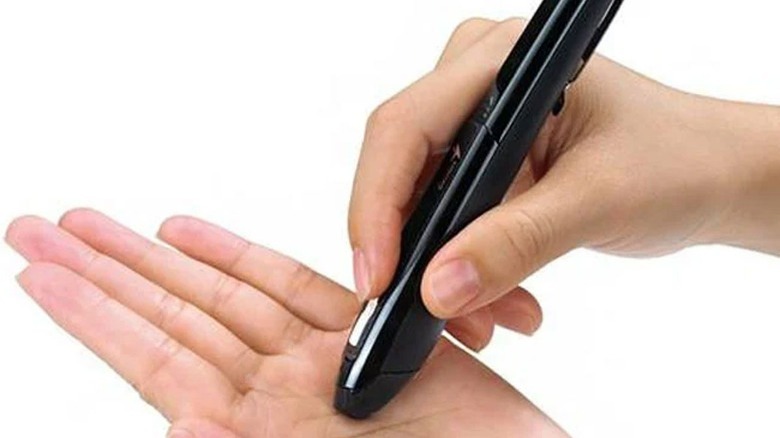
You could also spend $13.99 on a wireless pen mouse from Amazon, or build one yourself from a $10 mouse and $400 worth of your time, thereby contributing to the enormous pile of awkwardly designed projects already on in this DIY world of ours. But it's what makes the designs awkward that also makes this a worthwhile project.
This is basically a repurposing project, like so many mouse builds, with things arranged unusually for the pen form factor. Most of the projects keep at least some of the original PCB intact; it's typically cut so as to remove the section before and aft the sensor assembly. This leaves an awful lot of PCB to stuff in a pen, so they tend to be unwieldy.
But the PCBs in basic mice are fairly simple, and YouTuber Free Circuit Lab was industrious enough to desolder the components and reconnect them with wire, creating a much slimmer potential profile. Unfortunately, the gain is somewhat undermined by housing the pen mouse in a toy miniature guitar.
Get hands-on experience with micropositioning systems

The optical mouse's assembly keeps everything (sensor, lens, and clip) spaced appropriately for good optics, so many mouse hacks are built around this platform. This is simply because it's the optical sensor that brings value and interest to so many projects. But pointing devices aren't the only way to use the sensors, of course. In forums like Reddit or even Quora, you'll occasionally run across a conversation about all the possible uses of mouse innards, usually (if not always) including a few brain dumps around the idea of 2-D micropositioning.
Micropositioning systems, or, more specifically, the guidance portion of those systems, can largely be supplied by the components of an optical mouse since that's basically what an optical mouse is for. Commercial systems are typically limited to a resolution of roughly 0.1 µm. Since a 1600 dpi gaming mouse sensor has a resolution of around 16 µm, the average mouse might not be up to the task of serious micropositioning, but they're getting there. Logitech's HERO sensor operates at 25,600 dpi resolution, which is just under 1 µm. Of note is the fact that 25,000 dpi is just over 1 µm, so the extra 600 dpi was probably a marketing department demand.
The industrial 0.1 µm limitation isn't a limitation of the actual movement mechanism, amazingly, but stems from friction introduced by the guidance bit. So cheap optical sensors might never make the leap — unless we make some sort of magical leap in our understanding of advanced sensor science.
Expand your knowledge of optical mouse sensors
What, you are wondering, was all that about? Well, micropositioning drives a lot of mouse hacking, as well as one commercially successful (and quite fun) derivative, the line-following robot, and its experimental cousin, a hobbyist robot outfitted with a "ground-truth velocimeter." Experiments with line-following robots culminated in the Ozobot, launched in 2014 and packaged with logic that made it a fun and capable gadget for teaching kids coding, according to Eduporium. Ozobot is essentially a motorized mouse with a color sensor with a microprocessor that interprets the paths it follows. Soon after, line-following and other coding robots became very common, perhaps culminating in Colby the Code & Go Robot Mouse.
Around the time that Ozobot was being conceived, John Graham-Cumming was building on the work of Paul Mandel and others to convert an old PS2 mouse into a robot odometer. He got rid of the mouse's original microcontroller and replaced it with an Arduino Uno, and published his interface as an Arduino library for the MCS-12085 and MCS-12086 sensors.
Soon after, Tim from WildCircuits was working on an autonomous RC car and was handling odometry with hall effect sensors on the car's rear tires, which he found frustrating. After reading about Graham-Cumming and others, Tim installed an Avago ADNS-5020 sensor from an old mouse. He connected an Arduino Leonardo to the Avago chip via a Serial Peripheral Interface (SPI). He published his code, which provides access to the DELTA_X and DELTA_Y registers for movement info, a surface quality value, and a CSV dump of each complete frame of image data. Sigrok signal analysis software added support for decoding the ADNS-5020's protocol in 2015.
If you happen to have any of these three sensors, these project sites are great starting points.
Make an wild new sort of turntable

If an autonomous RC robot isn't your jam, never fear. One must always leave room for pure fun in one's maker exploits, and so it is with Doktor Andy's USB scratch controller, another ancient project from 2013, which he used for "live video scratching." Andy's concept was to build on an existing project that turned a hard drive into a turntable. This turntable used a pair of microcontroller-controlled op-amps, which reportedly didn't deal well with small, fast movements ...the stuff of which scratching is made. The solution, he decided, was using an optical mouse sensor to track the direction and magnitude of the hard drive platter rotation.
He experimented with adding various textures to the platter aiming to give the sensor a better chance at working with the surface than the original mirror-like platter finish. He settled on ordinary duct tape, which performed the best. From an old Logitech RX250 mouse, he harvested the bits he needed, including an A5020E sensor, for which he found an Arduino library. He added some other controls, built a nice-looking enclosure for his device, and uploaded a YouTube video of the turntable in action.
Make a needlessly complicated radio

A scratch controller is, at its heart, basically a jogwheel. And a jogwheel is just another implementation of a rotary encoder. So it's no surprise that another maker, more interested in listening to music than in making it, should have retrofitted a deceased stereo with a mouse-powered pushbutton knob. This is another lesson in reclaiming the bits of one device to use them as parts of another.
Dominic Buchstaller had a 1950s Greatz vacuum tube radio lying around in an irreparable state. He gutted and refinished the radio, then outfitted it with speaker, power supply, and amplifier. To this, he added a Raspberry Pi model A to serve, along with a Wi-Fi dongle, as a network audio player. He read and put to use all of the original controls using an Arduino, except for the selector dial. This rotated a large metal disc, and he tracked and processed the movement of this disk very much like Doktor Andy's turntable.
[Featured image by Clusternote via Wikimedia Commons | Cropped and scaled | CC0 1.0]
Make a microscope, break beam sensor, or seismograph
Transmogrifying a sensor into another kind of sensor can leave you unsatisfied with your work's quality perspective, as with converting an old mouse into a DIY microscope, or impractical from a cost perspective, as with the mouse-based break beam sensor. (You can, after all, buy an IR break beam sensor from Adafruit for less than $3.) But occasionally you come up with an idea that promises both cost-cutting savings and enough accuracy to make something magical.
This is the story of "frugal seismography" and how it's changing the field of seismography via a couple of devices, including one made from a repurposed mouse. The Raspberry Shake is a Raspberry Pi-based device designed to be just beyond consumer-grade seismographs, with a cost low enough to build out a worldwide network of seismographs. A couple of Kickstarters and five devices later, there are currently more than 1700 shakes online in 70 countries (via Raspberry Shake).
Compare this to Subir Bhaduri's "Seis-mouse-meter," a dirt-cheap device that uses an optical mouse sensor and a meter-long cantilevered PVC pipe to make a device that's reasonably sensitive and makeable by just about anyone. The project came from the 2020 edition of the annual Stanford Frugal Science class, in which students are paired with "global collaborators" to create frugal solutions to big science problems.
[Featured image by Ellin Beltz via Wikimedia Commons | Cropped and scaled | CC BY-SA 4.0]