How To Back Up Your iPad To iCloud

Although it is not a requirement to back up any of your devices, there are plenty of practical reasons why you should. Having an iCloud backup can make it easier to move all your data to a new iPad, save your files before sending it to a repair facility, or give you peace of mind before upgrading your iPad to the latest software.
Right out of the box, Apple already provides 5 GB of storage and an email account for free with its standard iCloud account, which can be used to store everything from your media files, notes, passwords, and other data. A crucial part of the Apple ecosystem, iCloud is the glue that brings all of its devices together, making it easier to share and access files between everything from your iPad to your Mac. However, Apple also offers a subscription to iCloud+ for people who have larger storage requirements.
For casual iPad users, you can avail yourselves of the basic iCloud+ plan which offers 50 GB of storage for only $0.99 per month. You can also opt for the 200 GB ($2.99), 2 TB ($9.99), 6 TB ($29.99), or 12 TB ($59.99) plans. Aside from additional benefits such as hidden emails, custom domain names, and other security features, iCloud+ bundles can also be shared with up to five family members. Before we proceed with how to back up your iPad via iCloud, here's a rundown of what it actually includes so you can be mindful of its limitations.
What iCloud Backup covers

According to Apple, the iCloud Backup includes several types of iPad data, including device settings, screen layouts, and how you've organized your apps. If you've made any interesting purchases, like Ringtones, you'll be happy to know these will be carried over. If you didn't sync native iPadOS features like Messages (text sent via iMessage, SMS, or MMS) or Photos to your iCloud, Apple mentions that it will store that information in your iCloud Backup instead. Lastly, Apple notes that iCloud Backup also covers data from third-party apps like social media and messaging. However, it notes that if the specific app utilizes iCloud Drive, it will be stored through iCloud, not iCloud Backup.
Unfortunately, there's still no official method to use the iCloud app on Android unless you use a browser. However, while you'll be able to take advantage of a lot of useful iCloud features, such as accessing your iCloud email and Calendar, using the Find My feature, and managing your Apple Photos, you will be barred from the benefits of native Apple features like Messages, Health, Wallet, and so on.
Thankfully, there are plenty of other cloud storage alternatives that you can use, which is great if you're not fully integrated into the Apple ecosystem. Some popular iCloud alternatives are Dropbox, Google One, and Microsoft OneDrive. However, if you're a true-blue Apple fan or just someone determined to still use iCloud for your iPad's backup needs, keep reading.
Steps to back up your iPad with iCloud

Before you start the backup process, you'll want to make sure that your iPad is hooked to a stable internet connection and a power socket. If either connection is not working properly, then your backup may experience issues. Once you're all set, here's how to get started:
1. On your iPad, launch the Settings app.
2. Tap your account name > iCloud.
3. Under Device Backups, tap iCloud Backup.
 Quina Baterna/SlashGear
4. Next to Back Up This iPad, toggle on the switch.
5. Wait for the Turning Back Up On pop-up to disappear.
6. Tap Back Up Now and wait for the backup to finish.
When iCloud Backup is enabled, it will take snapshots of your data, making it possible to easily restore it when needed. However, it is important to note that the automatic iCloud backup process will only start when your iPad is locked, charging, and connected to Wi-Fi. To know when the last time your iPad was backed up, visit the iCloud Backup section and look below the Back Up Now button.
 Quina Baterna/SlashGear
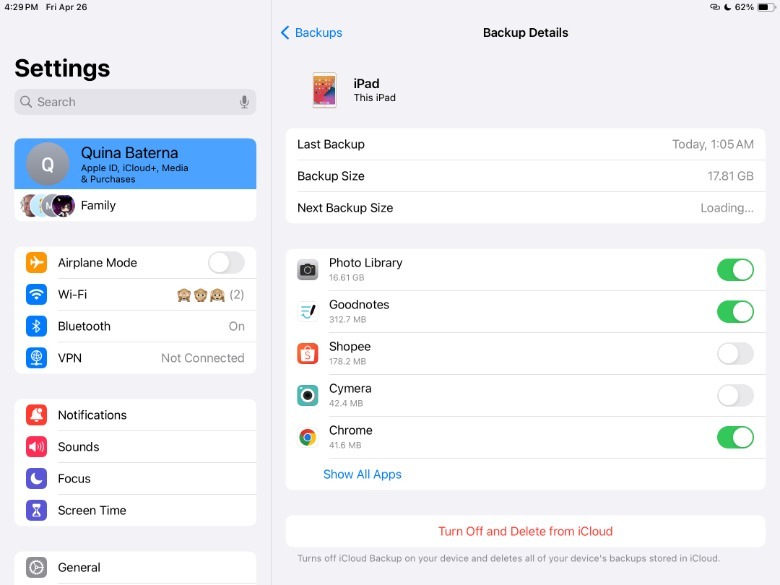
Lastly, to check your previous iPad backups, you can return to the iCloud Backup section and tap your iPad's name under All Device Backups. This will show the latest date and time of your backup, as well as the backup size. To turn off iCloud Backup and delete all previous versions of your iPad's backups on iCloud, tap Turn Off and Delete from iCloud.
How to manage iPad storage limits

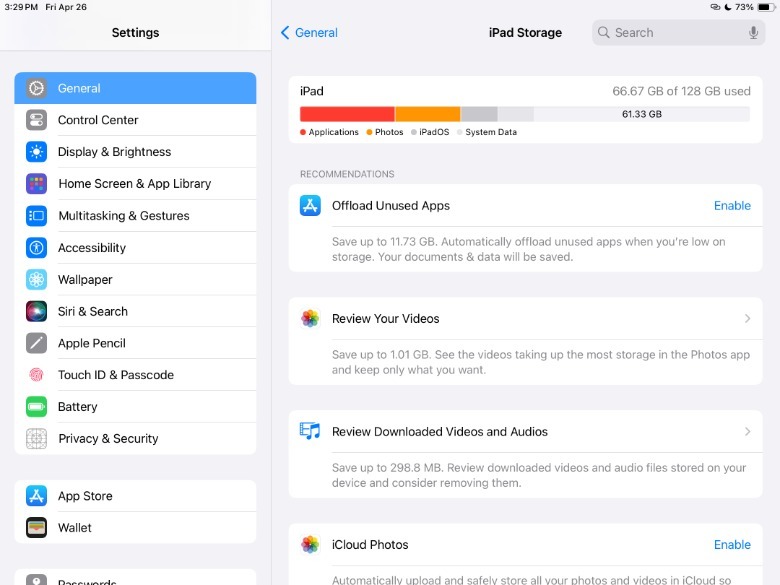
In some cases, even an iCloud+ subscription won't be enough for all your needs. While you can definitely invest in external storage, it will always be in your best interest to manage your storage requirements in general. Thankfully, the iPadOS makes recommendations specifically for your iPad to improve your storage management. To view iPadOS Recommendations, launch the Settings app and tap General > iPad Storage. Next to Recommendations, tap Show All. Then, you can follow the recommendations you are comfortable with, such as offloading unused apps, reviewing media files, and so on. (Note that according to Apple, you might not see Recommendations in some cases.)
 Quina Baterna/SlashGear
In addition, you might want to mass-delete a lot of unnecessary data, like cache and trash files. We have a nice guide for clearing app data on your iPad, especially for the apps that you would like to keep. On the other hand, clearing up trash files on the iPad is relatively more complicated than clearing up an Android phone or a Mac. Similar to the iPhone, the iPad doesn't have a standard Trash folder, but there are still ways you can find and delete trash files across its native apps, like Notes, Photos, and Files.
Among the many common mistakes that iPad owners tend to make include automatically downloading things you don't need or forgetting to delete them once you're done with them, such as movies, TV series episodes, or podcasts. With this, it's best to do a quick audit of your streaming or other content-related apps.