5 Tips & Tricks For Detailing Your Vehicle On A Budget
If your car has been looking bad, a little TLC can help. That said, professional detailing services don't come cheap. While prices vary from place to place, professional detailing can set you back anywhere from $100 for a partial job to $350 for a thorough cleaning. What's more, if you own a larger vehicle, like a pickup or an SUV, you'll probably have to shell out more money to get it detailed.
The good news is you can give your car a major facelift by going the DIY route. While this will still cost you some money, given that you'll need to purchase the necessary supplies and tools to detail your car, it's a lot less expensive than professional detailing. But remember that while a good detailing job can boost your car's value, one that's incorrectly done can be fairly expensive to fix. That's why we've compiled a list of tips and tricks to ensure you do it right while on a budget. Let's take a look.
Degrease and rinse the engine

While you want your car to look great on the outside, it's best to start the clean-up from the inside out, starting from the engine. Do this first so you can avoid hosing down any dirt and grime onto the already-cleaned body of the car. Before you start cleaning, though, make sure the engine is cool. Flipping the hood and letting the engine cool for a few minutes will help if your car has been running. Once the engine has cooled, remove the battery or negative terminal and cover all the electronic components in plastic bags.
You can now proceed to use an engine degreaser. Any affordable engine degreaser will do the job, but solvent-based ones are more effective. Although not as effective, water-based degreasers don't have as potent an odor as solvent degreasers, so they are a better choice if you're detailing your car in a closed space.
If it's been a while since you cleaned your engine, you might need to scrub off the grime and oil with a soft brush, but this isn't usually necessary. After letting the degreaser work its magic, you can carefully hose down the engine compartment. Be sure to use a low-pressure stream so you don't damage the internal components. Once all the grime is thoroughly rinsed off, use a rag to dry everything. When the engine bay is completely dry, remove the plastic coverings from the internal components, reattach the battery or the negative terminal, and close the hood. For more details, check out this guide on how to clean your engine bay step-by-step.
Vacuum and dust the interiors
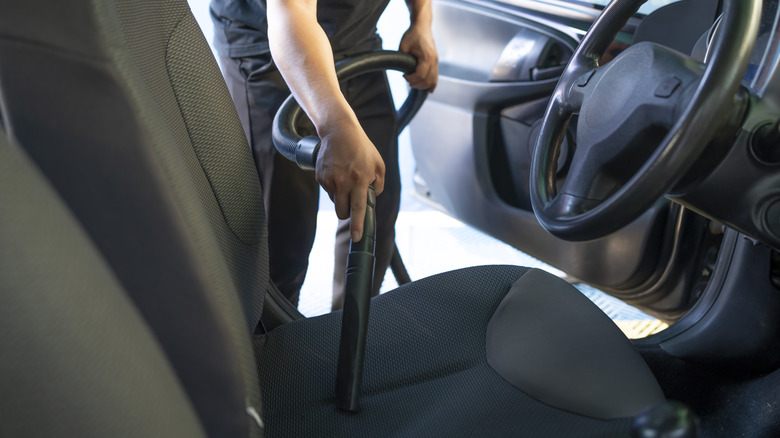
You're now ready to move on to the cabin. Begin the process by taking out the floor mats and dusting them outside. Once the mats are free of any large debris, use a vacuum to clean them thoroughly. A regular cordless vacuum is all you need for this. After the mats are vacuumed, place them to the side. Take out any removable accessories that you might have installed in your car, like cup holders, and give them a good wipe-down.
You can now vacuum the interior of the car. Be sure to vacuum between the seats, around your cupholders, and under the seats. If the seats have any stains, a DIY solution of one cup of vinegar, dish soap, and a gallon of hot water can help. Use a soft-bristled brush to work the solution into the stain; when it fades, use a rag to dry the area.
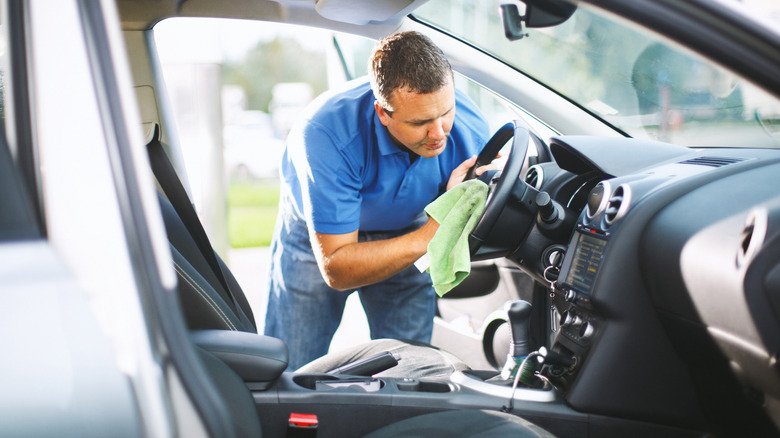
After you vacuum and remove any stains in the interior, use a cheap microfiber cloth to dust hard-to-reach areas, as well as the dashboard and console. You can further disinfect the dashboard with anti-bacterial wipes, but avoid using any potent chemicals that could strip away the coating. Be sure to also use the anti-bacterial wipes on other high-contact parts of the vehicle, like the steering wheel and door panels. After you finish cleaning the interior, place the floor mats back.
Wash the car, clean the glass, and headlights
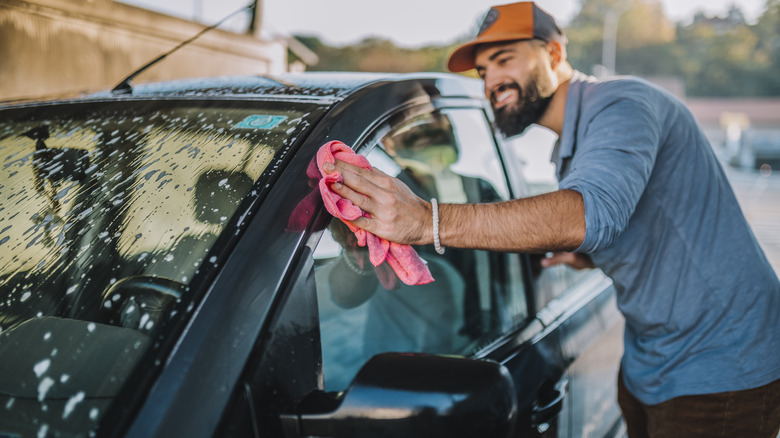
The next step is to wash the exterior of your car. Do this after you've cleaned the cabin so you don't have to stand on a wet surface while vacuuming and dusting the interior. A hose with a spray gun can help you remove any loose debris and dust. Once that's done, apply some car soap or universal cleaner to the car's body with a sponge. Let this soak for a few minutes to loosen any stubborn grime, then rinse it all off. When cleaning the exterior, be sure to go from the top to the bottom so the dirty water doesn't flow onto the already cleaned parts of the car.
If the exterior has any bird droppings, avoid scrubbing it off. Instead, soak the droppings in lukewarm water with a rag cloth and wipe them off when they loosen. Likewise, if you notice dried-up tree sap on the exterior, a little WD40 can help. Washing the exterior should have cleaned the glasses, including the windshield and the windows, to some extent. But if you see any streak marks or fingerprints on the glass, wipe the surface (exterior and interior) with a glass cleaner and microfiber cloth. The headlights are another area of your car that might require some attention. The good news is that you can use a simple DIY solution made of vinegar and baking soda to clean the headlights.
Clean the wheels and the tires
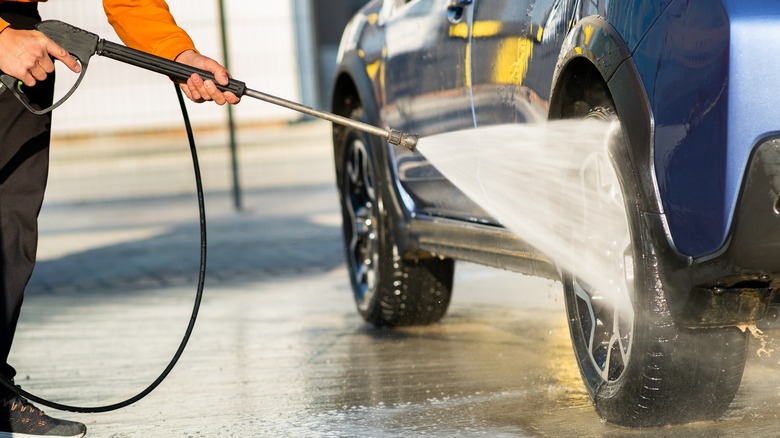
Your car's tires and wheels often accumulate the most amount of debris and dirt, so be sure to clean them thoroughly during the detailing process. Before you get started, however, purchase the right wheel cleaner for the type of rims you have so you don't damage the finish. Keep in mind that some auto products can do more harm than good to your car. In this case, chrome rims will require a chrome cleaner, while aluminum rims need a different formula. Both types are available online as well as with offline retailers, so shop around until you find a budget-friendly product.
Once you have your supplies, remove the hubcaps (if applicable), wash them with soapy water, and dry them. Then, spray on some wheel cleaner and brush away any debris that might have accumulated on the rims. Be sure to use a brush with soft bristles to avoid damaging the finish. You can also spray the tires with an all-purpose cleaner before you wash them. Once the debris is dislodged, use a hose to rinse each wheel and tire thoroughly.
After you've rinsed the wheels and tires, check each one for any remaining dirt build-up and repeat the process if necessary. If you're satisfied with the results, dry off the wheels and tires with a microfiber cloth and place the hubcaps on. You can use a tire protectant at this point to keep the rubber in good shape.
Use spray sealant to protect the car from the elements
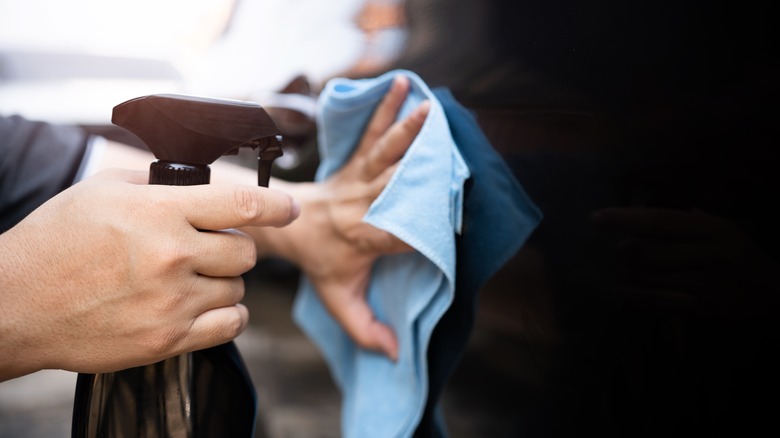
Spray sealants are inexpensive and fairly easy to use, even for a beginner. Don't skip this step, as spraying a sealant onto the body will protect the paint and add a glossy shine to the surface.
When your car's surface is completely dry, hold the spray sealant a few inches away from the surface of your car and spray it on evenly, making sure to cover all the surfaces. Let it rest for a few minutes, and buff the surface with a clean microfiber cloth to complete the process. If you want to create a glossier finish or want additional protection from the elements, repeat this step after a few hours.
A sealant can help protect the exterior of your vehicle for a few months if used correctly. That said, even with the sealant on, a big mistake to avoid is not washing your car enough. To keep the finish looking shiny, make sure to wash your car at least once a week.