6 Useful Features In Microsoft Clipchamp You Might Be Missing
When it comes to video editing software for Windows, most people's go-to apps are Adobe Premiere Pro, DaVinci Resolve Studio, and PowerDirector, and for good reason. Premiere Pro is popularly known for its VR editing, audio quality enhancement, and third-party plug-ins for increased productivity. DaVinci Resolve Studio features noise reduction, remote color grading, and multiple GPU support. PowerDirector is rich in video and AI body effects and is great for live streaming.
While they are potent editors, you'd have to shell out plenty of dollars to get them. If that's not the route you want to go on and you prefer a more straightforward, beginner-friendly app, then Microsoft Clipchamp is worth checking out. It already comes preinstalled on Windows 11 devices, so you won't have to go through the hassle of downloading and installing software. The best part is that it's mostly free, and you can get away with not having to upgrade to the Premium version.
If this is your first time hearing about Clipchamp, and are interested to know about its lesser-known features, we've compiled a list of six of the most useful ones you should check out right now.
Screen and camera recording
You'd normally only see screen and camera recording options on video conferencing apps like Google Meet, Zoom, and Microsoft Teams. However, Clipchamp actually also doubles as a recording tool that allows you to record yourself, your screen, or both. This makes things a lot more convenient, as you won't have to make the recording on one app, and then switch to another app to edit it. You can just do both on Clipchamp.
Here's how to do so:
- On the Clipchamp home screen, select Create a new video at the top.
- Go to the Record & create tab on the left side panel.
- Select your preferred recording tool. Options include Screen and camera, Camera, Screen, and Audio.
- Set the camera and/or microphone you want to use.
- (Optional) If you choose Screen and camera, adjust the size of the camera preview on the bottom left corner.
- Once you're ready, press the recording button.
- If you're recording your screen, choose the window you want to share. Alternatively, switch to the Entire Screen tab to record your whole screen. Then, click "Share." It's important to note that during the recording, Clipchamp will be minimized and you won't be able to see your camera preview.
- Start your presentation.
- To finish the recording, press "Stop sharing" or the recording button.
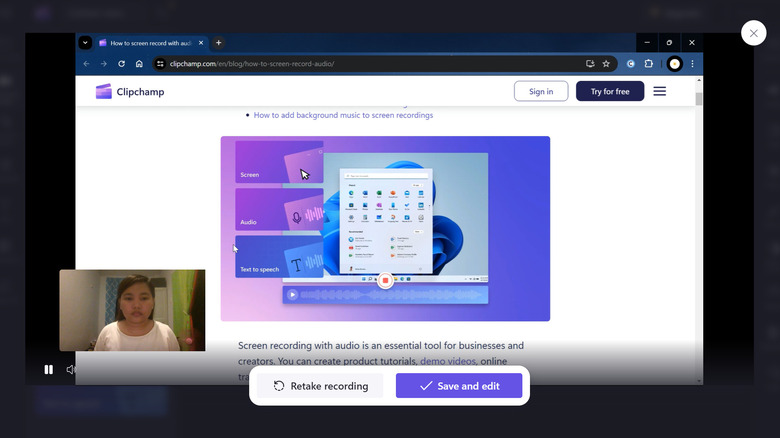
- Play the preview of your recording.
- Select Save and edit to proceed to the Clipchamp video editor. Alternatively, press "Retake recording" if you wish to start over.
- In the video editor screen, select your camera preview and move it to your desired location. You can also resize it to your liking.
- Edit the recording as needed.
- Click Export to save your edited recording.
Speaker coach
Not everyone's a natural at speaking and presenting. If you feel like you could use some improvement in that department but don't have anyone to practice with, perhaps Clipchamp's Speaker Coach can help. It's exactly as its name suggests: it coaches you on how to become a better speaker and presenter by offering feedback on certain aspects of your speech, such as pace, intonation, and language used. To access Speaker Coach, follow these steps:
- Create a new video in Clipchamp.
- Press Record & create on the left side panel.
- Choose how you want to record yourself.
- On the recording screen, select Coach.
- Click "Turn on Speaker Coach."
- Start the recording by pressing the red button in the middle.
- Record yourself as if you're presenting your piece.
- Stop the recording.
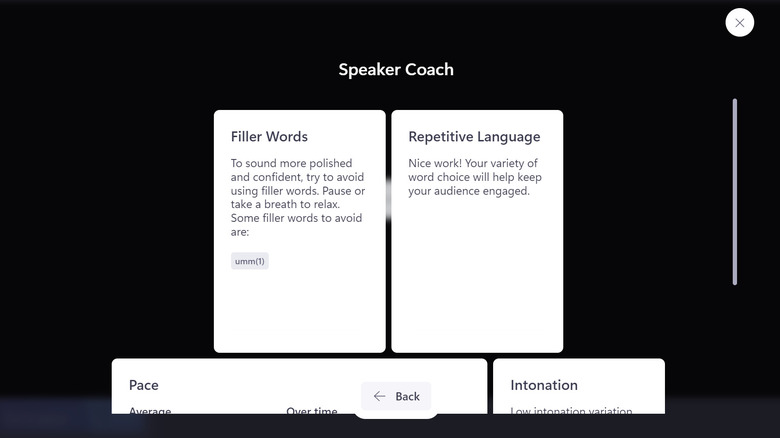
- Select Review Speech to see your speaker coach analysis. This analysis is composed of four sections:
- Filler Words: Lists all the filler words you've used in the recording and how many times you said each one. You can also read some tips on how to avoid filler words.
- Repetitive Language: Identifies any repetitive words in your recording.
- Pace: Calculates your average words per minute and whether it was just right or needs improvement.
- Intonation: Tells you whether your tone was good or low and how to improve it.
- Close the Speaker Coach to return to the recording.
- Press "Save and edit" to save your recording or "Retake recording" to redo it and try implementing the tips from the speaker coach.
AI auto compose
Like many of its peers, Clipchamp offers a host of video editing tools to help transform your photos and videos into more polished content. But what if you're out of ideas or not too skilled to make it on your own? In that case, consider using Clipchamp's auto compose feature. It's powered by AI technology, and is designed to create a video for you. Here's how to use it:
- On the home screen, click Create a video with AI.
- Enter a name for your video.
- Add your photos and videos.
- Press "Get started."
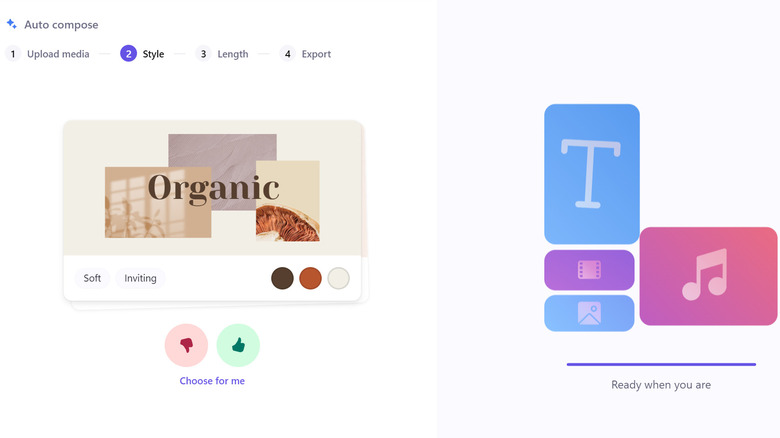
- Click the thumbs-up or down icon on the styles you like. Alternatively, press "Choose for me" to let AI select the style automatically.
- Once Clipchamp finishes reviewing your media, hit "Next."
- Choose your preferred aspect ratio (Landscape or Portrait) and video length if applicable.
- Press the play button on the preview screen to see how your video turned out.
- (Optional) If you need to add/delete media or change the style, head over to the Upload media or Style tab.
- Click "Next" to proceed.
- (Optional) To change the background music, select Music and pick one from the available tracks.
- (Optional) To change the font, press Font and choose one of the other styles.
- If you're still not a fan, click "Create a new version." Clipchamp will generate another video for you.
- (Optional) To continue editing the video to your liking, select Edit in timeline. This will open the video in the Clipchamp editor, where you have creative freedom.
- Once you're happy with the output, select Export.
- Press "Save to your computer" to save it as an MP4 or send/share/upload it to one of the other options (e.g., Google Drive, YouTube, TikTok).
Silence remover
If you're frequently working with recorded videos like podcasts, training guides, and video conferences, you're probably sick and tired of manually finding and deleting unwanted silent clips. It's just too time-consuming, and you'd rather focus on editing the parts that matter more.
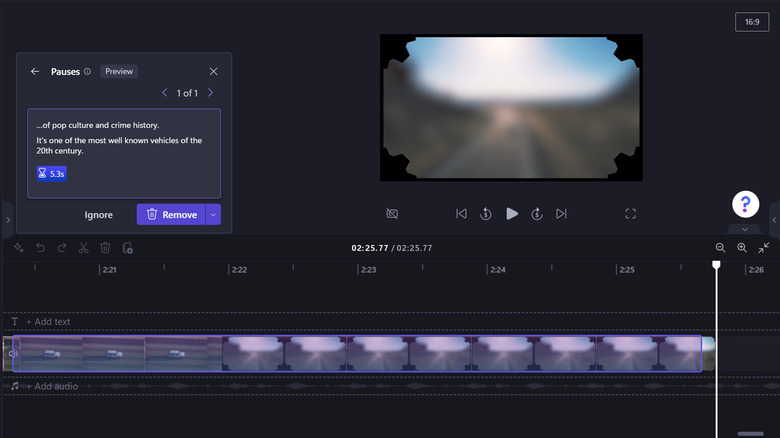
Fortunately, Clipchamp can check this task off your to-do list with its silence remover feature. It automatically detects pauses that last at least three seconds and outputs a list of these clips for you to review and remove. Here's a step-by-step of how to use silence remover:
- On the home screen, press Create a new video.
- Import your video to Clipchamp.
- Drag and drop it onto the timeline in the middle.
- Press the sparkle icon in the upper left corner of the timeline.
- Select Trim & tidy.
- Allow the tool to transcribe the audio.
- (Optional) Change the language to match your video's spoken language.
- (Optional) Turn on Filter profanity to replace offensive words with asterisks in the transcript.
- Hit "Transcribe." The tool will then analyze your video and find the pauses. Once that's done, you'll see a list of the suggested clips for removal.
- Click Review on the individual clips to see if you do want to remove them. These clips will show up in purple for easy identification.
- Press "Remove" to delete the clip from the video. Otherwise, select "Ignore" to keep it.
- Save the edited video by hitting "Export," and choosing your preferred video quality.
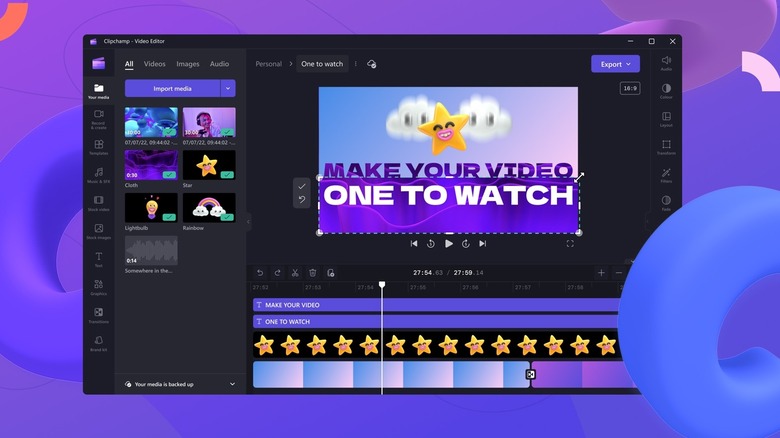
TikTok templates
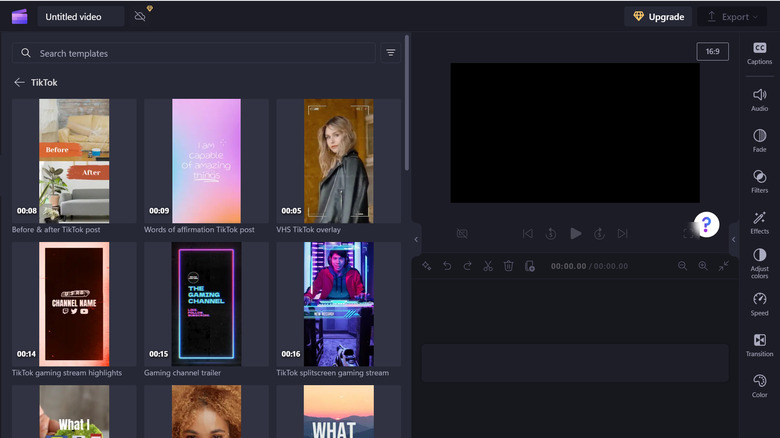
It might not seem like it, but Clipchamp is one of the best ways to edit your TikTok videos. Aside from its extensive content library, basic editing tools, and fancy transitions, the app also comes complete with TikTok templates. Some of the templates you might be interested in using include gaming stream highlights, what I eat in a day, and before and after posts. To use a TikTok template in Clipchamp, here's what you need to do:
- Open the video editor by clicking Create a new video.
- Click the aspect ratio on the upper right corner of the screen.
- Change it to 9:16 to switch the orientation to portrait.
- Navigate to the Templates tab.
- Scroll down to "TikTok."
- Pick your template from the available options. If you don't find what you need, you can use one from the Templates web page.
- Press Add to timeline to start editing the template.
- Go to "Your media" on the left side panel.
- Import your photos and/or videos.
- Replace the media on the template with your own by simply dragging and dropping your photo/video to the space occupied by the default media.
- Make any other necessary adjustments.
- Click Export.
- Select your video quality.
- (Optional) Upload the video to TikTok as a draft by connecting your account to Clipchamp.
Autotranscription

Certain videos, such as online courses, talk shows, and documentaries, are better paired with transcriptions. However, transcribing entire hour-long videos manually is a hassle, and if you opt for audio-to-text services, you might end up paying a hefty sum. A practical solution to this dilemma is to use the auto-transcription feature in Clipchamp. Not only does it provide you with an SRT file you can download but it also supports over 140 languages, including Arabic, French, Spanish, and Macedonian. Follow these steps to transcribe your videos in Clipchamp:
- Create a new video.
- Drag and drop your video into the app. Alternatively, record yourself using one of Clipchamps recording tools.
- Add your video to the timeline.
- Click Captions in the right side panel.
- Press Transcribe media.
- In the Transcribe with AI dialog box, set the language to the one used in the video.
- Check the box for Filter profanity and offensive language to use asterisks in place of such words in the transcript.
- Press Transcribe media to start the transcription.
- Scroll through the transcript generated.
- Edit the text as needed.
- Press Download captions to save the SRT file.
- (Optional) Turn off captions in the video if you don't want to add the transcript to the video before saving it.