Getting Started With Arduino: A Guide For Beginners
Fascinated with electronic projects and want to build your own? Arduino boards can most definitely help with that. These microcontroller boards are designed to send and receive data to and from the components connected to their pins. This functionality makes them excellent platforms for all sorts of electronic projects; from simple systems like an indoor plant watering system and automatic garbage bin, to more advanced applications like drones and autonomous systems.
Arduino systems, when compared to Raspberry Pi, are much more straightforward to work with. You won't have to put together extra accessories like monitors and keyboards, or deal with the hassle of picking and installing an operating system. Instead, you simply open the Arduino software (which can be installed on your Windows desktop or accessed online), write your code, and upload it to the board. Then, you're basically set. If you're looking to get started with Arduino and need a nudge in the right direction, this guide is for you.
Gathering the materials needed
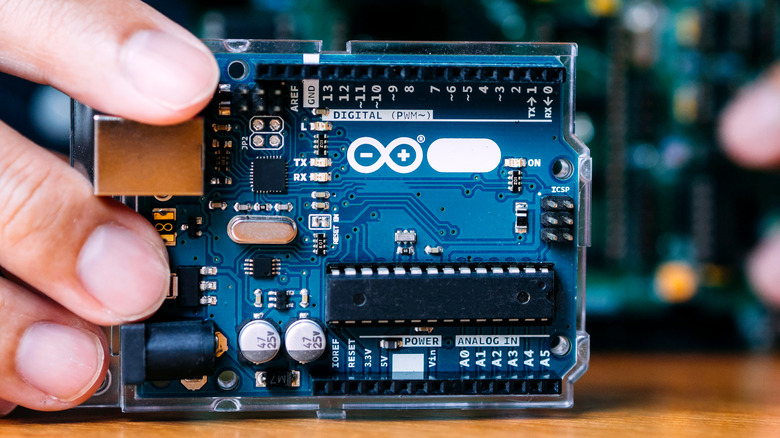
To get started with learning Arduino, you'd first need to have the essential hardware materials on hand — at the top of the list is the Arduino board itself. There are several variations available in the market, such as the UNO, Nano, and Mega; which primarily differ in size, GPIO pins, and computing power. The classic UNO is the ideal choice for beginners, as it's versatile enough for both beginner and advanced projects.
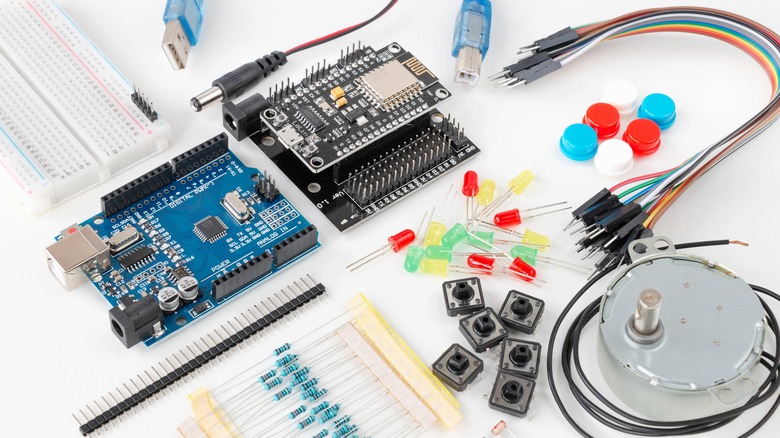
Aside from the board, you'll also need various electronic components and accessories to connect to your board. This typically includes resistors, push buttons, and sensors, as well as jumper wires and solderless breadboards. You can buy these items separately from shops like Adafruit and SparkFun, but getting an Arduino starter kit is more convenient.
Most already come complete with the UNO board and a bunch of components like LEDs, a temperature sensor, a DC motor, a servo motor, and an LCD module. Then, there's the matter of the power supply. If you're simply tinkering and testing your board and components, you don't need to worry too much about this. You can simply power up the board by connecting it to your computer. However, if you intend to develop a standalone project, then you'll need a dedicated power supply with an input voltage of 7-12 volts (for UNO boards).
In addition to the board and components, it's important to get your hands on some tools for your Arduino kit, too. You'll typically solder pin headers or wires to components, so a soldering kit should be a priority. You'll also want a multimeter, especially when troubleshooting power issues. Other tools that can come in handy include a wire stripper, a precision screwdriver set, and soldering helping hands.
Understanding your electronic components
Now that you have your materials ready, it's time to familiarize yourself with how to use them. Let's start with the UNO board.
You'll typically only work with a few of its main parts: the USB port, power port, reset button, and pins. The USB port is for connecting to your computer to upload the code, while the power port is for connecting to a power supply. Meanwhile, the reset button is just that — to reset the board to its initial state.
As for the pins, the UNO features 14 digital pins for both input and output use, six analog pins for input only, three ground (GND) pins, a VIN pin for connecting to an external power supply, two power output pins (3.3V and 5V) for powering your circuit, and a reset pin for connecting a push button to reset the UNO in case you can't use the one on-board. Save for the ports, everything else is labeled, so you won't have any trouble locating what you need.
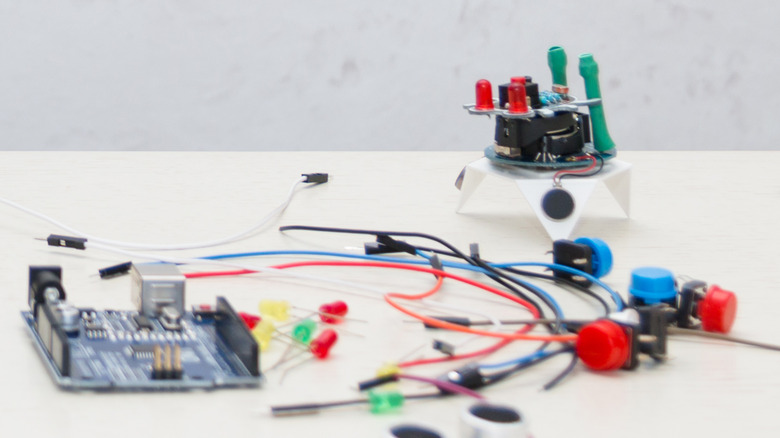
Now, moving on to the sensors. They fall into two categories: input and output. Inputs are components that send data to the Arduino. They're either digital (only sends HIGH or LOW signals) — think pushbuttons and PIR motion sensors — or analog (sends a range of data) — think temperature sensors and potentiometers. Outputs, on the other hand, are components that receive data from the Arduino. This includes LEDs, LCD modules, servo motors, and buzzers.
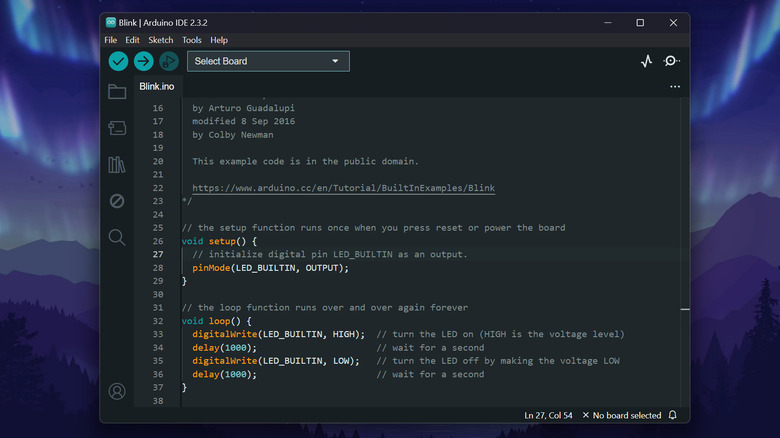
When building Arduino projects for beginners, you'll usually need both input and output sensors. However, you can come across some simple projects like the Blink example that only require an LED output. These basic output-only tutorials are excellent starting points to better understand sensors.
Familiarization with the Arduino IDE
With the hardware front covered, let's start discussing the software perspective. For your Arduino to work as you intended, you'd need to program it, and that's where the Arduino Integrated Development Environment (IDE) comes into the picture.
It's an app primarily used for writing the code and uploading it to your board, but it can also come in handy for other purposes, such as updating your board's firmware and displaying and plotting serial data received or printed by the Arduino. The IDE is available in a browser and a desktop version, but for simplicity's sake, opt for the desktop app as you can use it offline, and it doesn't require an account, unlike the online IDE.
Although the IDE can be intimidating at first glance, you'll actually only press a couple of buttons for most of your projects. One of the frequently used functionalities is File > Examples, where you'll access built-in example sketches and examples from libraries you installed. You'll also use Sketch > Verify/Compile to check for errors in your code, Sketch > Upload to upload the code to your board, Sketch > Include Libraries > Add .ZIP Library to import third-party libraries, Tools > Manage Libraries to install and uninstall libraries, and Tools > Serial Monitor to open the Serial Monitor.
To get started with using the IDE with your UNO, here's what you need to do:
- Download and install the software.
- Launch the IDE.
- Connect the board to your computer.
- Go to Tools > Board.
- Select Arduino Uno.
- Navigate to Tools > Port.
- Click on the port your board is connected to. This is typically labeled as "Arduino Uno."
- Write your code or upload one from the built-in examples.
Practicing sketch creation
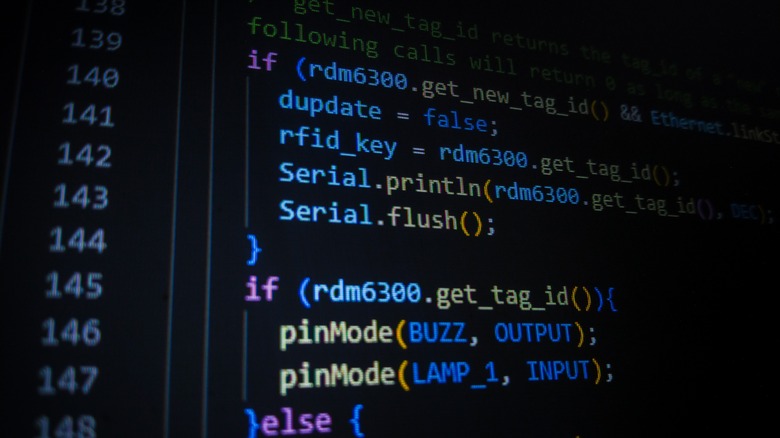
Probably the most complex part of working with Arduino is creating the sketch, a.k.a. writing the code. The Arduino programming language uses a variant of the C/C++ language, so if you're already familiar with that, you can readily understand Arduino sketches. However, if you're entirely new to programming itself, here are some fundamental elements you'll mostly use as a beginner:
- Structure:
- void setup() – Where you add configurations like pin modes, serial communication, and variable initialization.
- void loop() – Where you'll write the main program.
- #include – Includes installed libraries in your code. You can't use a library's functionalities without including the library first.
- #define – Assigns a name to a fixed value, often used when labeling pins.
- if – Creates conditions that, when set to true, will run the code inside it.
- else – Typically partnered with if. When the if condition is set to false, the else statement is then executed.
- Functions:
- pinMode() – Assigns a pin as either an INPUT, OUTPUT, or INPUT_PULLUP.
- digitalRead() – Reads the output (HIGH or LOW) of a digital pin.
- analogRead() – Reads the output (0 to 1023) of an analog pin.
- digitalWrite() – Sends a HIGH or LOW signal to a digital pin, common for activating an output component.
- analogWrite() – Sends a value between 0 to 255 to a digital pin. Frequent use cases for this include controlling the angle of a servo motor, the brightness of LEDs, and the speed of a DC motor.
- Variables:
- int – For assigning or storing an integer value to a variable. You'll typically see this when reading values from a pin, such as int temp = analogRead(A0).
- float – Similar to int but for numbers with decimals.
You can read up on other elements in the Arduino Language Reference.
Building a simple project
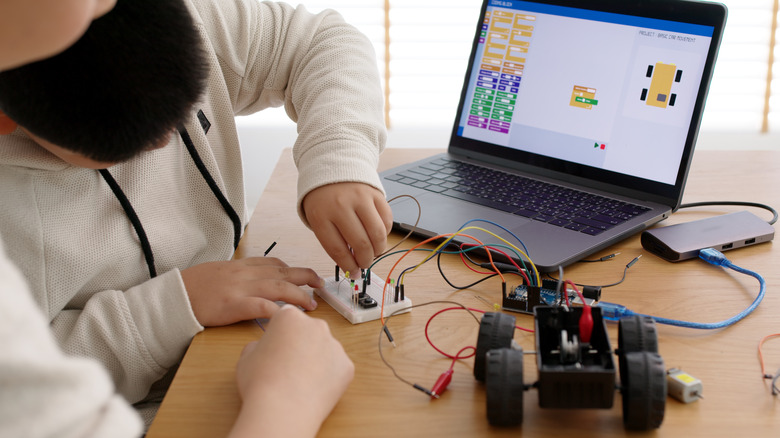
You now have your materials and a foundational understanding of the hardware and software requirements of an Arduino project. However, simply knowing the concepts won't do much. To truly learn Arduino, you have to move beyond theory and start building. After all, nothing can beat hands-on experience.
For your first project, start small using one of the built-in examples in the Arduino IDE. The most beginner-friendly sketch here is the "Blink," which simply makes an LED blink. You won't need to wire up anything yet as the sketch uses the on-board LED. After learning how the Blink sketch works, you can move on to the other examples that use external components. Most of the sketches already provide wiring instructions for the components. They're also complete with comments to help you better understand how the code operates.
If you're looking for more fun and practical projects, there's a host of sites at your disposal. First up is the Arduino Project Hub. The projects here are neatly categorized into areas like Environment monitoring, Robotics, and Home automation. You can also filter the projects by difficulty (from Easy to Super hard) and type (e.g., Getting started, Tutorial).
Hackster is also packed with Arduino projects for all levels. For your convenience, the site even allows you to browse through projects that only use an Arduino UNO. Another great resource for finding Arduino projects is Instructables. Although you can't filter the projects by difficulty or board used, it provides thousands of projects to choose from, some of which have YouTube videos that go with the tutorials.