5 Tips & Tricks For Creating Time-Lapse Videos On Your iPhone
We may receive a commission on purchases made from links.
Shooting a good-quality time-lapse from your iPhone isn't very difficult. All you have to do is learn how the recording mode works, get some practice and, remember the tips and tricks we have for you. Time-lapse videos are a great way to artistically capture the flow and pace of life. These types of videos allow you to compress action that occurs over minutes or hours into a short video that looks extraordinary. To do this, your iPhone captures images at regular intervals of about one or two frames per second (FPS). Then, it plays them at a higher frame rate, such as 30 FPS.
Now, the frame rate at which your iPhone records a time-lapse depends on its length. If the video is less than 10 minutes long, the Camera app captures two FPS. This means that when you shoot a time-lapse for a minute, your iPhone records 120 frames, and when played at 30 FPS, the footage results in a four-second time-lapse video (15 times faster than normal). When you shoot beyond 10 minutes, the iPhone switches to capturing one FPS, which means that the longer you shoot, the faster your time-lapse will seem to get.
Now that you know how time-lapse works, let's help you shoot fantastic videos on your iPhone.
Stability is key to creating stunning time-lapse videos
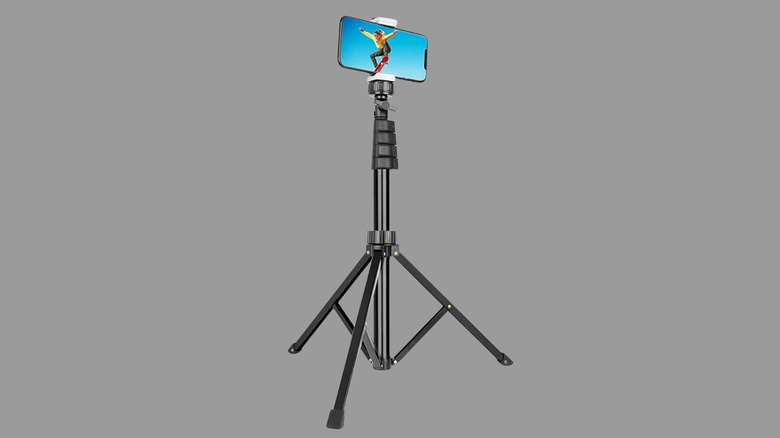
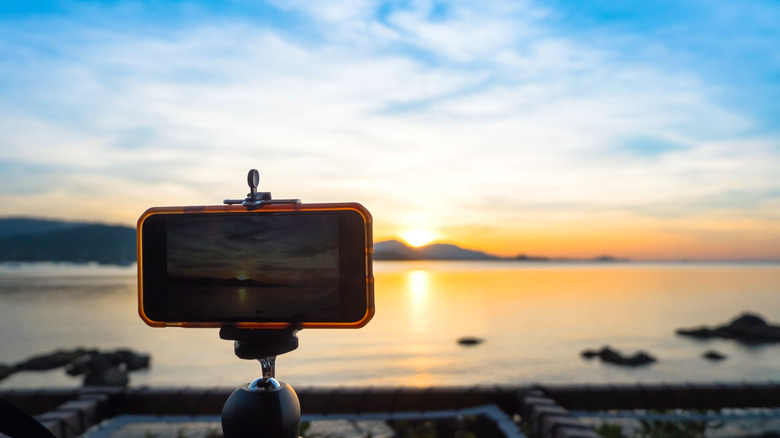
To record sped-up footage, your iPhone captures images regularly and compiles them to create an illusion of movement. For this to work well, the device must stay perfectly still throughout the recording. It is next to impossible to record a good looking time-lapse video while holding the camera in your hands, as even a slight shake or vibration can ruin the effect. To eliminate shakiness and ensure consistent framing, use a tripod with a tight clamp.
The good news is a regular entry-level tripod can cost just a few bucks, and for that price, you'll see a world of difference in your videos. For instance, the $19.98 Sensyne 62-inch phone tripod gives you enough flexibility to shoot stable, cinematic time-lapse videos in a variety of different heights. Alternatively, you can look for a surface against which you can rest your iPhone, like a wall, bench, water bottle, or backpack. For people who like to record their road trips, getting a suction mount can help create aesthetic videos while driving. An important pro tip is to carry a power bank, especially if you plan to record long videos, as they will likely take a toll on your phone's battery.
Check out the five must-have iPhone accessories for photographers to help up your quality even more.
Slow or gradual movements make great time-lapse subjects
Anything that moves slowly or gradually is an excellent subject for time-lapse videos. You might have seen those beautiful videos of a bud blooming into a flower, or a shot of clouds racing across the morning sky. Both are appropriate examples of how time-lapse videos show the world in a new way.
Similarly, you can create astounding time-lapse videos at a busy intersection or a street corner, with pedestrians or the flowing traffic as your subjects. Sunrise or sunset, combined with some scenery in the foreground, is always an excellent subject for such videos. Nowadays, social media creators often use such footage to showcase time-taking tasks in short-form videos. Moreover, any scene that contains prolonged events that might be difficult to notice in real-time or simply be boring becomes exciting if you record it as a time-lapse.
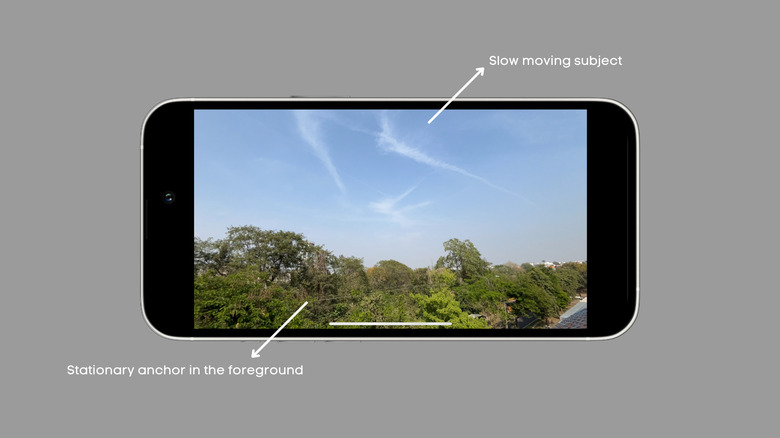
A pro tip here is to include an anchor subject in the foreground or the background (with the help of grid lines) to enhance the relativistic movement of the subject, making the video more appealing. For instance, if you're shooting a time-lapse of the clouds, make sure to include some stationary elements in the frame, such as trees, mountains, or grasslands. Some other tips to snap better photos on your iPhone include switching to the ultrawide lens while recording landscapes.
Experiment with focus/exposure
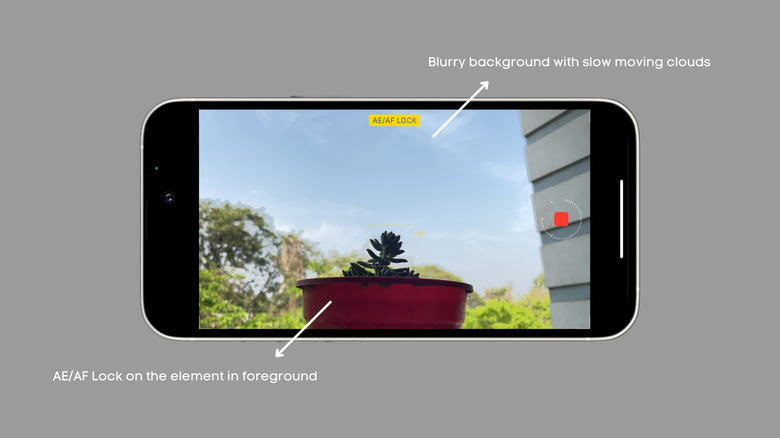
While there are various tips and tricks for shooting cinematic-quality videos on your iPhone, locking the exposure and focus can greatly impact the video footage. Before recording a time-lapse, take a few moments to observe the scene and determine the subject. Once you've figured that out, mount your iPhone on the tripod, place it on a steady surface, and then press and hold on the desired part of the frame (on your iPhone's screen) to lock the exposure and focus. Doing this maintains consistent lighting throughout the footage and makes the subject look sharper.
If you wish to take your footage to the next level, the trick is to experiment with the exposure. By default, your iPhone maintains an average exposure throughout the frame, ensuring that all the areas are equally visible. If the frame contains contrasting elements (bright and dark areas), lowering the exposure might draw more attention to the well-lit ones, giving your timelapse a dramatic touch. You can also use the exposure slider to brighten up dark scenes, like a camping site, or when shooting indoors. In the image above, we've locked the focus and exposure on the subject and increased the exposure a bit.
Edit your timelapse using your iPhone
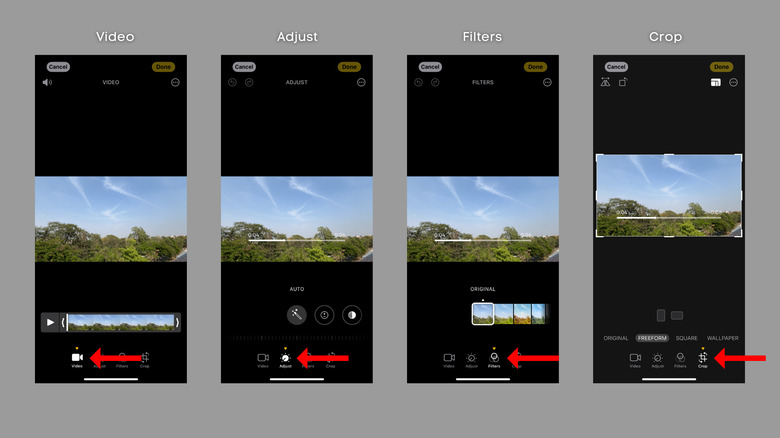
Your iPhone is not only capable of recording time-lapse videos. It can also help you edit iPhone videos like a pro. Simply open the video in the Photos app and hit the Edit button at the top right. On the following screen, you'll get plenty of options to adjust your time-lapse, much like you can to a regular video. Some options include Video, Adjust, Filters, and Crop.
The first option, Video, helps you pick the best moments from your time-lapse and save them as a new clip. All you need to do is review the clip using the scrubber and adjust the length using the arrows at the beginning and end. Then there's Adjust, which lets you tweak the highlights, shadows, contrast, brightness, saturation, and other similar properties. So, for instance, if your clip can use some brightening or it would look better with more vibrant colors, head to the Adjust menu and make the required changes.
If you aren't sure about changing the values in the Adjust menu, you can still use the video filters, such as Vivid, Dramatic, or Mono. If framing is off, you can use the Crop menu to straighten your video or change its aspect ratio.
Use third-party apps
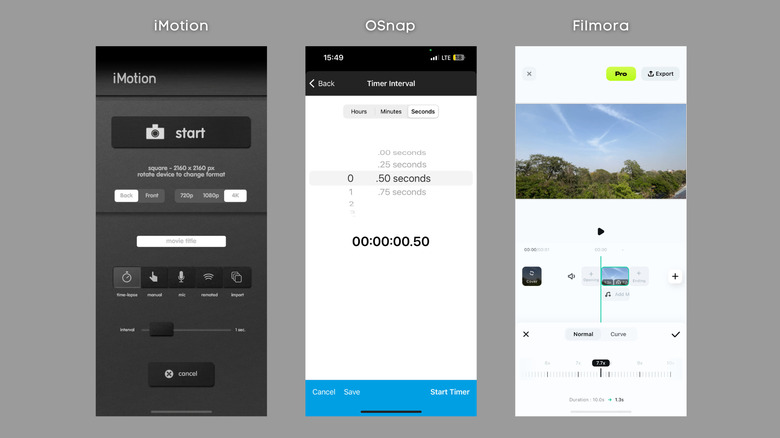
The iPhone's included camera app shoots excellent time-lapses, but it's not perfect. One of the iPhone camera app's limitations is that it cannot record a sped-up video in 4K. Further, you can't change the frame rate (or smoothness) while recording a time-lapse. As we mentioned in the beginning, the device determines the FPS based on the length of the time-lapse. You can't modify the exposure or focus after you've started recording either, which may force you to reset and start again. While these things might not bother regular users exploring the feature, there are options out there.
Several third-party apps allow iPhone users to record time-lapse videos in 4K resolution. For instance, iMotion by Fingerlab can record ultra HD videos at specific chosen time intervals, a clear advantage over the native iPhone app. Fortunately, both features are free to use, too. Similarly, OSnap by Justin Cegnar also allows you to control the frame rate (although the free version only supports 720p resolution). Finally, there are video editing apps such as Filmora, which allow users to speed up regular videos by up to 10 times, resulting in pretty cool sped-up footage similar to time-lapse videos.