Lenovo Users: How To Remove Superfish Adware
The steps to remove Superfish from your Lenovo laptop are relatively straightforward. The first thing you'll want to do is to uninstall Superfish. This is an app, so you'll be removing it the same way you remove any app. Once you're done there, you'll need to remove the Superfish-installed self-signed root certificate authority (CA). This is the most important part of this removal sequence, and it's a step you should not skip. It's easy to do, and you SHOULD do it right now.
First, to uninstall the Superfish software – here called "Visual Discovery", you'll have to go to Control Panel and... do the uninstalling. This process is the same as uninstalling any other piece of software on your computer.
Find Control Panel -> Uninstall a Program
Select Visual Discovery -> Uninstall
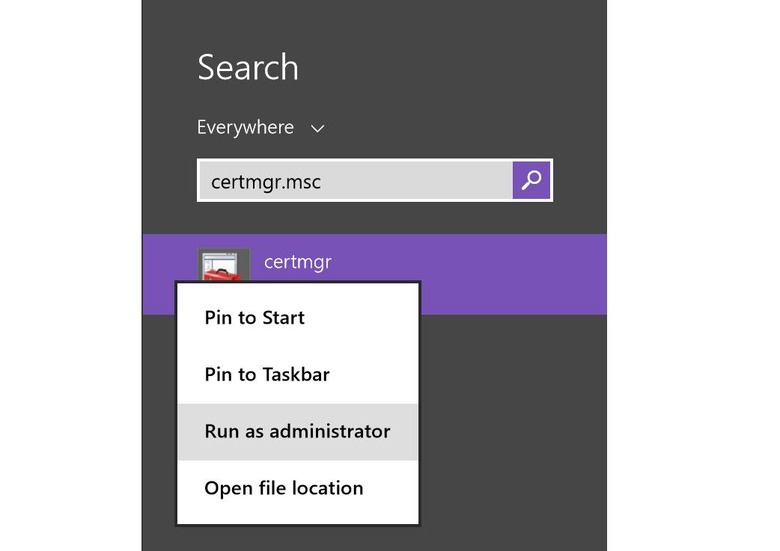
This second bit comes courtesy of Steven V. Vaughan-Nichols from ZD-Net. To do this bit, you'll need to start by finding Microsoft Management Console and run it as an administrator.

If you do not know how to run Mmc.exe with administrator's credentials – if you don't know what that means – we suggest you seek out the help of a more Windows-savvy friend or colleague.
Once Microsoft Management Console is open, do the following:
1. Go to File -> Add/Remove Snap-in
2. Pick Certificates, click Add
3. Pick Computer Account, click Next
4. Pick Local Computer, click Finish
5. Click OK
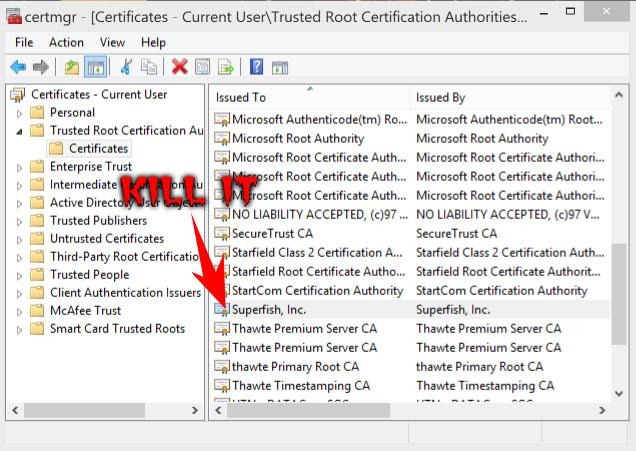
6. Find Trusted Root Certification Authorities -> Certificates
7. Find the one issued to Superfish and delete it

From there you should be good. You might also want to clear your cache on all browsers. There may be a bit of dead fish in the seams.

There's also a Superfish CA test site out there right now made by Filippo Valsoda. That's a name you might remember from a very similar test site from nearly a year ago, one testing for Heartbleed.
Lean more about Superfish in the timeline below.
