Arduino Nano Vs. Uno: What's The Difference?
Learning electronics? Then, chances are you already know what an Arduino is, or at the very least, you've heard of it. After all, it's among the most popular electronics platforms available in the market today, and when you look up DIY electronic projects online, you'll see developers and enthusiasts using some variation of Arduino board for their creations.
This widespread popularity is pretty much justified, though. After all, the Arduino boards come with a host of benefits that make them an excellent choice for a wide array of applications. They feature analog pins for reading analog components (e.g., potentiometer, flex sensor, pH sensor), use a programming app available on major desktop operating systems, and are relatively affordable and easy to source (there are plenty of Arduino clones you can get for cheap, and they generally operate the same way).
However, not all Arduino boards are created equal, and it's important to choose the right one for your project. If you're on the hunt for the perfect board, then you've probably come across the Uno and Nano. They're two of the most frequently used Arduino variations, but they serve different purposes. To help you decide which one to get, let's look at the Nano and Uno's primary differences.
What is Arduino Nano?
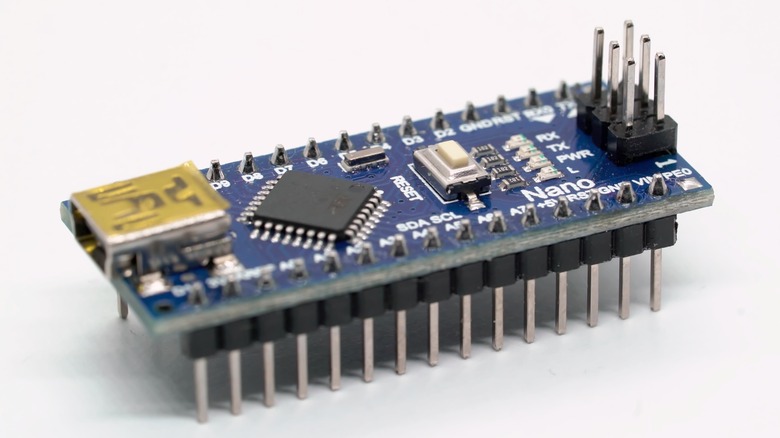
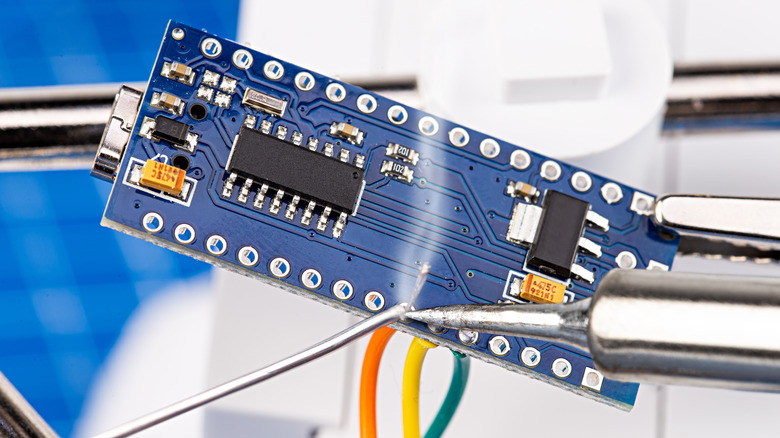
Introduced in 2008, the Arduino Nano is a microcontroller board that belongs to the expansive Arduino Nano Family. This consists of different variations of the Nano, such as the Nano ESP32, Nano 33 BLE, and Nano 33 IoT. The Arduino Nano itself is the most basic and oldest of the group, and just like its many iterations, it's designed to work primarily with breadboards, making it a great tool for prototyping.
From the software perspective, working with the Nano is no different from working with other Arduino boards. It's programmed using the Arduino IDE, so most of the sketches built into the software can be tested with the Nano. The board also operates at 5V, similar to most Arduino boards. While relatively old, the Arduino Nano is still priced at $24.90, which is a significant price leap from the more recent and more affordable Nano Every that you can get for $13.70.
What is Arduino Uno?
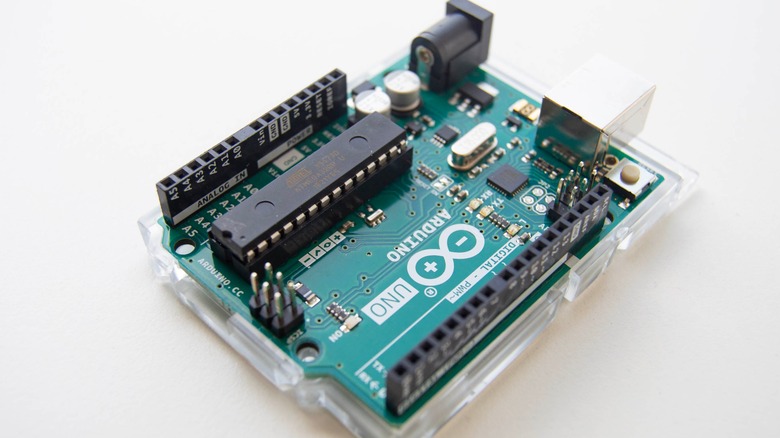
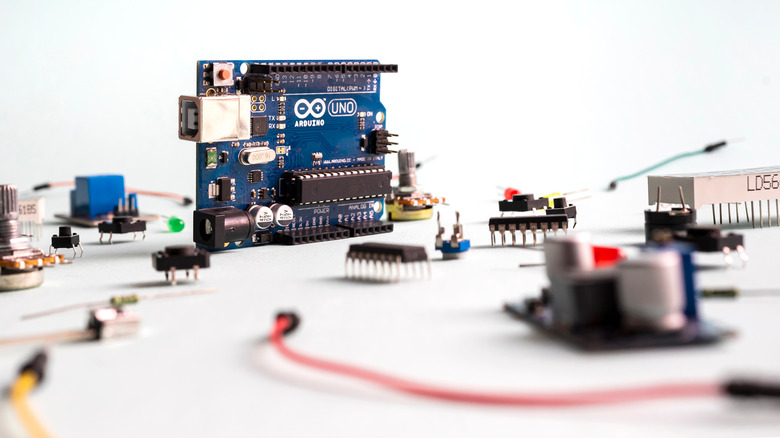
Another microcontroller board developed by the Italian electronics company, the Arduino Uno essentially serves as the face of the brand. It tops the list of the company's most popular boards, and it also has the most documentation and tutorials published by both Arduino itself and its thriving community of third-party enthusiasts. This abundance of resources, and the fact that the board is typically included in Arduino starter and student kits, make the Uno particularly appealing to beginners.
While the board's name might suggest that it's Arduino's first hardware creation (after all, Uno is Italian for "one"), it actually isn't. What Uno represents is a different milestone that the company was set to celebrate: the much-awaited release of the Arduino IDE version 1.0. Both the board and the software have undergone several revisions since their introduction in 2010 and 2011, respectively. In fact, the original Uno has already been retired. That said, we'll be focusing on the Uno R3 in this discussion instead.
Size
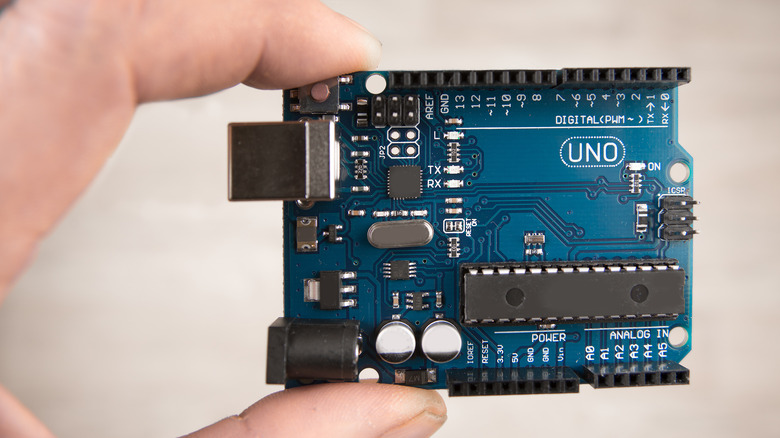
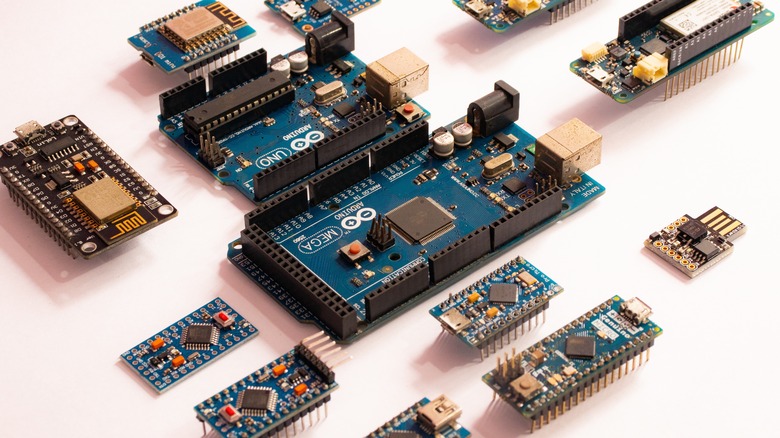
One look at the Nano and Uno, and you can immediately tell how significantly different they are in terms of size. The Nano, just as its name suggests, is the smaller board between the two, and interestingly, also the tiniest ever produced by Arduino. It comes in a light seven-gram weight, with dimensions of 45 mm (length) by 18 mm (width). The Uno, on the other hand, is much bigger. It weighs more than three times the Nano at 25 grams and has a larger footprint, with a length of 68.6 mm and a width of 53.4 mm. With its ports, the Uno stands at a total height of 15.4 mm, although with all the I/O pins soldered on, the Nano is a little bit thicker at 18.6 mm.
When it comes to actual applications, this striking difference in size makes the boards ideal for separate types of projects. The small form factor of the Nano comes in handy for building portable and compact electronic projects, such as a smart IR thermometer, RGB goggles, and a universal TV remote. Meanwhile, the Uno is more suitable for general-purpose projects. As long as what you're building doesn't need to be squeezed into a tight case, you can likely use an Uno board for it. Some beginner-friendly Arduino Uno projects you can get started with include an ultrasonic piano, a gesture-controlled system for VLC, and an automatic plant watering device.
Pinout
Considering that the Uno is much larger than the Nano, you might think it comes with a lot more pins. However, their pinouts are surprisingly similar in most aspects. First off, they have the exact same number of digital pins. These 14 pins can be configured as normal input and output pins or as their specialized functions:
- D0 as RX for receiving TTL serial data
- D1 as TX for transmitting TTL serial data
- D2 and D3 as external interrupts
- D3, D5, D6, D9, D10, and D11 as PWM outputs, handling values from 0 to 255
- D10, D11, D12, and D13 as SPI communication pins, used as SS, MOSI, MISO, and SCK respectively
- D13 as the built-in LED
The analog input pins on the two microcontroller boards are also somewhat similar. They both have 10-bit resolutions that can read values of up to 1024, and their A4 and A5 pins both double as SDA and SCL pins for I2C/TWI communication. However, the Nano offers a slight advantage as it has two more analog input pins than the Uno. But it's also worth noting that only six out of the eight analog pins on the Nano can be used as digital pins, compared to all six of Uno's analog pins. Additionally, the Uno features two extra pins, a duplicate of the A4 and A5 pins (meaning, they're internally connected), that you can dedicate for I2C/TWI communication.
A few other distinctions you'll notice between the two boards' pinouts are that the Nano has more reset pins (two versus one on the Uno), fewer GND pins (two versus three), and no IOREF pin, which the Uno includes. You'll also notice that the Nano's pins are male since it's designed to be placed on a breadboard. Conversely, the Uno's pins are female.
Power source
Both the Arduino Nano and Uno can be powered via their integrated USB connectors. This automatically supplies regulated 5V power to the board, allowing you to use any USB-supported power source like your computer, power bank, or standard 5V wall charger. However, the types of connectors on the two boards differ. While the Nano comes with a mini-B USB, the Uno has a USB-B instead. That means the power cables are not interchangeable.
Another common way to power these two boards is through a battery connected to their dedicated VIN pins. This pin is consistent across both models and can handle voltages ranging from 6 to 20V. However, for optimal performance, it's best to use an external power supply with a voltage between 7 to 12V. Speaking of power pins, the Nano can also use its 5V pin as an input. Just supply a 5V regulated input directly to this pin, and you're good to go. Unfortunately, it's generally not recommended to do the same on the Uno as you'll risk compromising your board. But although you can't use the 5V pin as a power source for the board, the Uno does come with another power option: its on-board barrel jack. You can connect a 6 to 20V external power supply here, but the recommended voltage and current ratings are 7 to 12V and 1A only.
Processor
The Arduino Nano and Uno are equipped with very similar processors (the chip that essentially serves as the brain of the board). The Nano features an ATmega328, while the Uno sports an ATmega328P. As they're both 8-bit AVR RISC-based microcontrollers, they share many technical specifications. They have the same clock speed of 16MHz, SRAM of 2kB, EEPROM of 1kB, and flash memory of 32kB. However, one notable difference between the Nano and Uno is the size of their bootloaders which affects their processor's usable flash memory. On the Uno, only 0.5kB of flash memory is used up by the bootloader, unlike the 2kB used on the Nano. This means the Uno has more memory available for sketches, allowing you to upload bigger and longer codes.
Aside from this, what makes the Uno's processor stand out from the Nano's is its low power consumption. This is thanks to Atmel's picoPower technology, designed to use a true 1.8V supply, an ultra-low power crystal oscillator, proprietary techniques for reducing leakage current, and a brown-out detector (BOD) disabling feature, all of which minimize the chip's overall power usage. Another major difference between the processors of the Nano and Uno is that the Uno's is removable. If you somehow damage it, you can readily pull it out of the DIP (Dual In-line Package) socket and replace it. The Nano's processor, unfortunately, is soldered directly to the board, so replacement isn't as quick and simple. It's generally easier to just buy a new board than attempt a repair.
Which should you buy?
As you may have noticed, the Arduino Nano and Uno come with several similarities, and conveniently, they can be used almost the same way. You can program them with the same software, and many sensors are compatible with both boards. However, there are specific instances when you might prefer one over the other. For instance, if you're new to Arduino and electronics in general, the Uno is often the recommended option. It's backed up by a massive assortment of tutorials and step-by-step project guides, all of which you can easily find with a quick Google search. Plus, when you opt for standard Arduino starter kits (which is one of the best ways to get started with Arduino), you already get an Uno board and its USB cable — no need to shell out more money to buy both separately. The Uno is also powerful and versatile enough to handle a wide range of projects, so as you level up and become more comfortable with difficult tasks, you can continue using the Uno without needing to upgrade (unless otherwise necessary for your project).
On the other hand, the Nano is the more practical choice when your project has size restrictions. Since it's Arduino's smallest board, you generally won't have a hard time fitting it into a compact casing. The same is true for projects requiring lighter microcontroller boards, such as a drone and bionic hands. The Nano is significantly lighter than the Uno, so its weight is pretty much negligible. The Nano is also a better choice when prototyping since the male pins make it attachable to the breadboard, eliminating the need to lug around separate components and extra wirings. Additionally, you'd want a Nano if you need more analog pins or have budget restrictions.