How To Secure Your Data Before Sending Your Apple Device For Repair

Is your MacBook's keyboard experiencing phantom typing? Is your iPhone's screen suddenly ignoring your taps and swipes? Or maybe your Apple Watch refuses to charge for no apparent reason. Whatever you're experiencing, the solution is likely the same: send the device to Apple so the company's technicians can figure out what's wrong and, if possible, fix it. Before you hand over your device, though, you need to back up your data.
That's not just my opinion, mind. Apple advises its customers to back up their devices before sending them in for repairs, and the reason is simple: the company isn't responsible for any data you lose during the repair process — which, in some cases, involves simply sending the customer a replacement device and shipping their original one off to be refurbished or recycled. Quite obviously, if you receive a replacement device, it'll be a blank slate. The only way to get all of your apps, files, and similar content back, is by loading a data backup created from your previous device.
The responsibility to create that data backup is entirely on you. The good news is that you don't have to find and manually save every piece of data — Apple includes backup features on its devices, whether you're looking to ship in your brand-new MacBook, an aging iPad, or your daily driver iPhone. You have two options — local and cloud backups — though I typically advise users to create one of each, particularly if your device contains important school, personal, and/or work data.
What is means to secure your Apple data

What does it mean to secure your data? Put simply, when you give your device to Apple for repair — whether in person at a Genius Bar or through the mail — you're handing it over to strangers. Those strangers, in the majority of cases, will need to be able to able to access your device as part of the repair process, and that means having access to all of your personal data ... unless you secure it beforehand. Securing it is as simple as backing all of that data up ahead of time, and then wiping the drive so that whoever gets access to the physical device will not have access to any of the data that used to be on it.
No matter how nonchalant you feel about the data currently on your iPhone, iPad, MacBook, or Apple Watch, I recommend that you follow this common procedure. It may feel like none of that data is particularly important or sensitive, but you'd be surprised what someone can learn about you by stitching together seemingly random, disparate information — not to mention, it's possible that there's something on your device that you forgot was there, whether that's a sensitive personal picture or the login credentials for your work VPN.
iCloud vs. local data backups explained
Once upon a time, the only way to backup your Apple product was by saving a copy of it to a local drive, typically an external hard drive. Fast-forward to 2011 and Apple changed things in a big way with the introduction of a now-commonplace online service called iCloud, which is a key part of Apple's modern ecosystem. Part of iCloud's purpose involves tying together your various Apple devices via a singular account, making it easy to sync content from your MacBook to your iPhone and vice versa, not to mention passively backing up photos, videos, files, and app data. iCloud can also be used to store a backup of your entire Apple device, which eliminates the need to save the (possibly massive) backup to a local drive.
The option to backup your devices locally never went away, however, which leaves you with a big question: should you create a local or online backup? My suggestion is that you take the time to create both. Why? Your data is precious, and once it is gone, it is gone forever. While the backup process is generally reliable and foolproof, it's always possible that something could go wrong — maybe your hard drive dies at the worst possible moment, for example, taking your backup with it. In that case, you'd be happy to have an iCloud backup too, right?
How to back up your Apple data to iCloud
If you need to back up an iPhone or an iPad, iCloud is a very simple solution while local backups via iTunes remain an option. If you're planning to send a Mac in for service, however, you should view the cloud platform as more of a syncing service and Time Machine — which saves a local backup to a physical drive — as the full and proper backup option. To back up your iPhone or iPad to iCloud, you need to:
 SlashGear
- Open Settings.
- Tap your name.
- Tap iCloud.
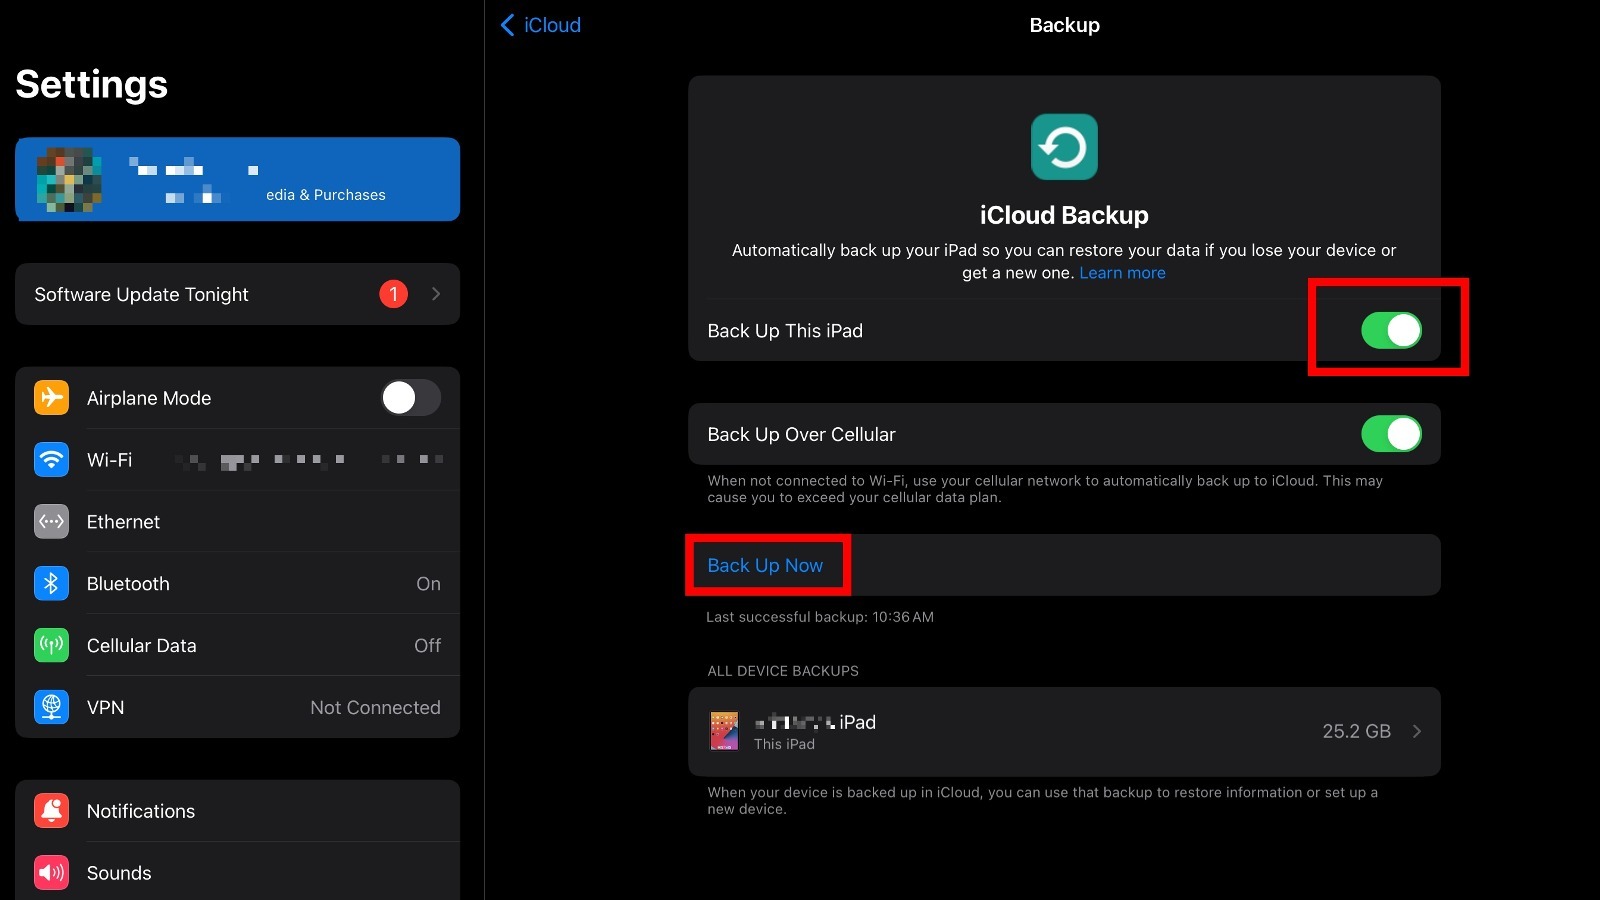
- Tap the iCloud Backup option under Device Backups.
- Toggle on the switch to the right of "Back Up This iPad."
- Tap the Back Up Now button to create a backup immediately.
Wait for the backup to finish. This could take quite some time depending on how much data is on your device. You can use the same iCloud menu to check how much free space your iCloud account currently has, as well as any existing device cloud backups, their size, and the dates when they were made. You may find that iCloud Backups were already turned on and that a recent backup of your device has already been saved to your Apple account.
If you're a Mac user, you can sync your local data to iCloud Drive using a similar process:
- Open System Settings.
- Click your name.
- Click iCloud.
- Click Options next to iCloud Drive.
- Click the check box next to Desktop & Documents Folders, as well as Mail and any other installed apps you want to back up to iCloud.
Wait for your Mac to upload the selected data to iCloud — this could a while depending on your internet speed and how much data you're backing up. Once the iCloud backups are finished, I recommend you create a local backup of your device, particularly if it's a Mac desktop or MacBook.
How to create a local Mac backup with Time Machine
While an iPhone or iPad user can skip creating a local backup if they insist, I always advise Mac owners to create a local backup of their laptop or desktop using Apple's included Time Machine software. The reason is that iCloud backups on Mac function more as a syncing service for your files and app data, and while that may be enough for your needs, it's always possible that something will be missed in this backup process. Time Machine, in comparison, copies your entire Mac drive, including system files, ensuring that nothing is missed — and that you'll still have your data even if you accidentally delete a file from iCloud using one of your other Apple devices.
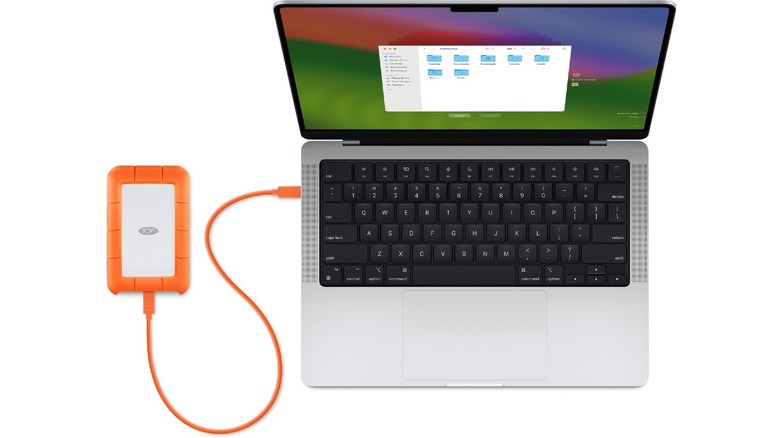
To create a Mac backup using Time Machine, you need an external HDD or SSD that has a large enough capacity to store all of the files on your Mac. Time Machine will alert you if the drive you connect doesn't have enough space for the backup. Make sure there's no other data on the external drive. Once you have this drive available, connect it to your Mac via a USB port, then you need to:
- Click the Apple logo in the top left corner of the screen.
- Click System Settings.
- Click Time Machine.
- Click "Add Backup Disk."
- Select the USB drive you connected.
- Click "Set Up Disk."
- Select the Erase button if prompted; this will erase anything on the drive.
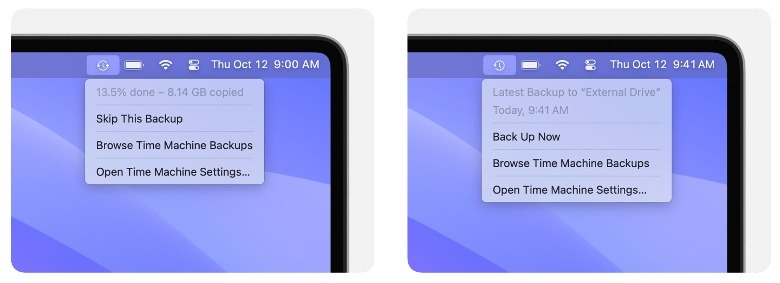
- Click the clock icon that appears in the menu bar on the top right of the screen.
- Select the Back Up Now option.
The Time Machine menu in the menu bar will show the backup progress with the percentage of data backed up. Wait for the backup to reach 100%, at which point the Mac will be fully backed up to the external drive. I suggest you create this backup the day before wiping your machine and sending it to Apple for repair, noting that any data created after the backup may be lost.
How to create a local iPhone or iPad backup on Mac and PC

Apple has made it very simple to create local backups for iPhone and iPad owners, assuming you also have a Mac. It's possible to create a local backup using a Windows PC, as well, though in that case you're still required to download and use iTunes to complete the process. Regardless, creating the local backup doesn't take too long, and I recommend doing so for the peace of mind it offers.
Mac users can create an iPhone or iPad backup with the following steps:
- Connect the iPhone or iPad to your Mac using a USB cable.
- Open Finder on the Mac.
- Click "iPhone" or "iPad" in the left-side pane.
- Click the General option at the top of the Finder window.
- Select the option that reads: "Back up all of the data on your iPhone to this Mac."
- Click the Back Up Now button.
- Wait for the local backup to be created.
For Windows PC owners, creating a local backup of an iPhone or iPad is slightly different:
- Download and install iTunes if it's not already available.
- Connect the iPhone or iPad to your PC using a USB cable.
- Launch iTunes.
- Click the iPhone button in the top left corner of the app.
- Select Summary.
- Click Back Up Now.
- Wait for the backup to finish.
Windows users will be able to find their iPhone and iPad backups using iTunes — you'll need to click Edit in the iTunes menu bar, select Preferences, and then click Devices. You'll see the list of each local backup that is saved on the PC's hard drive. Quite obviously, the PC must have enough free space on its drive to store the iPhone or iPad backup, otherwise, you'll see an error message warning that storage is too low.
What happens if you don't back up your Apple data?

While Apple and just about anyone else you ask — including me — will warn you to back up your device data before sending it to Apple, no one is forcing you to. Assuming you follow the other required procedures, such as removing the device from your Apple ID and Find My, removing the device's password, and removing authorization for the device to make digital content purchases, Apple will proceed with the repair even if you didn't bother to back up your files and other data.
Keep in mind that even if Apple doesn't replace the device with a new or refurbished unit, it is still possible that the drive will be wiped and reinstalled with a fresh copy of macOS — and if Apple's technicians proceed with that, your data will be erased in the process. Apple won't be able to help you get your data back if you find that it was erased during the repair, and its response will be little more than a shrug if you complain about any data loss. Though it may seem like a hassle, I always advise Apple device owners to make backups before any servicing takes place — and while you're at it, you should get into the habit of regularly backing up your devices in case you lose them or they're stolen at some point.