How To Send Screenshots From Your Nintendo Switch To Your Phone
The Nintendo Switch is unique among gaming systems because it has a dedicated button (called the Capture Button) solely for capturing screenshots and videos; quickly press the button to snap a screenshot and hold down the button to record a video clip. The content is automatically saved on either the console's built-in storage or on the microSD card inserted in the console, depending on your settings. You can manually move and delete the saved media files whenever you'd like.
Early in the console's life, screenshots could only be directly shared to Twitter and Facebook — if you wanted them elsewhere, you had to use the convoluted workaround of transferring the images to the microSD card, removing the card, and then inserting it into a computer to transfer the content manually. The company added additional content management options in later software updates, however, including the ability to wirelessly transfer screenshots to a smartphone using a somewhat antiquated and tedious (though incredibly simple) QR-code-based system.
How to initiate the wireless screenshot transfer process on a Switch
While many modern gadgets have a dedicated mobile app that facilitates content transfers, Nintendo went with the old-school ad-hoc wireless network method. You're likely familiar with this process if, at one point in time, you owned a digital camera that featured direct wireless transfer support. Put simply, your Nintendo Switch is able to broadcast its own wireless signal (like a Wi-Fi hotspot, essentially) that your smartphone connects to the same way it would a Wi-Fi network, granting it direct access to the files you want to transfer. To initiate this process, you need to:
- Turn on your Nintendo Switch.
- Go to the Home screen.
- Select Album in the list of icons below the game thumbnails.
- Press the A button to select the screenshot you want to transfer.
- Press the A button again to open the Sharing and Editing menu.
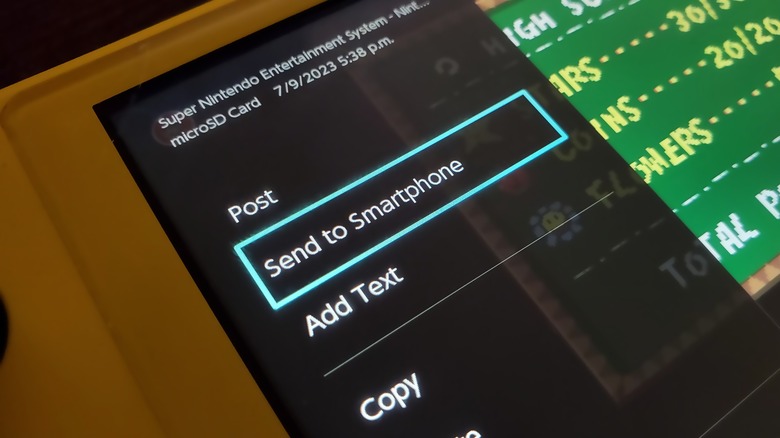
- Scroll down and select Send to Smartphone.
- Select Only This One to transfer only the selected screenshot.
- Select Send a Batch if you want to transfer more than one screenshot.
If you selected the Send a Batch option, you'll be taken back to the Album app where you'll need to manually select each screenshot you want to transfer. Note that Nintendo limits each wireless batch transfer to up to 10 screenshots and one video; if you want to send more, you should consider using a flash drive or directly connecting to a computer using a USB cable.
How to wirelessly connect a Nintendo Switch and smartphone
Once you've initiated the transfer process and selected the screenshot(s) you want to send to your phone, you will need to connect your handset (or tablet) to the Switch using its ad-hoc wireless network:
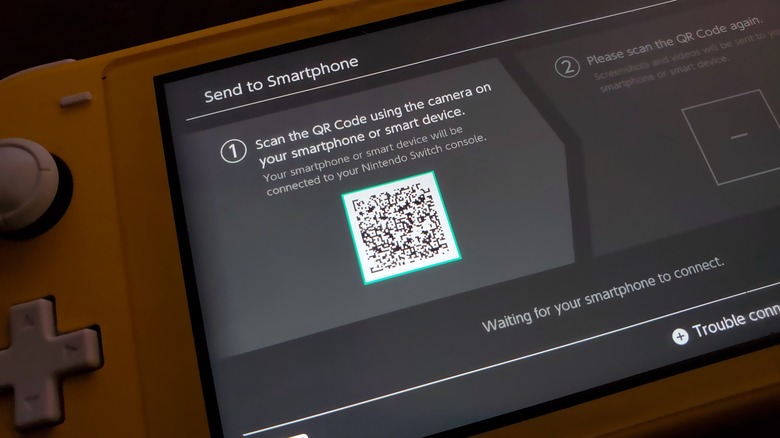
- Scan the QR code that appears on the Switch after selecting the screenshot(s) to transfer.
- Wait for your smartphone to automatically connect to the Switch's wireless signal.
- Dismiss any prompts that appear warning that the signal doesn't offer internet access.
- Return to your smartphone's camera app.
- Scan the second QR code that appears on the Switch.
- Tap the link that appears on your smartphone.
- Wait for your phone's internet browser to open the content page.
Because this is an ad-hoc connection between your smartphone and Switch, the page with the screenshots won't have a typical domain address — rather, you will connect directly to the Switch via its IP address on your network. If the browser doesn't open automatically, you can manually navigate to the content page by entering "192.168.0.1/index.html" in the browser's URL field after connecting to the Switch's wireless signal.
How to save Nintendo Switch screenshots on your phone

Now that your Nintendo Switch and smartphone are connected wirelessly, you'll be able to manually scroll through, tap on, view, and download the screenshots you selected when you initiated the transfer process:
- Scroll through the web page for the screenshot you want to save.
- Tap and hold the shared screenshot until a menu appears.
- Tap the Download option to save the file to your smartphone.
- Repeat the previous two steps until every shared screenshot has been downloaded.
- Click the Exit button on the Switch to close the sharing menu.
- Wait for your smartphone to disconnect from the Switch and reconnect to your Wi-Fi.
Though the last step is largely automated, you may sometimes have to manually reconnect to your Wi-Fi network after the Switch's wireless signal turns off. Now that the screenshots are saved on your smartphone, you can edit and share them the same way you would any other image.