This is why your Instagram photos suck (and how to fix it)
Instagram is full of beautiful photographs. If you've been on the service long enough, you've probably found a bunch of accounts that regularly post mind-blowing images. Each one is beautiful in its own way; you imagine taking photos like it, carefully cultivating your own Instagram account into a trove of skilled, captivating pictures. Reality, though, hasn't worked out this way. Your pictures aren't so great and maybe you're feeling discouraged, but don't fret. Anyone can take great Instagram photos with the right steps.
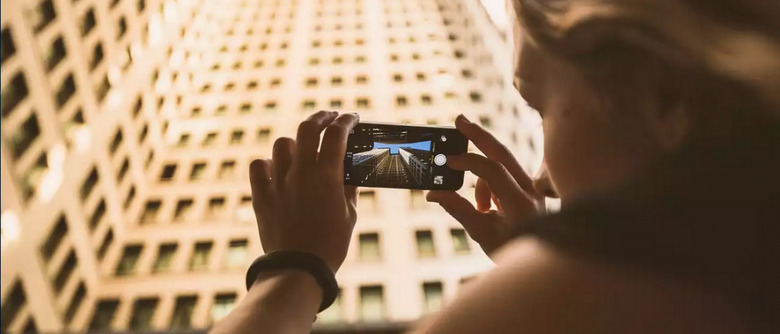
You're using a crappy camera
First things first, be honest with yourself: does your phone have a crappy camera? We're not just talking about how many megapixels it offers or whether you can overlay virtual creatures onto your photos. Look at the images you've taken. Do they tend to blur, have visible noise and artifacts, fuzzy edges, overexposed highlights and under-exposed shadows? If so, you're dealing with a crappy camera.
Yes, it is possible to capture some nice photos with a low-quality camera. It will be difficult, though. Very difficult. It's like crossing a lake with a bunch of milk jugs duct taped together rather than using a proper canoe. If you want to take excellent Instagram photos, the first step is getting a good-to-excellent camera. You have two choices here, the most obvious being a new smartphone that is equipped with a high-quality camera. If you can't afford to update your phone (or just don't want to), you can also buy a dedicated digital camera, take photos with it, then upload those photos to the cloud and download them onto your phone.

There are advantages and disadvantages to each one. If you buy a new phone with a good camera, you're probably looking — at a minimum — at dropping a couple hundred dollars, though the phones with the top cameras typically come with $400+ price tags. You can get very decent image quality from a point-and-shoot camera for a lower price, but it comes with the disadvantage of having to carry a separate camera around with you. Also, if you're not careful, you may end up taking your heart-stopping photo in such a way that it can't be properly cropped to Instagram's aspect ratio, and that's frustrating.
Which smartphones have great cameras? The Galaxy S7, iPhone 6s, the older but still great 41MP Nokia Lumia 1020 PureView, and more. Check out our Phone Reviews portal!
Clean your lens! And maybe get a new one
It seems like common sense, but too few people do it: clean your camera lens before taking a photo. You don't have to carry around a fancy microfiber cloth and a little spray bottle, you don't have to make a production out of it. Just give your phone's lens a quick wipe with your shirt before snapping a picture, and it'll go a long way toward eliminating hazing, light glares, and such.
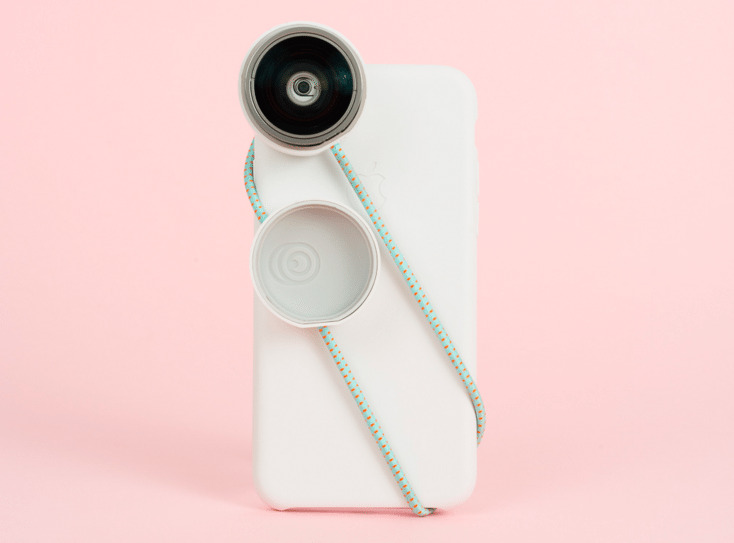
While we're on the topic of lenses, consider getting a well-made attachment lens for your smartphone (assuming you're using a phone camera). These attachment lenses range in size and quality — you'll want a nice glass one, obviously — but they open up a world of opportunities you won't get with your regular smartphone lens. Wide-angle, fisheye, and more all present unique photography options. Not sure where to start? Check out the Photojojo Iris lenses.
You need more than Instagram's tools
It may surprise you to learn that many of Instagram's beautiful photos were not edited and processed with Instagram's in-app tools. No, you don't create your best work using a couple handfuls of filters and some exposure sliders. Many of the high-quality accounts you see on Instagram belong to photographers who spend quite a while on each image, importing it to their laptop where they use Photoshop, Lightroom, or any other number of editing applications to make it perfect.
After all the hard work is done, they save the final image to their phone and then upload it to Instagram using the app.

You'd be well advised to do the same if you're interested in uploading only your best work. Tons of photo editing applications are available — Macphun has a bunch, there's Exposure X, Adobe Lightroom (of course), LightZone (it's free), and more. Take the time to find one you like, and don't be afraid to use more than one program.
Learn what makes a photo 'good'
Of course, editing software won't do you any good if you're working with a poorly executed photograph or if you have no idea what elements makes a photograph 'good.' You're going to have to take the time to study and learn the ins and outs of basic photography, and then you should identify the type you enjoy and spend more time learning about it specifically.

Fortunately, knowledge is increasingly becoming a free commodity, and there are numerous free resources with high-quality information. MIT, for example, offers its photojournalism course online for free, and Open University has its own course. If you're not interested in online learning, check out your local art museum, as there are often professional photographers offering paid classes.
Pay attention to what works
Finally, once you've started uploading more photos to Instagram, pay attention to which photos attract the most attention, and consider soliciting feedback about which elements your audience likes. Study the successful photos and compare them to your less successful photos, identifying what is different. Once you've recognized those elements, you can try experimenting with them in different ways to refine them, eventually developing your own unique — and hopefully recognizable — style.