How I made my own action figure with silicone and resin
A few months ago I became interested in the offbeat art of bootleg action figures. I started by following artists and designers on Instagram, and a big part of sharing art like this on Instagram is revealing parts of the product's creation process. I wanted to see if I could make an action figure of my own, so I did it. I attained a few bottles of chemicals, grabbed some cups, cardboard, and tape, and got working.
I feel a strong need to learn and become efficient with every single creative tool to which I have access. It's a comfort complex, one in which I can't stand the idea that if a single person can create a product I use, I can't produce it myself. When I discovered artist-made action figures and resin-casted toys, I needed to learn how to make my own, and I needed to buy a few supplies.
I bought basically the first version I saw of each tool or supply I needed in this project. That's not normal for me, as I like to read product reviews of any and all products I buy before buying. But for this niche activity, there was a massive lack of reputable reviews of every product on my must-buy list. I needed silicone to make a mold, resin with which to cast, and a bunch of products to keep my work area clean.
Tools Used in Casting Mold:
• Craft glue syringes
• Plastic forks (for mixing)
• Diamond Driven Liquid Silicone Compound
• Cups (disposable measuring cups ideally)
• Cardboard
• Duct tape
• 1981 The Empire Strikes Back R2-D2 action figure
• Vinyl gloves (found in first aid area of pharmacy)
• Transparent resin (for later step)
Because I'm not certain if any of these products are best – because they're the only versions of each tool I've ever used, I need to be clear that I'm not recommending any of them here based on brand. That said, I do like the color of the Diamond Driven silicone – so purply!

The Test Subject
I found an original 1981 R2-D2 Star Wars action figure in less-than-mint condition that seemed like an ideal candidate for this learning process. I could have cast the toy as one piece, devoid of end-product articulation, but I opted for a full teardown.

R2-D2 is held together with a single phillips-head screw.* After the screw is out, the head comes up and off, and there's a hidden loop of plastic that served two purposes. The loop holds the legs in place. Also, were the loop in one piece and not long-since cracked, it'd act as a catapult for R2-D2's long-lost sensorscope.
The sensorscope is gone, so there's a distinctive hole in R2-D2's head, as you'll see again later in the casting process. I didn't worry about accounting for or fixing the sticker on R2-D2's body since it was basically beyond repair – but still pretty OK after 38 years of play.
Casting the Mold
I started by standing each part up in a custom-made cardboard box. I started without anything else, pouring the mold over the top. This simple method resulted in several messed-up molds, with parts having fallen over or floating to the top of the poured silicone in the process. I learned after a few pours that I needed to start with a less rudimentary process.
The best method for mold-casting I've used thus far involved clay. While I'm sure there's a more professional method with which to cast, this method is relatively simple and was the one I've been able to recreate with success more than a few times. For the moment I believe I've reached a sweet spot for casting a simple silicone mold balancing time, cost, and skill.
Casting a silicone mold for an action figure step by step:
1. Find or create a disposable, watertight container. The container should be at least a half-inch larger than your target toy on all sides.
2. Fill half of the container with clay.
3. Press your figure into the clay so that its down-facing side is watertight.
4. Attempt to submerge around half of the toy on its shortest axis.

Above you're seeing a box I made, cut down, taped up, cut down, again and again and again. Your first try might actually be a whole lot cleaner-looking than this!
5. For step 5, I created vent lines from the toy to one side of the container using toothpicks. I used toothpicks because they were around the size as the tips of my craft glue syringes, which are used in the resin part of this process.
6. Mix (depending on the product you've got) and pour the silicone on the toy (and the clay).
7. Allow the silicone to set – I usually wait at least 12 hours, just to be sure it's solid.
8. Remove the container.
9. Remove the clay.
10. Re-make box around the resin with the previously clay-covered side of the toy and toothpicks now revealed, facing upward.
11. Pour second half of silicone mold.
12. Wait another 12 hours (or so) until silicone hardens.
13. Separate two halves of silicone mold (might need cutting/tearing)
14. Remove toy and toothpicks.
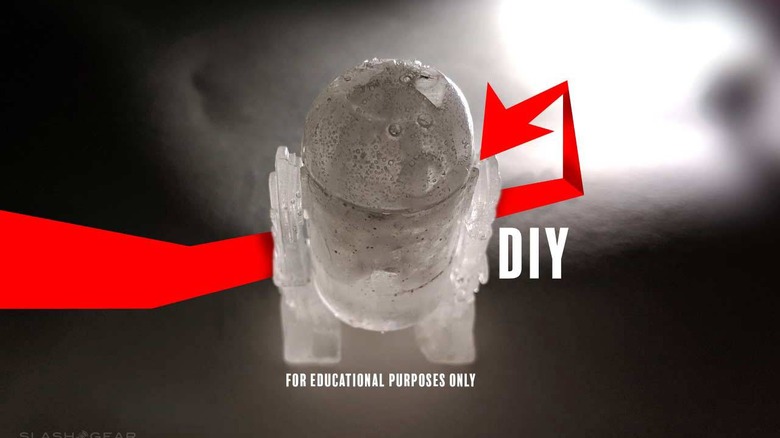
The result is a piece (or two pieces) of silicone with a space in the middle. The space is the shape of your toy. Before each resin injection, the silicone should be tightly secured with tape. You could also use something more re-usable like rubber bands. The next step is pouring resin – but we're not gonna chat a whole lot about that today.

Getting to this point took an absurd amount of trials and errors, of that you can be sure. I'm at a point at which I can begin to ramp my efforts up with better methods and better tools. After injecting transparent resin to make this R2-D2 learning unit, I'll be looking for mixing agents, pigments, alternate silicones and other tools, and more complicated subjects with which to cast.
Current State of Progress
This process looked easy – but it most certainly was not. Instagram is littered with extremely talented creators like @extratruckestrial, creator of the Buddhator (Skeletor buddha), @Labmonkeynumber9, @Hasnotalent, and @Killerbootlegs, creator of Phantom Starkiller. They've been doing this sort of thing anywhere from a few months to over a decade!
If we really want to go down the road to glory, we've gotta consider how we might get bubble pack plastic parts for the fronts of packaged action figures. We've gotta consider how we might design an action figure's card back, and how a card back might be created. It's a burgeoning creative environment up in here, and we've only just begun!

BONUS: Remember how the original R2-D2 works with a metal screw? I casted a mold and made a few resin screws, too. They wouldn't do too well under a whole lot of strain – but for this, they work perfect. Acutally I'm sort of surprised the original wasn't made with a plastic screw in the first place. But now we're all semi-transparent and ready to move on to the next part of this project – stick around for more as we advance!