CyanogenMod Installer walkthrough: Nexus to new phone in minutes

Today the CyanogenMod software universe expands with the app ecosystem called CyanogenMod Installer. What the team at the alternate-Android software team's intent is with this software is to take the otherwise convoluted process in loading the CyanogenMod software to a smartphone and turn it into an "anyone can do it" experience. In other words – if we have to make a real "how-to" guide, the team at CyanogenMod haven't done their job properly.
If you're already here, we're going to go ahead and assume you know what CyanogenMod is. If you don't, head down the CyanogenMod tag portal hole and find out – it's really simple in the end: it's a 3rd-party created operating system replacement for Android. It's got a collection of features hand-picked by an elite group of software developers and it runs everything Android runs normally.
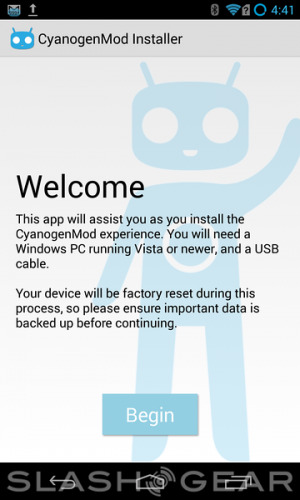
While in the past, users would have had to go through a lengthy process – different for each individual machine, based on manufacturer, carrier, etc – now the CyanogenMod Installer allows the software to be installed in just a few clicks. To begin, you'll need to head to the Google Play store to grab the CyanogenMod Installer app.
1. Follow the directions given to you in the Android app.
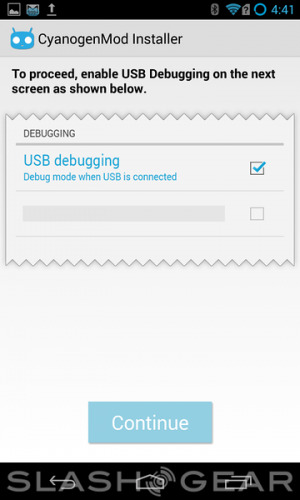
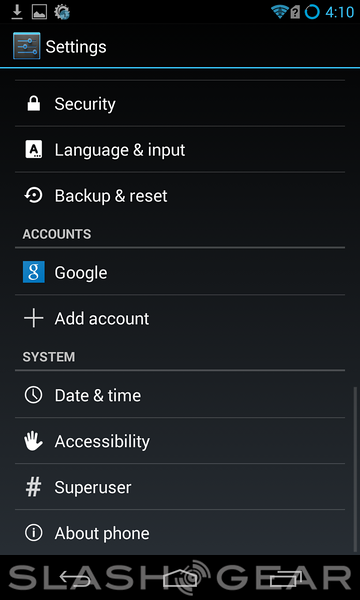
These directions may include you tapping an option here or there – these instructions open your device up for the installation of 3rd-party software and to your PC's interactions with your smartphone.
NOTE: see if your smartphone or tablet is compatible on CM's ever-expanding device list.
In the case of the Nexus 4 – the first device we're testing – it was a matter of about 2 taps and we were ready to roll. The next step was heading to http://get.cm/ which currently redirects to a "Beta" page for downloading CyanogenMod's PC-side installer. You'll need Windows Vista and above – that includes Windows 7 and Windows 8 too.
2. Follow the directions given to you in the desktop app.
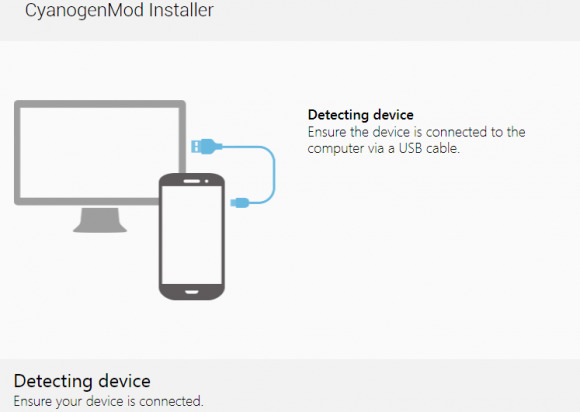
If your device is compatible, you'll only have to click once – maybe twice. We had to go in and activate USB debugging in the smartphone – but in general this (and other similar instructions) include CyanogenMod literally pushing your phone to show you the screen they need you to tap. Barring the whole process being automatic, it could not possibly be easier.
3. Profit. (Nary an unknown here.)

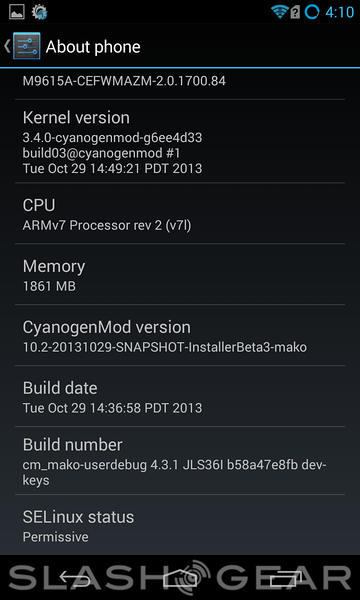
You'll have the newest (stable) version of CyanogenMod loaded to your smartphone. So far we've tested the LG-made Nexus 4. Next up is the Samsung-made Nexus S, and on down the line through a variety of devices of all makes and models. Please feel free to request that we work with a phone in the near future – we'd be glad to test any device we've got on the workbench.
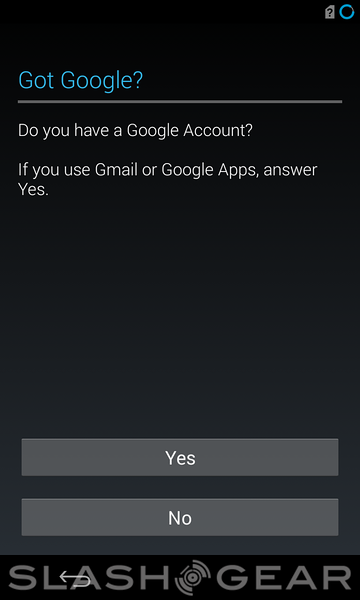

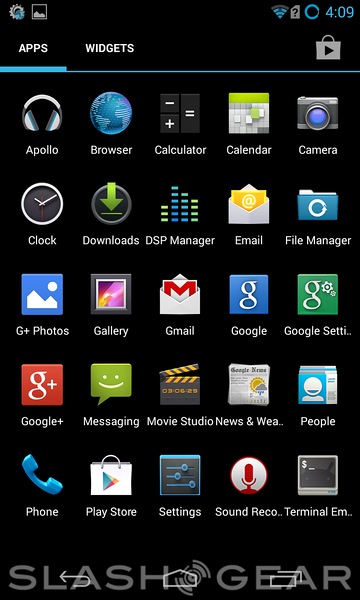
Of note for those of you that've been away from the CyanogenMod ROM environment for more than a season or two: Gapps (the usual suspects in Google-made Android apps) load right out of the box. You'll be asked if you have a CyanogenMod account and/or if you want to make one, then you'll be asked if you have a Google account – it's all here right off the bat.
Stick around as the CyanogenMod universe continues to expand. With a tool as radically simple as this one around, it's easy to see how Cyanogen and crew might become a force to be reckoned with in the very near future.