Windows 11 PC Settings That Are Ruining Your Experience
Windows 11 came as a bit of a surprise to many users. After once promising in 2015 that Windows 10 would be the "last version" of its operating system, Microsoft released its numerical successor in late 2021. The public reception to Windows 10 had been generally positive, a return to normalcy after the radical, touchscreen-centric departures of Windows 8 and 8.1. And years of updates had made the OS into the best version of itself. However, there were still a few things Microsoft wanted to change under the hood.
Windows 11 is not the disappointment many of its detractors claimed upon the OS's initial release. After a few major updates (what would have been called Service Packs in previous Windows eras), most of the major annoyances and kinks have been worked out, and it is a significant improvement over Windows 10 in a lot of ways. The visual elements take cues from Windows Vista (the most aesthetically pleasing version of Windows despite its faults) while retaining some of what worked best in Windows 10, and the OS supports plenty of future-proof technologies.
But that doesn't mean it's perfect, especially when it comes to the way Microsoft has Windows 11's settings configured by default. There are some options that would make life easier which are turned off by default, and others turned on that make things harder. Additionally, it's clear that Microsoft is now fully in the data collection business, as nearly every corner of Windows 11 seems designed to track users for diagnostics and ads while aggressively pushing Microsoft's proprietary services. So, from the merely annoying to the rage-inducing and productivity-choking, here are some Windows 11 PC settings that are ruining your experience.
You haven't enabled new productivity tools

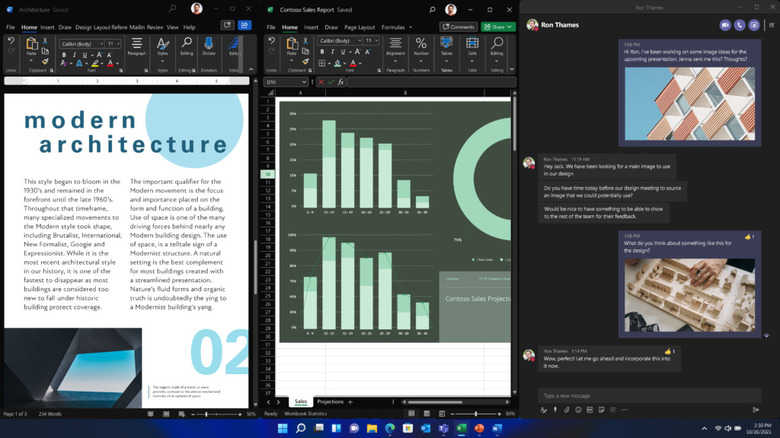
Windows 11 ships with a new suite of multitasking tools which are among the best additions Microsoft made to the user experience. Snapping windows into different arrangements is easier than ever with Snap Groups, as you can access different app layouts by hovering your mouse over the Maximize button at the top right of a window. There's also the title bar window shake feature that lets you grab a window with your cursor and shake it around to minimize all other windows, perfect for when you have a cluttered screen and just need to grab a file off the desktop (via Microsoft).
However, not all these fantastic features are turned on by default. To take full advantage of Windows 11 multitasking, you'll want to head into the System section of the Settings app and click on "multitasking." From there, make sure both the Snap windows and Title bar window shake toggles are turned on. Under Snap windows, you'll find a list of checkboxes where you can adjust the experience to your liking. For instance, if you're not in love with the snap suggestions that appear when hovering the Maximize button, or if you want to drag apps to the screen edge without triggering a window snap, those can be disabled. Another tip: Set the option to show Microsoft Edge tabs when snapping to "Don't show tabs." Even if you love Edge, that's going to clutter up the desktop.
If you're using a laptop, you may also want to enable Microsoft's new trackpad gestures, which can be configured in Settings under Bluetooth and devices > Touchpad > Advanced gestures. With three and four-finger gestures, you can set different swipes to switch apps, open search or task view, and more.
You're letting Microsoft track you and serve you ads
Is it not enough that every webpage we visit and every app we install on our phones bombards us with advertising? Must we also endure it from our very operating systems? Windows 11 not only tracks you for ads, it shows you plenty of its own. Advertisements for Microsoft services and products erupt across every surface of Windows 11 like overripe pimples, from the Search bar to Edge, and even Explorer. Even the Settings app tries to give you "suggested content," aka more ads.
Microsoft is aggressively pushing subscriptions for its OneDrive cloud storage and Microsoft 365 (which includes the Office suite), along with its Slack and Zoom competitor Teams and its Edge browser. While some of these products are decent, the incessant bombarding of users with ads for them is disrespectful to Windows users and gets in the way of productivity. At times, Windows 11 begins to feel like an ad platform that just happens to let you run programs inside of it.
Fortunately, most Windows 11 ads are opt-out. The first step is to delete your advertising ID, which is the anonymized profile Microsoft populates with usage data to create an impression of you (via Microsoft). Head to the "Privacy & security" section of Settings, then select General and turn off every last toggle you see. Next, head back to the top of "Privacy & security," select General, then find and turn off "Tailored experiences," eliminating "personalized tips, ads, and recommendations" (three different ways of saying "ads") from your Windows 11 experience.
You're letting Microsoft serve you ads in Explorer
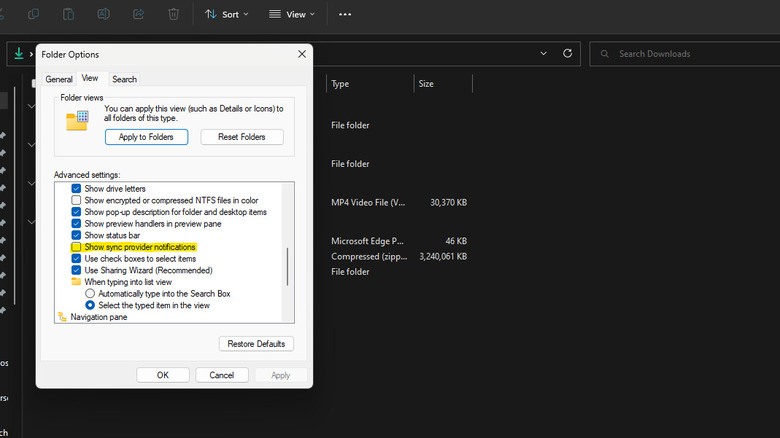
Next, let's get rid of those pernicious ads in Explorer. These aren't currently a problem, but they have been in the past. It's worth noting that, after users noticed banner ads in Explorer, Microsoft backtracked, claiming they'd pushed an internal build to a public channel by mistake, as reported by The Verge. Nonetheless, the setting responsible for allowing those ads remains turned on in Explorer's settings, meaning the banners could return at any time. To ensure they do not rear their heads, it's a good idea to disable the setting that allows them.
First, open Explorer, then click the three horizontal dots on the right side of the ribbon. Select Options, then navigate to the View tab of the resulting settings window. In the Advanced settings pane, find "Show sync provider notifications" and uncheck the box to the left of it. Hit apply, and you'll never have to worry about getting an ad while you're just trying to find a document on your PC.
Other ways you're letting Microsoft track and interrupt you
There are plenty of other ways Microsoft tries to track you in Windows 11, most of which have to do with improving features and functionality down the line. The thing is, just because Microsoft says that's what it'll use the data for doesn't mean it's telling the truth, or that it won't change its mind down the line. Your best course of action is to withhold as much of your data as possible.
The first settings you'll want to adjust in order to accomplish that are those related to the collection of diagnostic data and device usage. (You can still always submit an individual report if you encounter a bug.) Unfortunately, there is a certain amount of "required data" Microsoft insists on collecting, but to withhold the rest, head to the "Privacy & security" section of the Settings app and select "Diagnostics & feedback" (via Microsoft). Toggle off the options for "Send optional diagnostic data," along with "Improve inking and typing." Under all of those, set Feedback frequency to Never, then click Delete under "Delete diagnostic data" to get rid of anything Microsoft has already collected.
You'll also want to head back into the "Privacy & security" settings and head over to multiple other sections within. In Speech, toggle off "Online speech recognition." In Activity history, toggle the main option off as well, as it tracks not only what you do on your PC but even which websites you browse and what you do inside of apps. These are just a few of the many privacy settings you can change in Windows 11.
Too many programs are launching at startup

Windows loads up a set list of programs every time you boot up your PC. While most users will have a few programs, such as antimalware software, that need to be open alongside Windows, having too many programs launch at start not only means startup takes longer, but those programs also take up your computer's resources, slowing down your machine in addition to other issues. Even worse, many common programs such as Spotify have a "launch at startup" option enabled by default, so if you don't keep things under control, the list of startup applications will balloon as time goes on.
To make sure you're only allowing your most essential programs to start with Windows, head to Task Manager (CTRL+Shift+ESC) and select "Startup apps." The programs labeled Enabled under the Status column are currently starting with Windows, and you can sort by Status to make things more legible. For any Enabled app that isn't absolutely essential, click on it, then click Disable in the top right of the Task Manager window. Once you're satisfied, restart Windows. Don't forget that there are a ton of other ways to speed up Windows 11.
Put taskbar shortcuts back where they're supposed to be (on the left)
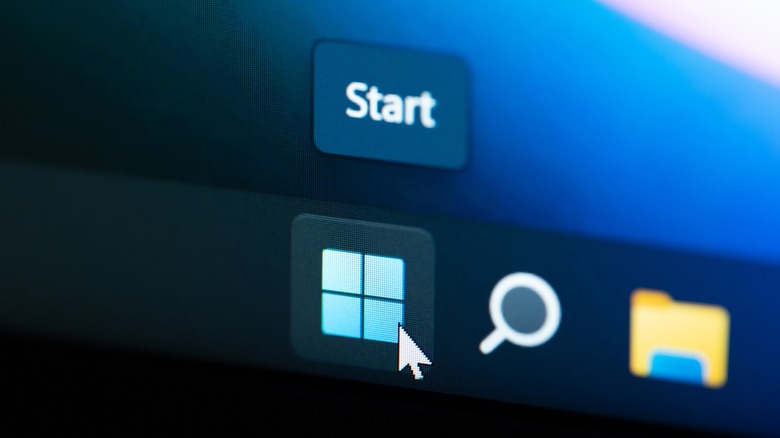
One of the biggest aesthetic changes Microsoft made with Windows 11 is to the Start icon and pinned apps. Not only did they get a makeover to look more modern, they also come centered in the middle of the taskbar by default, mimicking the layouts found on competing OSes like Mac OS and Chrome OS. It's one reason so many people hate Windows 11.
If you're like many longtime Windows users, you may feel irritated by the centered Start menu. After a lifetime of muscle memory, we expect the Start button to be at the bottom left, where we barely have to look at what we're doing to click it. Having it in the middle means needing to be extra precise with your mouse, and it can also be plain distracting if you're the kind of person who doesn't keep the taskbar hidden. Luckily, you won't have to do anything drastic to put the taskbar shortcuts back where they belong (via Microsoft on YouTube). Just right-click an empty space on the taskbar and select "Taskbar settings." Inside the Settings window that launches, select "Taskbar behaviors," then select "Left" from the dropdown menu next to Taskbar alignment.
Get rid of useless taskbar items

Windows 11 includes some amazing quality-of-life improvements over Windows 10, but among its many welcome additions is a lot of bloat. Nothing encapsulates the clutter of Microsoft's latest operating system like the random junk it chose to stick on the taskbar, almost all of which is either superfluous or entirely useless.
By default, you'll see a search button, a task view button, a widgets button, and a chat button on your taskbar next to your Start and app icons. With the exception of task view, none of them are particularly useful. Instead of clicking the search button, you can simply hit the Windows key on your keyboard and start typing. The Widgets panel may seem useful, but play around with it and you'll quickly realize it's mostly a way for Microsoft to push its proprietary RSS newsfeed. As for Chat, it's just Microsoft Teams wearing a trench coat and can be ignored unless your workplace forces you to use Teams.
To get rid of these icons, right-click an empty area on the taskbar and select Taskbar Settings. At the top of the Settings panel that appears, you'll find a section labeled "Taskbar items." Uncheck Search, Widgets, and Chat (via Microsoft). It's one of the more mercifully simple fixes on this list.
Add useful folder shortcuts to Start
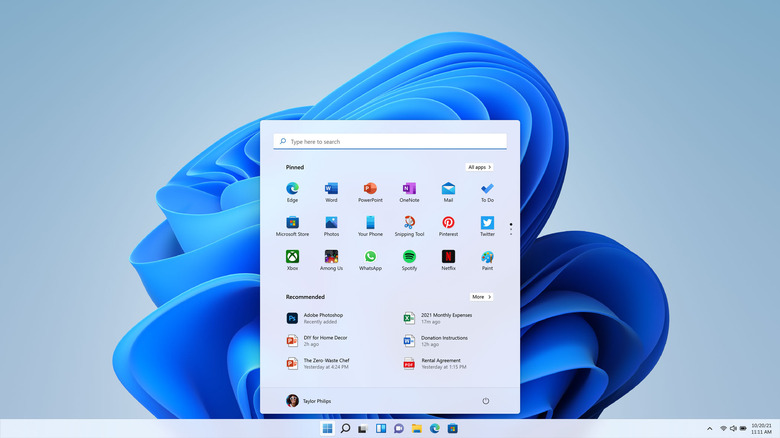
Even though it pretty much nailed it back in 2001 on Windows XP, Microsoft just can't seem to stop itself from radically altering the Start menu with every new version of Windows. Sure enough, the Start menu has been overhauled again on Windows 11, and it's one of the more disappointing changes to the OS. The Windows 10 menu had all your apps in a column on the left, with the ability to pin apps in Live Tiles on the right. But in Windows 11, your full app list is an extra click away, while the pinned apps take up most of the real estate and are underscored by an abysmally useless Recommended section.
However, there is one change you can make to reclaim some Start menu functionality. Buried in Settings is an option to add shortcuts to some of the most common directory folders, allowing you to access Documents, Music, and more with a single click. Head to Personalization inside the Settings app, then to the Start options, where you'll select Folders. On that page, you can choose which shortcuts to add to the Start menu from a total of nine options.
Save your eyes with Night Light

If you're a late-night work owl, a midnight gamer, or just like to chill in bed with some Netflix, you're probably doing untold damage to your eyes and sleep schedule. According to UC Davis Health, blue light exposure can cause macular degeneration, cataracts, and even eye cancer. It also interrupts your circadian rhythm, which can play a role in causing further health consequences in addition to disrupting your nightly sleep.
Luckily, most mobile and desktop operating systems now offer a built-in blue light filter and Windows 11 is no exception. Built into the OS is a feature called Night Light that allows you to screen out blue light and includes some convenient tweaking options. You'll find Night Light by heading into Settings and choosing System. From there, find "Display settings," where Night Light is under the "Brightness & color" section.
From there, you can toggle Night Light on or off, but clicking through will give you even more customization. You can set a Night Light schedule, so you no longer have to remember to turn it on manually. Additionally, you can set that schedule to coincide with sunrise and sunset in your area, and adjust the strength of the filter.
Unhide file types in Explorer
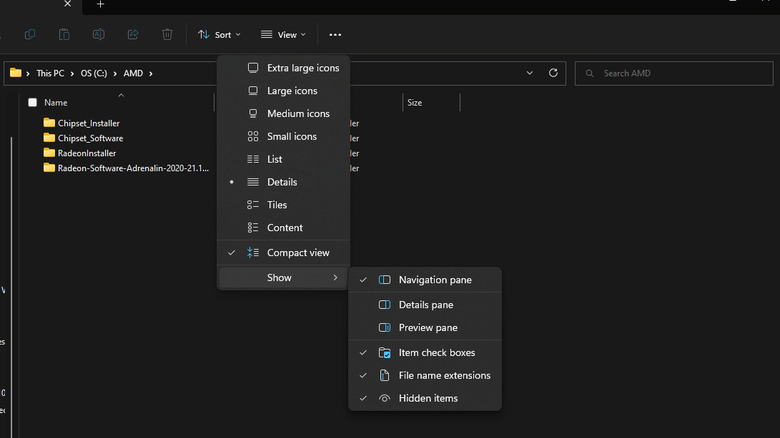
Of the many baffling choices Microsoft made in Windows 11, few are as inexplicable as the decision to remove file extensions from view by default in Explorer. Want to know whether the file you're looking at is a Word document, a PDF, or an MP3? Too bad, says Microsoft. It seems to be a change made for the sake of aesthetics but hiding valuable information from view in the name of minimalism is an uncharacteristically shortsighted UX design choice for Microsoft.
Luckily, putting the ".mp3" back on the tail of that file named "Linkin Park LimeWire 2009" isn't too hard. In the ribbon near the top of Explorer, click View, then hover over Show and select "File name extensions" from the submenu. You can also find the toggle in Settings, where it is somewhat bafflingly tucked away in the "Privacy & security" section within the File Explorer subsection of the developer options. This is not exactly the kind of feature that only developers would want to enable, so the logic behind sticking it there is another head-scratcher.
You have restartable apps enabled
We've all had the terrifying experience of having a computer shut down on us while we're struggling through a workload. One moment you're typing through a report and the next, you're staring down a low battery symbol. Well, Microsoft has invented a solution to that problem in the form of restartable applications, a feature that starts the apps you had open at shutdown when you boot up your machine.
Kind of. What restartable apps actually does is start those apps up. What it does not do is put them back where you left them, which makes it kind of useless. On top of that, it prevents Windows from doing some of the more important things that would normally happen during a reboot, such as dumping memory. Unless you find yourself leaving lots of unfinished work open when you shut down Windows, there's no reason to leave this setting turned on, as it prevents your computer from doing a true reboot.
"Restartable apps" is unintuitively hidden under Accounts in the Settings app. From there, navigate to "Sign-in options," where you'll find a toggle next to "Automatically save my restartable apps and restart them when I sign back in." Go ahead and flip that off.
There are many more small tweaks and fixes that can be made to improve your experience across Windows 11, along with plenty of third-party solutions. But what we've covered here is a good starting point that should make your brand-spanking new operating system feel like the upgrade it's supposed to be.