SlashGear Review - Ultra Products m998 Mid-Tower ATX Case
Last week I received an Ultra Products m998 Mid-Tower ATX Case for review. I love new PC cases, and have never used one from Ultra before, so I was excited to test it out. Before getting into the review, I'd like to mention that I am almost obsessive about my cable management (a couple of years as a networking admin will do that to you). So I generally take my sweet time and try to find creative ways to position the cables neatly out of the way without the use of such semi-permanent tools like zip ties. Enough about me though, on to the review!
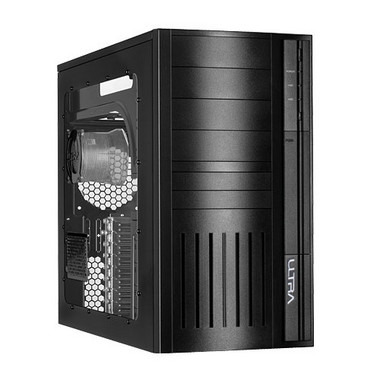
Let me first start off saying that this case is big. Bigger than most mid-tower cases that I've dealt with in the past. It measures 20.47"x9.45"x18.11" for those wondering specifics. Mind you, that doesn't include the optional wheels. For its size it really isn't unnecessarily heavy. It does have some weight to it, the aluminum case feels quite sturdy yet light. The outside paneling of the case is made from high-grade 1.5mm aluminum, while the front bezel is made of plastic.
Opening it up you'll notice that there are two 120mm fans installed, one at the front bottom, and one at the top rear underneath the PSU mount. There are two things that really draw your eye here, first, the motherboard tray is made from finished stainless steel, which is very shiny. The other thing that you'll quickly notice is that to the right there are a series of power connectors, this is called the Ultra Power Bar, but more on that later. One other thing you may notice is to the left of the power connectors is a plastic panel which acts as a tool for cable management.
I both love and hate switching my PC to a new case. I always look forward to the shiny new case that will be sitting underneath my desk, as well as the chance to make things more organized on the inside. However, I dread the amount of time that always goes into such a task. Fortunately, this case was by far the easiest I have worked with in the past.

Practically everything on this case (save the drives you install) utilize thumbscrews, which make tools unnecessary. That shiny stainless steel motherboard tray actually slides out the back after removing a few thumbscrews. Then you are free to plop down your board and install any add-on cards without working inside of a cramped space. During this time you can also install your power supply, optical drives, hard drives and floppy drive (yes, I still keep a floppy drive in my PC).
Once you have your power supply installed, you need only connect two of the 4-pin molex connectors and 8-pin PCI-e connectors to Ultra Power Bar to the right. The rest of the cables (aside from the two that connect directly into the motherboard) can be tucked away in the extra space around your PSU. You can remove the other side panel and begin running cables through the plastic cable management guide.

You'll start by connecting the power connectors, of which there are plenty. They have provided more than enough to connect everything you would need. Since you're only using the connectors you need, this cuts down on the clutter.
You can also go ahead and run any other front panel connectors and SATA or ATA cables through the cable management guide at this time. I recommend taking off the other side tray when doing this, as it gives you full access to the area behind the hard drive bays. This is where most of your excess cable will be kept.
Slide back in the motherboard tray and hook up your cables. Any slack can be fed back through the plastic cable management guide, thus eliminating clutter and providing more room for proper airflow.

Yes, I know, time to get rid of those annoying ribbons. Since the review I've actually moved on to a SATA DVD drive.
This process was far easier than any other case I have worked with in the past. A combination of the removable motherboard tray, the Ultra Power Bar and the cable management guide made this possible. What's more is that I upgraded my motherboard a day after my initial installation, and it was just as quick and painless as before.
I tend to judge cases in three areas: looks, ease of installation and cooling. This case earns top marks for its sleek black aluminum paneling, as well as its innovative solutions for installation. That just leaves one further test, cooling.
My machine is not currently overclocked (stay tuned in the coming days for my overclocking experiences) and it operates in a decently-cooled environment. The full specs for my test system are below:
In all, it's your average upper mid-range gaming PC. Nothing too fancy (aside from the 45nm CPU). The room was roughly 24 degrees (all temperatures are in Celsius, I'm not an Eskimo) throughout the testing.

Once again, the Ultra m998 did not fail to impress. While my system isn't overclocked, it certainly won't be overheating any time soon. Even with a stock heatsink and fan, I was able to keep the temperatures cool enough for almost anyone. I'll be doing some upgrades and working on some overclocking during the next week and you can bet I'll be counting on this case to keep everything nice and cool.

Boy, that shiny new case sure makes my old optical and floppy drives look bad!
Overall, I was extremely impressed with this case. It is stylish, yet not over-the-top, installation in simple, yet organized and performance is cool, yet quiet. The MSRP is $199, which may seem steep to some. However, you can find it many places for around $150 or less, which for what you get, is well worth the money. I give the Ultra Products m998 Mid-Tower ATX Case four and a half out of five gears.
[rating: 4.5]
Note: Some of you might notice the lack of pictures prior to the assembly process. I sincerely apologize, as my brand new CompactFlash card became corrupted and I was only able to save the last few shots. I have included some stock photos where necessary.Update: Just thought I'd add something here. I needed to swap out the power supply in this system today and because of the way the case handles the power cords, it made things a breeze. I've never had such an easy time swapping out a PSU.